Gen 4 CRF450X build

Building Tips, Suspension Set Ups, Conversion Parts .... Build to your Heart's Content!
User avatar
other
Posts: 338
Joined: January 25th, 2010, 5:11 am
Location: Perth Hills, Western Australia

Gen 4 CRF450X build

Post by other »

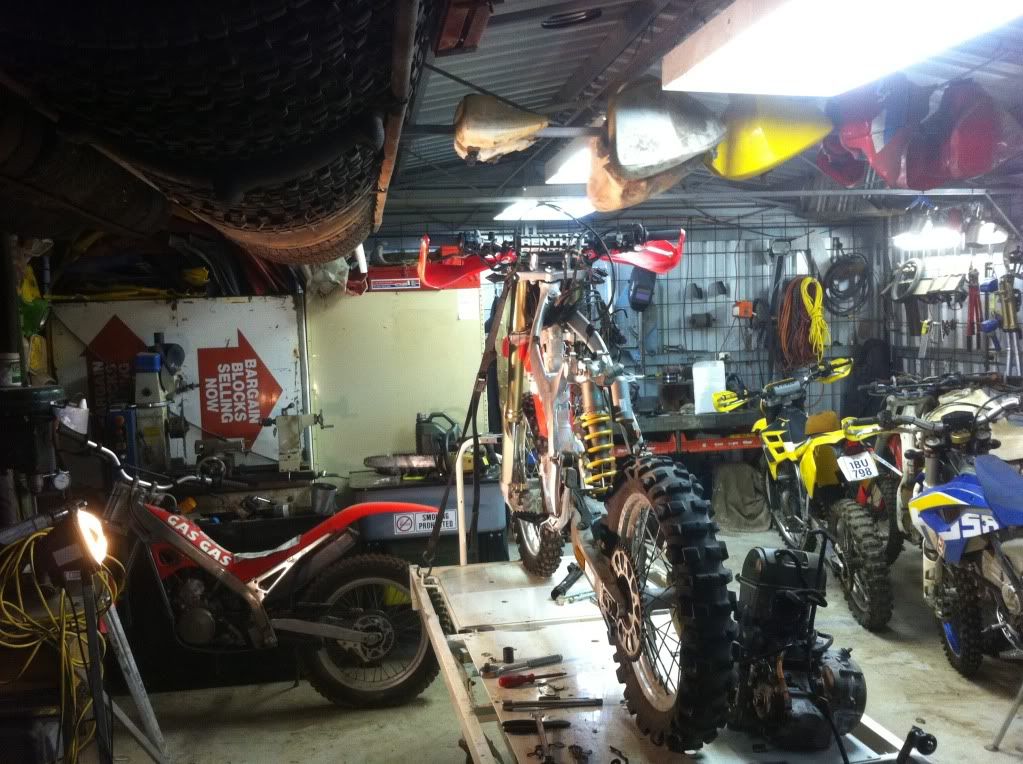
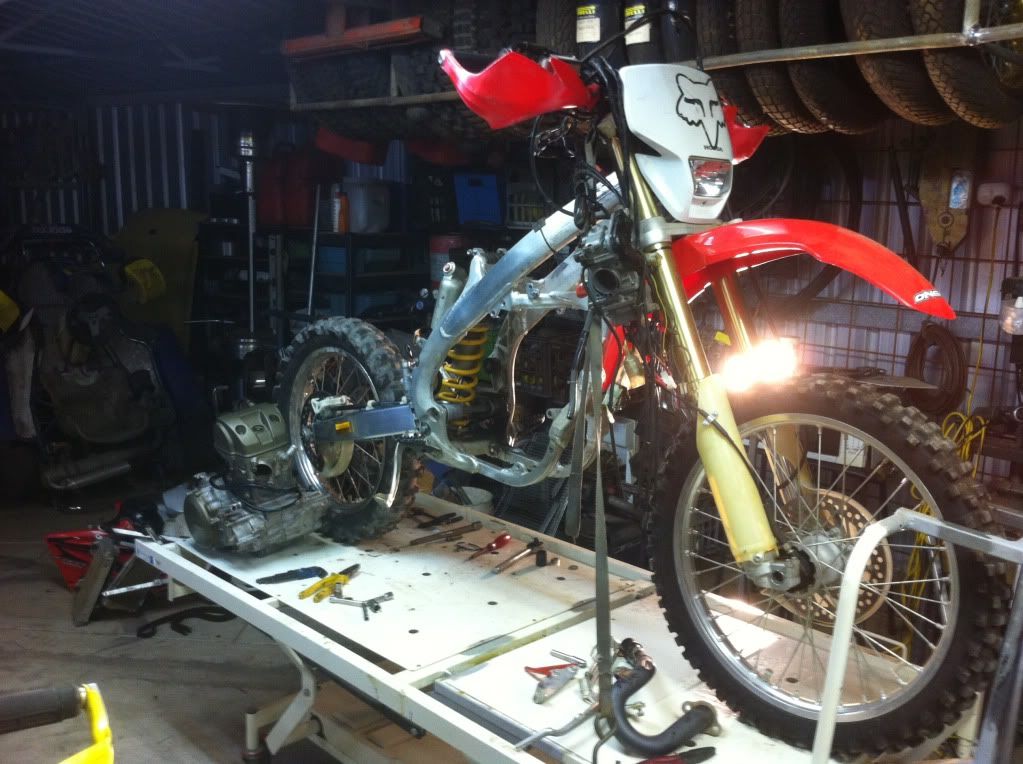
I thought it was time I got off my lazy arse and sorted this 2008 CRF450X out with a decent powerplant. Gotta say, it has worked really well so far, as I am able to use a standard plug and cap, with no tank mods other than reversing the outlet. The frame rails (6061 T6) bent nicely, and the only downside so far is I cant use the nice Stoffers billet engine mounts. This is because I'm keeping the bend of the cradle rails really tight to the engine profile, and the mounts are designed for a far looser fit. I may pay the price in convenience when it comes to removing the engine later, but so be it. First things first . . . . I took the CRF for a last ride before starting work, and the damn thing has never gone better ! I'm sure it was behaving impeccably coz it realised it's demise was at hand . . . then stripping began. Holy shit ! It took me 3 hours (honest to God) to get the engine out of the mongrel thing !
Image 
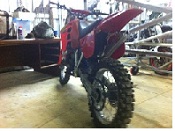
Brace yourself bitch, you're about to get raped.
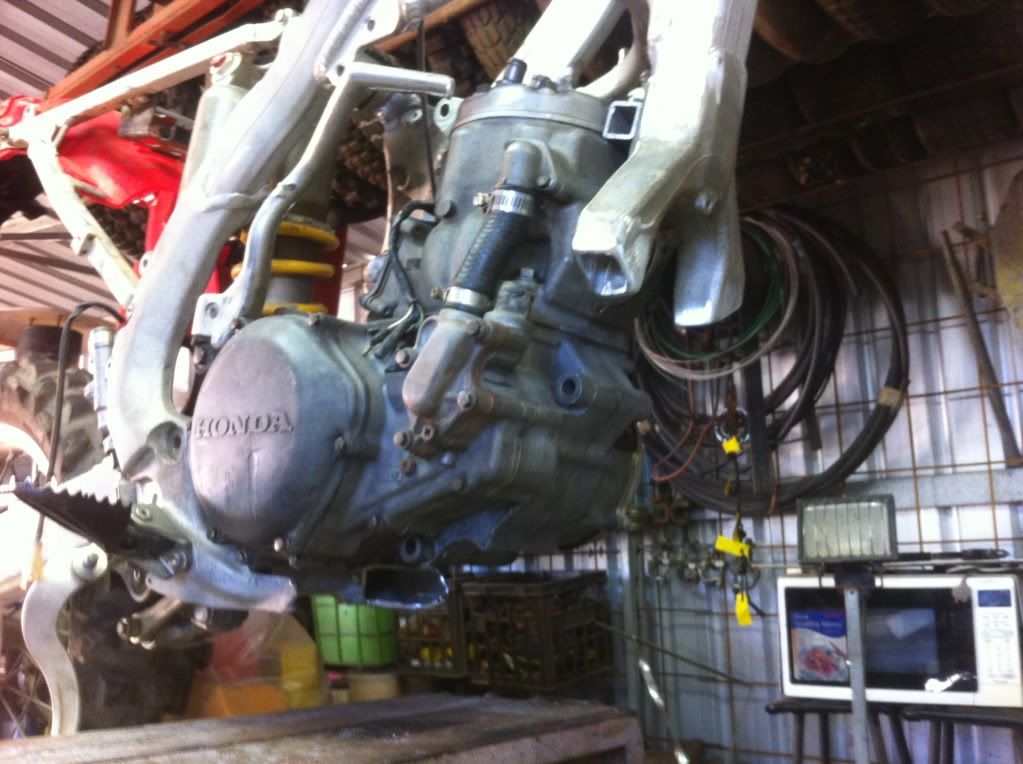
Image The deed is done.
Image Out with the Sawzall . . . No turning back now.
Image 
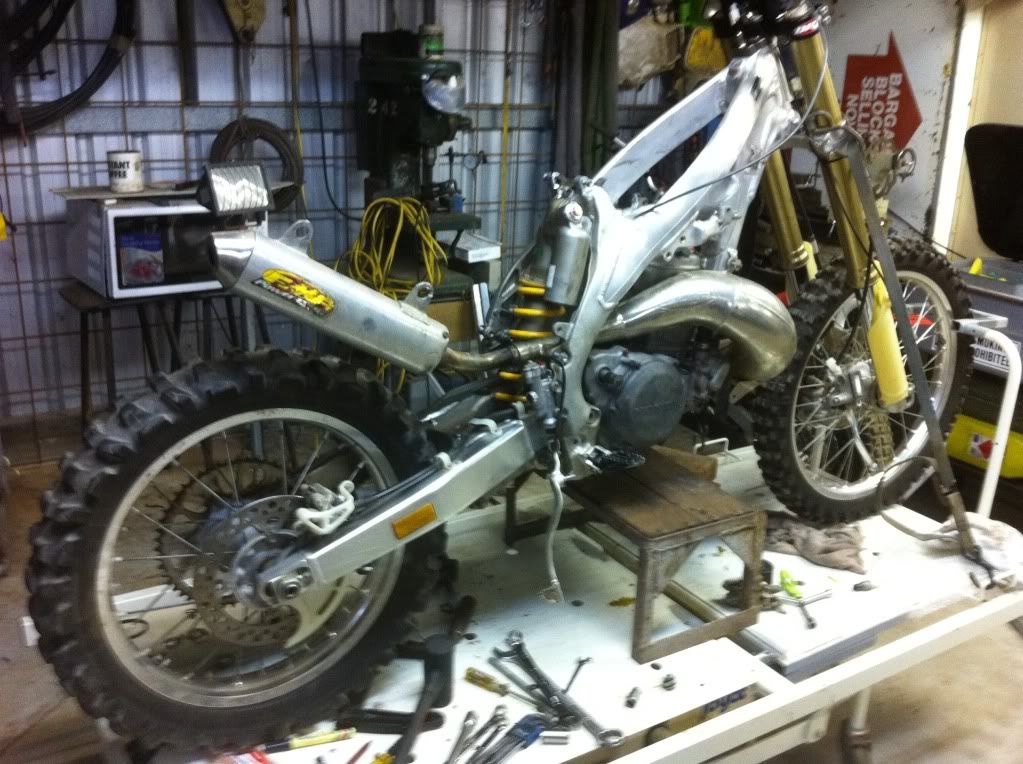
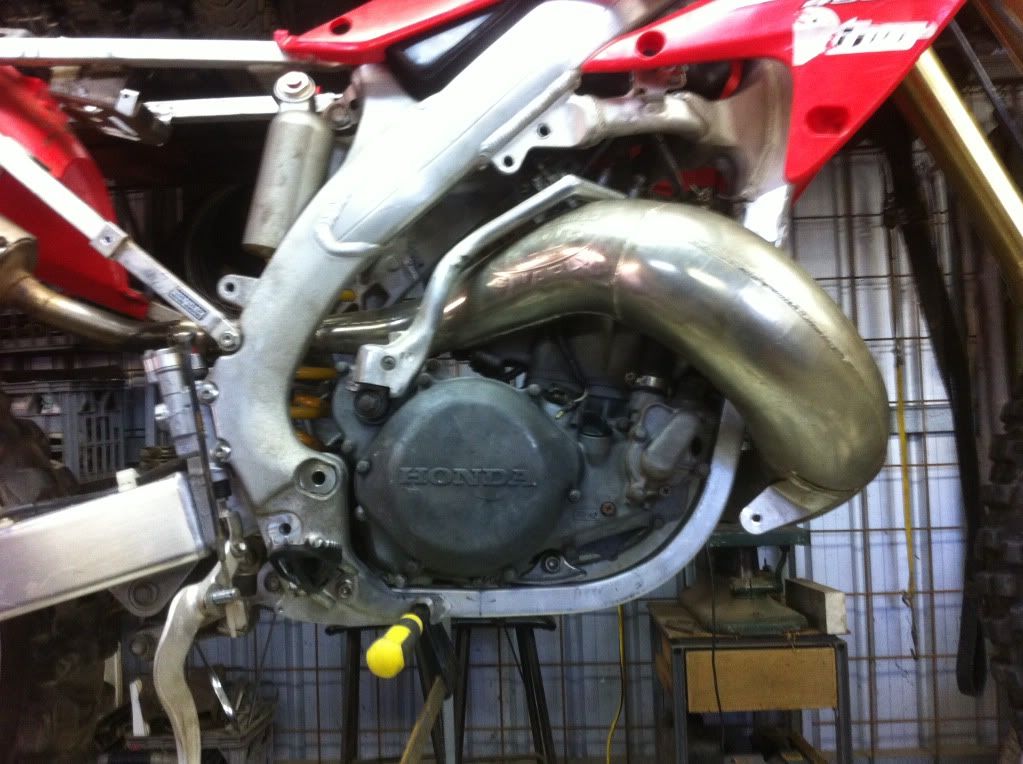
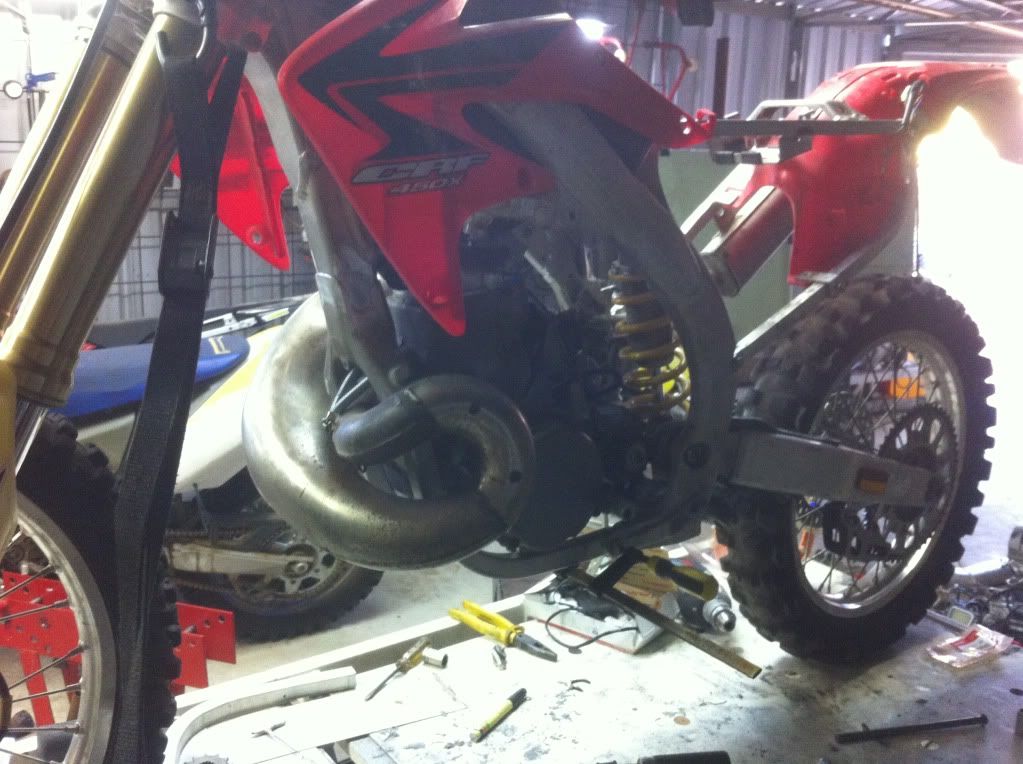
The 500 in her new home for the first time.
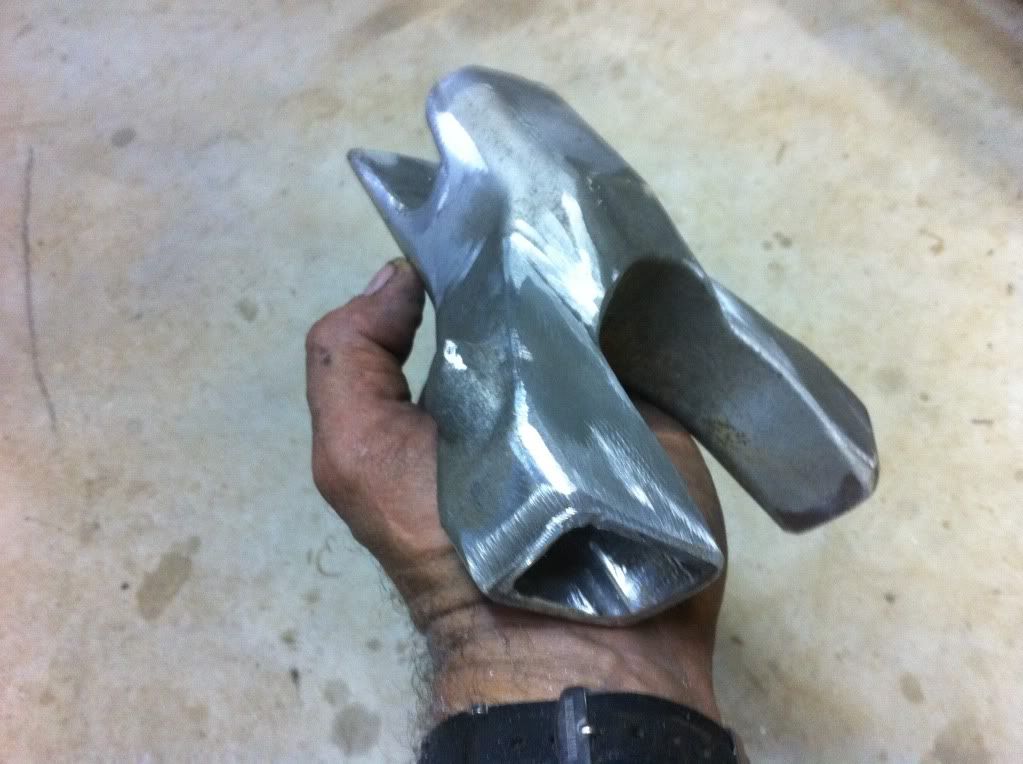
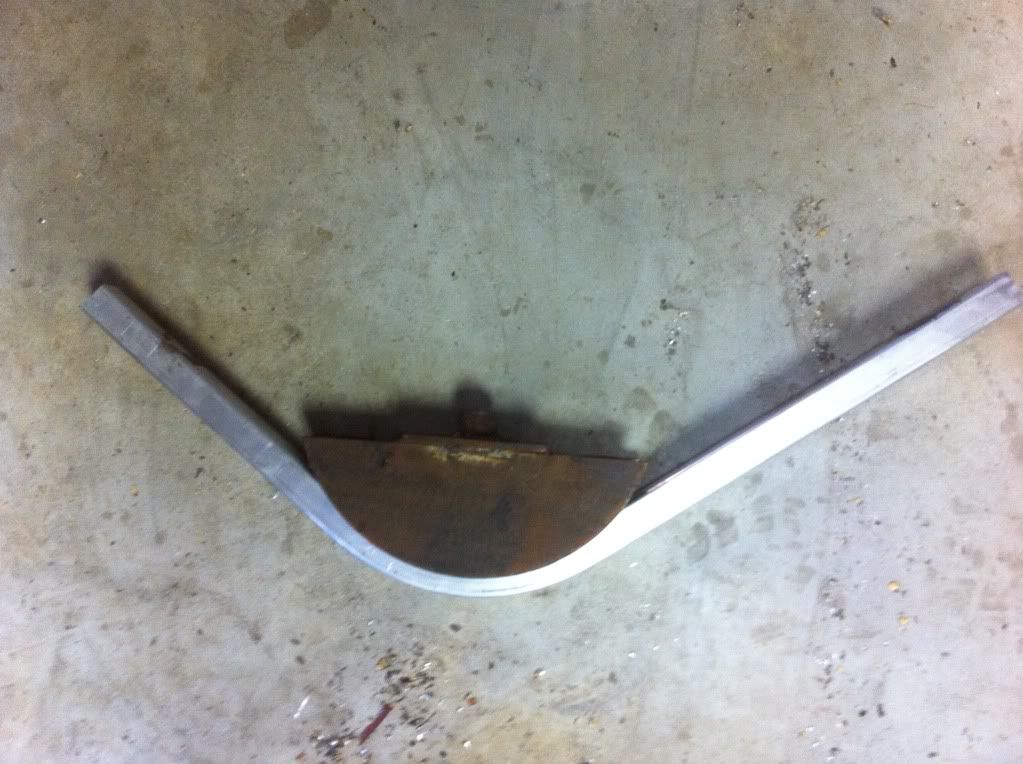
Image The prepped Y.
Image 
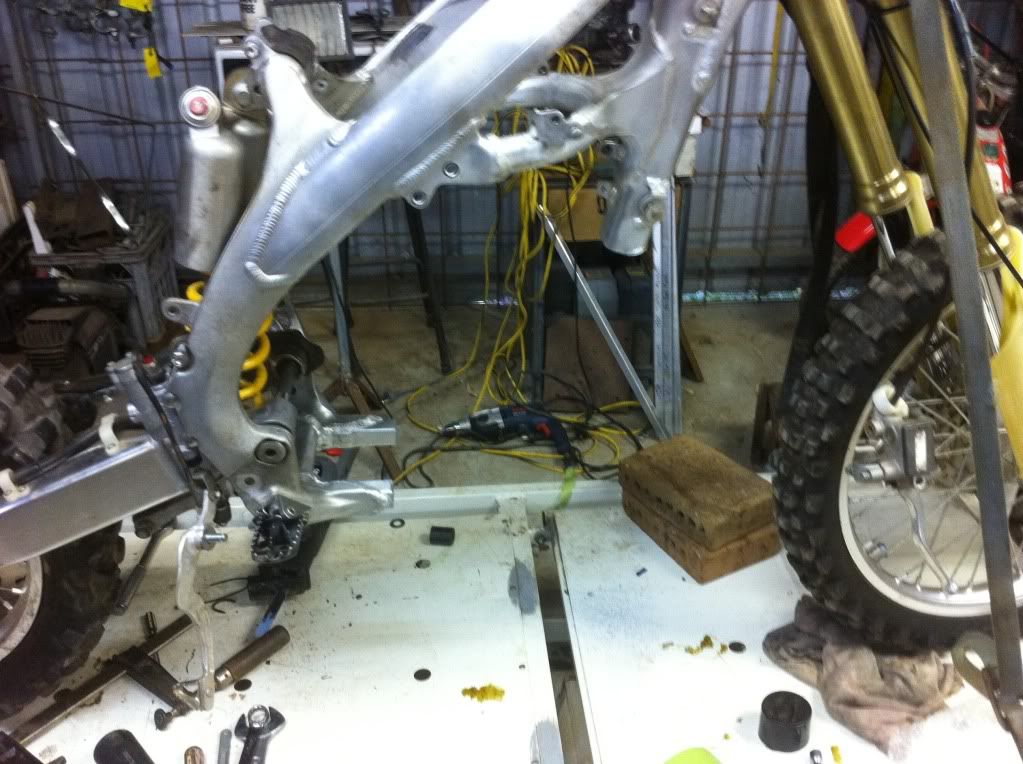
The Y fitted, and the pockets cleared out for replacement cradle rails.
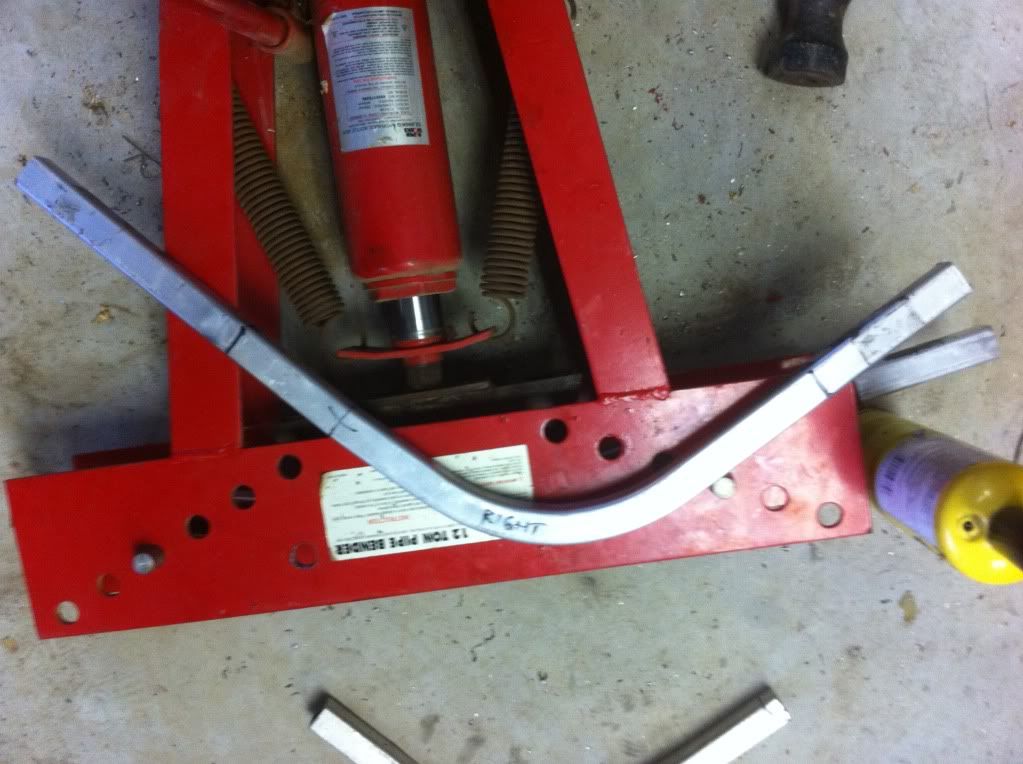
Image The bending setup.
Image It may be homemade (thanks Juddy), but it works well.
Image Cradle in place, and lower mounts mocked up. Nice tight frame rail line.
Image Snug as a thumb-in-a-bum.
Image By now the weekend is nearly over, and the beer fridge was calling. Gotta get the 3-phase power reconnected to my recently enlarged shed (hence the mess in the background), and then I'll get the TIG fired up and stitch this thing up. Further updates to follow as progress is made.
Thanks for looking.
Greg
Last edited by other on April 16th, 2012, 12:02 am, edited 4 times in total.
User avatar
other
Posts: 338
Joined: January 25th, 2010, 5:11 am
Location: Perth Hills, Western Australia

Post by other »

damn, don't know why all the pics didnt work ? !
User avatar
AlisoBob
"Hoon-father"
Posts: 15404
Joined: May 31st, 2007, 6:39 pm
Location: Aliso Viejo Ca

Post by AlisoBob »

you got the slash on the wrong end...
User avatar
other
Posts: 338
Joined: January 25th, 2010, 5:11 am
Location: Perth Hills, Western Australia

Post by other »

OK thanks Bob. I'll delete the first post and have another go.
FIXED, thanks.
User avatar
Gmbond
Posts: 381
Joined: September 14th, 2009, 7:17 pm
Location: Ontario Canada

Post by Gmbond »

Work looks good so far, have you got any photos of what you will be using for motor mounts then?
User avatar
other
Posts: 338
Joined: January 25th, 2010, 5:11 am
Location: Perth Hills, Western Australia

Post by other »

Not yet Gmbond. I'm waiting for the hunk of 6061 to come in, and then I'll get it happening. Will be in the next update, hopefully.
kevin_s
Posts: 284
Joined: May 2nd, 2011, 6:00 pm

Post by kevin_s »

Nice work mate,looking forwards to the end results.
User avatar
other
Posts: 338
Joined: January 25th, 2010, 5:11 am
Location: Perth Hills, Western Australia

Post by other »

Thanks Kevin. I've modified your jig a little too . . . . it now has a short length of pipe to accurately locate the height of the exhaust, and a piece of rod tacked in to replicate the location of that troublesome bottom case bolt on the clutch side. It will also get the headstay addition in due course. All this means is that in future, I can dummy up a frame without ever having to install the engine at all.
User avatar
AlisoBob
"Hoon-father"
Posts: 15404
Joined: May 31st, 2007, 6:39 pm
Location: Aliso Viejo Ca

Post by AlisoBob »

Is that 12 weeks of work?

12 days?

12 hours?

( :lol: )


Looks great so far!
User avatar
other
Posts: 338
Joined: January 25th, 2010, 5:11 am
Location: Perth Hills, Western Australia

Post by other »

Thanks Bob. Spent about 4 hours on Friday evening stripping and cutting it, then about 7 or 8 on Sunday doing the rest ( gotta give Saturday to the missus in the interest of domestic harmony), so 12 hours would be pretty close. With work and family commitments, I now won't get to touch it again for a fortnight !
User avatar
other
Posts: 338
Joined: January 25th, 2010, 5:11 am
Location: Perth Hills, Western Australia

Post by other »

Image
As you can see, the CRF450X has a skinny little rear rim on it (18 X 2.15"), while my steely has a much wider Excell rim (18 X 2.5). It appears on the face of it that the sprocket to disc rotor dimensions are very similar on both wheels, so I was hoping to be able to fit the wider rimmed wheel straight into the AF. Has anyone done this, does it work ? Or do I have to unlace both wheels and "mix'n'match" rims, hubs and spokes ? Thanks.
User avatar
2strokeforever
Posts: 1524
Joined: November 13th, 2009, 1:04 pm
Location: Vernon B.C Canada

Post by 2strokeforever »

tubliss and 18X2.15 work pretty darn good together
the 450 will have less power and will be harder to start, and will be heavier, but to make up for it it will require more maintenance.
4stroke=dead fish
User avatar
other
Posts: 338
Joined: January 25th, 2010, 5:11 am
Location: Perth Hills, Western Australia

Post by other »

Can you sit a 140 profile tyre on a 2.15" rim ? I run a 120 on a DID 2.15 on a little Gasser 2T, which works awesome, but have always favoured 140's on a 500. If you reckon it's OK, maybe I'll just run it till I knock the rim into an octagon shape, and then worry about it, hey ?
User avatar
2strokeforever
Posts: 1524
Joined: November 13th, 2009, 1:04 pm
Location: Vernon B.C Canada

Post by 2strokeforever »

140/80/18 IRC M5B is my favorite tire to run on my 18X2.15 rim, using the tubliss at 4-7 psi
id rather have the 2.15 cause a tubliss wont work on a 2.5 (at least with the good tires)
Image
running the low pressure makes it shape to the ground real good, like a trials tire is suposed to :lol:
the 450 will have less power and will be harder to start, and will be heavier, but to make up for it it will require more maintenance.
4stroke=dead fish
User avatar
other
Posts: 338
Joined: January 25th, 2010, 5:11 am
Location: Perth Hills, Western Australia

Post by other »

Yeah 2StF, I'm already a Tubliss convert, have 'em fitted to my FE570 Berg. Can't seem to puncture them no matter how much I abuse them. I find that below about 8 or 9 PSI the bike is really loose at high speeds, on hard pack or gravel, so I tend to run around 10 or 11 PSI. The AF will stay on UHD tubes and old mousses until I get aound to fitting Tubliss to her as well.
omaotek
Posts: 45
Joined: May 26th, 2011, 1:49 pm
Location: Kauai Hi

Post by omaotek »

Did you heat up the tubing with that propane torch next to the bender before bending it?

Im thinking about bending some for my cradle, But I only have enough material to get it right on the first shot.
User avatar
cr500beercan
Posts: 52
Joined: March 21st, 2012, 1:56 pm

Post by cr500beercan »

How did you get the pipe to clear the y ? Did you use a 250 y?
User avatar
other
Posts: 338
Joined: January 25th, 2010, 5:11 am
Location: Perth Hills, Western Australia

Post by other »

omaotek wrote:Did you heat up the tubing with that propane torch next to the bender before bending it?

Im thinking about bending some for my cradle, But I only have enough material to get it right on the first shot.
Yep, but you really just take the chill off it. You can use an electric hot air gun too. I had masking tape on the tube (to avoid scarring from the bending dies), and I didn't put in enough heat to even brown the tape. The trick is bend it REALLY slow. I went too fast on one . . . . . luckily I had a spare.
Last edited by other on April 25th, 2012, 12:52 am, edited 1 time in total.
User avatar
other
Posts: 338
Joined: January 25th, 2010, 5:11 am
Location: Perth Hills, Western Australia

Post by other »

cr500beercan wrote:How did you get the pipe to clear the y ? Did you use a 250 y?
Nope, original 450 Y, and she's really snug around there ! Measure, measure it again, then do it one more time just to be certain ! It really is as snug as a thumb-in-a-bum ! There might be 3mm clearance (1/8") between pipe and Y both sides.
User avatar
other
Posts: 338
Joined: January 25th, 2010, 5:11 am
Location: Perth Hills, Western Australia

Post by other »

Ok guys, I'm after a little more help, this time with the best airboot for the job. I have an '85 500 boot here, that almost works, (in fact if the reed block was 10 or 12 mm longer, it would be almost perfect . . . Wasn't there a V-Force reed block that added length ? ? ?). I also have an '86 250 boot which looks longer, but I have yet to remove from the roller and try . . . . The CRF of course is a non starter, and the '90 500 is too bulky to fit between the shock and the frame . . . If I am going to pop the bucks on yet another boot, I want it to be closer to fitting than the "85 500 one. What has everyone else used on Gen 4 450's ? Also, would you recommend adapting the CR500 air filter, or does everyone use the CRF filter that fits the airbox ? (the CRF appears to have a larger surface area, so shouldn't be a problem, I guess ).
Footnote : went to start welding the old girl up last night, and the AC/DC TIG has died since I last used it ! so now I have 415V to the shed, but the welder is in for repair . . . seems progress is fated to be slow on this one !
Any help on the best airboot to start with would be greatly appreciated.
Thanks
Greg
User avatar
cr500beercan
Posts: 52
Joined: March 21st, 2012, 1:56 pm

Post by cr500beercan »

Usualy a cr250 intake boot is adapted to the stock 450 air box , like a 2000-2001 intake boot
User avatar
cr500beercan
Posts: 52
Joined: March 21st, 2012, 1:56 pm

Post by cr500beercan »

You had to lower the front of the motor way down to clear the pipe?
User avatar
other
Posts: 338
Joined: January 25th, 2010, 5:11 am
Location: Perth Hills, Western Australia

Post by other »

cr500beercan wrote:You had to lower the front of the motor way down to clear the pipe?
I was quite concerned about positioning (clocking) the engine, because there are so many variables. I don't believe I have lowered the front too much, because of the alignment of the air boot and the exhaust. If I lift it any more, the muffler mount falls well below the top mount on the subframe, and the plug fouls the tank outlet. I actually raised the Y by 71mm, and 'clocked the motor to sit with the exhaust springs just clearing. I then double checked with a spirit level, and at static ride height, the "HONDA" on the clutch cover is less than 1mm down from horizontal on the "A". This position gave me the best fit for exhaust pipe, air boot, chain run and spark plug. Having locked this in, I then bent the frame rails to fit as tight as practical around the engine. Not much science to it really, but I will admit I was pleased to find that the most practical 'clocking' was true horizontal (as near as 'fuck it' is to swearing) on the cluch cover text. Check the photo taken square on showing the fitment of the frame rails ( and mocked up lower mounts), as this gives a pretty good indication of the engine's rotational position. Looks pretty right to my eye.
User avatar
other
Posts: 338
Joined: January 25th, 2010, 5:11 am
Location: Perth Hills, Western Australia

Post by other »

Image
Image
managed to find time to get a couple of engine mounts machined up this weekend, but then it started raining , and the lure of the single-track was too strong.
Image
. . . . I know, I'm weak, and gave in to it ! (Don't hate me for the 4St, those 570 Bergs are fuckin awesome !)
User avatar
Bean
Posts: 233
Joined: December 6th, 2008, 2:06 am
Location: NEW SOUTH WALES AUSTRALIA

Post by Bean »

I think I have 1 air box adaptor left for the 450x if you need one ? I fly out of aus Thursday 3. Of may and get back may 28. I make the adaptors that stoffers sells so you can check them out in the Aussie kits thread . My number is 0400954272
OK THAT'S 2 DONE ....
WHO'S IS NEXT????
Post Reply