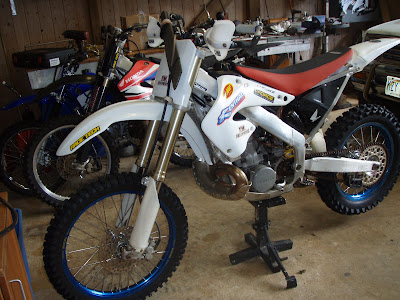
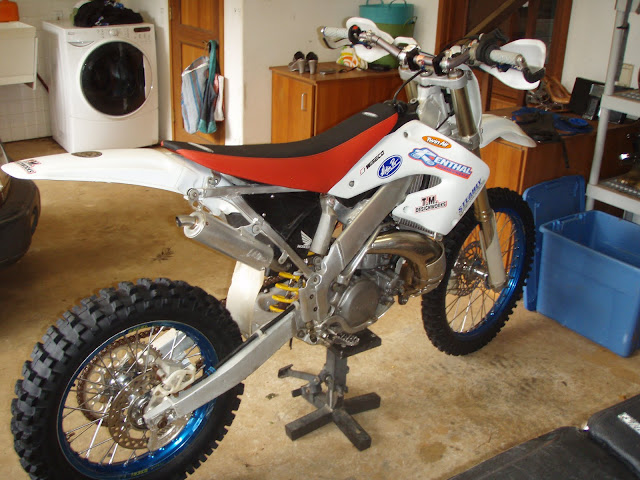
01 cr250 with 93 cr500
01 cr250 with 93 cr500
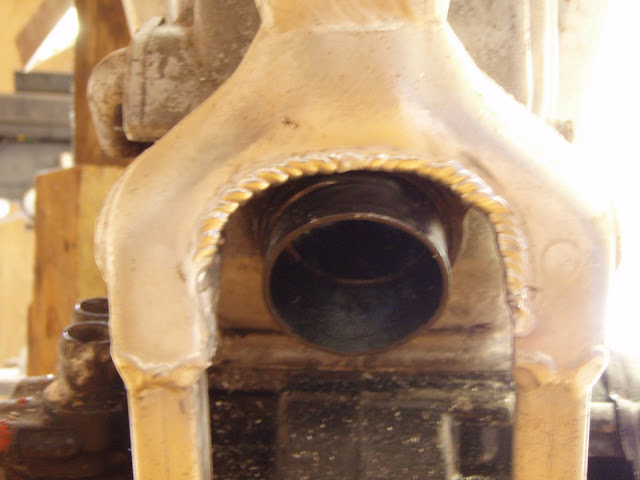
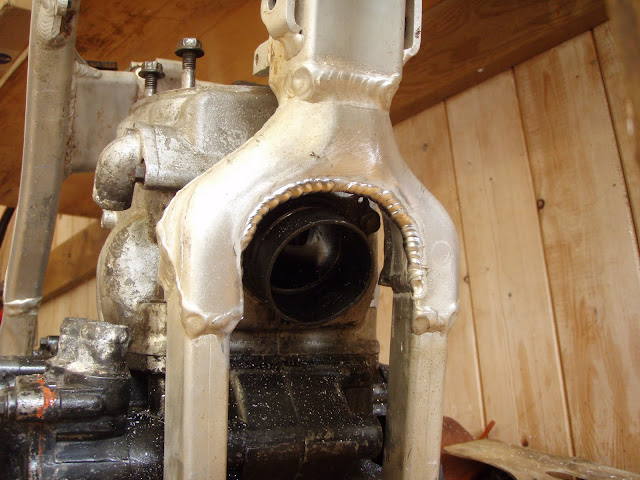
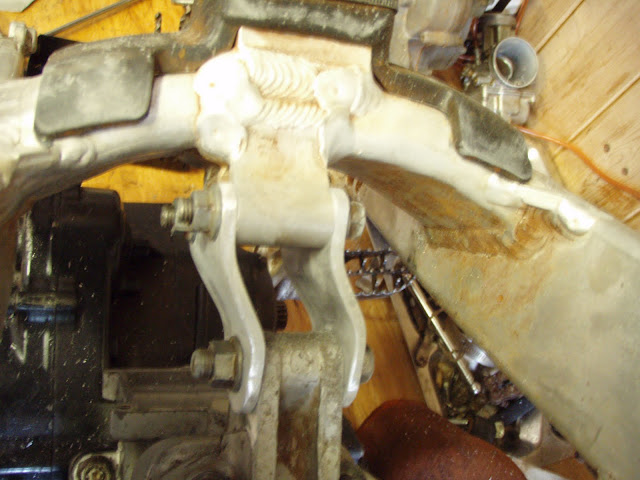
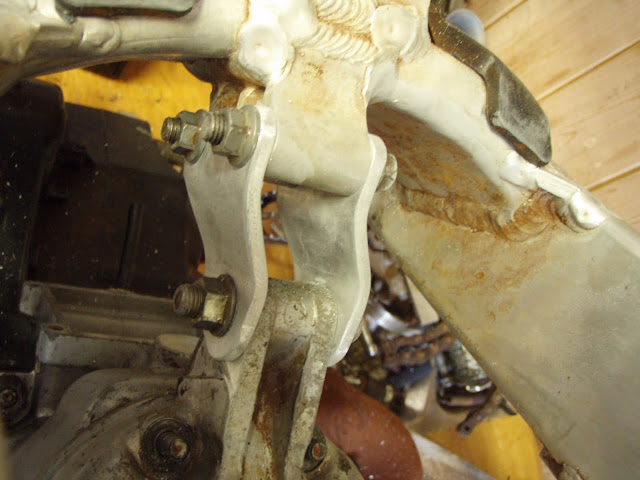
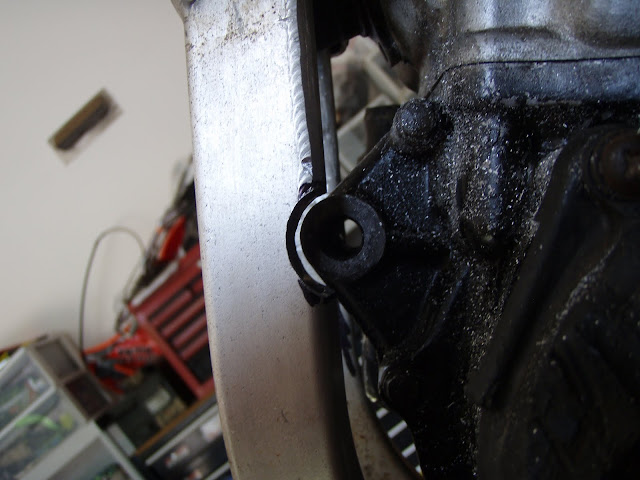
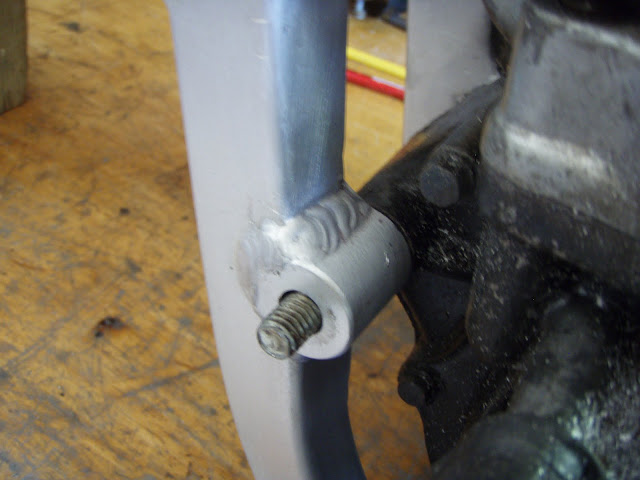
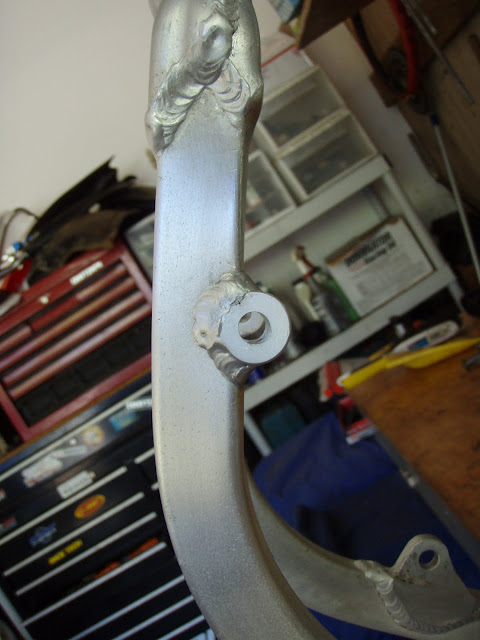
I have a 2001 cr250 and plan on putting a 93cr500 engine in it. So far I have removed the front motor mounts and clearanced the Y for the pipe. I will post some pics when I figure out how...


Has anyone used a spool gun to weld there frames?? I have a millermatic 210 with a spool gun attachment but never used it very much, I mainly use the welder for mig welding steel. I also have a miller syncrowave 200 tig welder that I have only used a handfull of times on stainless steel and two or three times on aluminum. Im trying to decide which would be the better machine to use for someone with minimal experience welding aluminum?

Hey omaotek - my sister in law just moved to same island as you recently...
and here's a thread on why not to mig:
http://bannedcr500riders.com/board/view ... highlight=
And my Gen2 conversion:
http://bannedcr500riders.com/board/view ... highlight=
g/l with your build!
and here's a thread on why not to mig:
http://bannedcr500riders.com/board/view ... highlight=
And my Gen2 conversion:
http://bannedcr500riders.com/board/view ... highlight=
g/l with your build!
The CR500 is an acquired taste. If you don't like it, acquire some taste...

Thanks Hoofarted. I see you used the IMS tank for your build and you didnt have to modify anything for fitment, thats good to know!
I pulled out the syncrowave 200 after sittting for two years and tried to practice some tig welding but the POS wouldnt give me more than 20-30amps output in the AC mode. After opening up the welder and toubleshooting the problem I found that on the back side of the printed circuit board there was a small green spot on one of the printed circuits, sure enough I checked for continuity between the two ends of the particular circuit and it was open. To temporarrily (permanent) fix the prob I soldered a small piece of wire between the two ends of the circuit. Put the welder back together and works good now. Im not sure if its a common problem but anyone that has a syncrowave 200 with the same issue be sure the look at the printed circuit board very closely.
I pulled out the syncrowave 200 after sittting for two years and tried to practice some tig welding but the POS wouldnt give me more than 20-30amps output in the AC mode. After opening up the welder and toubleshooting the problem I found that on the back side of the printed circuit board there was a small green spot on one of the printed circuits, sure enough I checked for continuity between the two ends of the particular circuit and it was open. To temporarrily (permanent) fix the prob I soldered a small piece of wire between the two ends of the circuit. Put the welder back together and works good now. Im not sure if its a common problem but anyone that has a syncrowave 200 with the same issue be sure the look at the printed circuit board very closely.
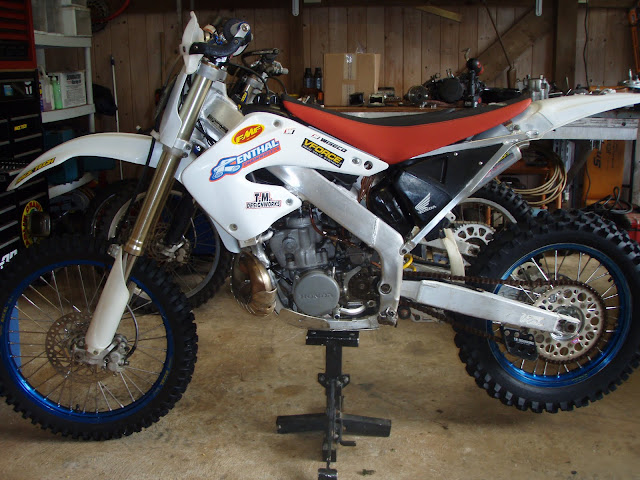
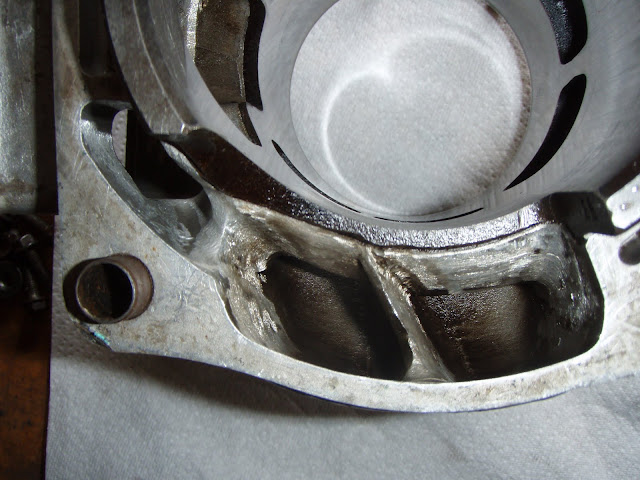
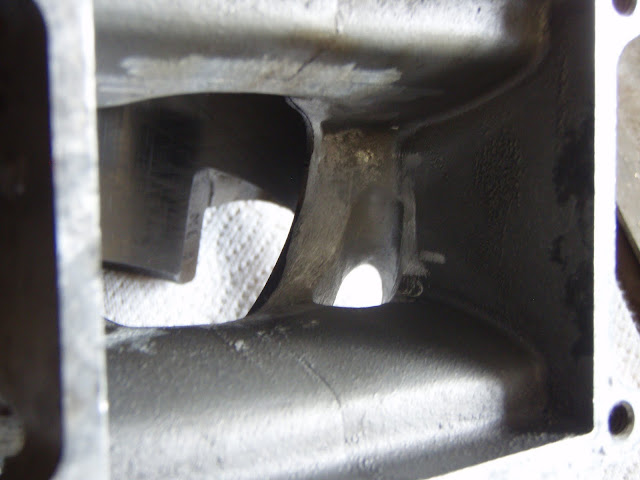
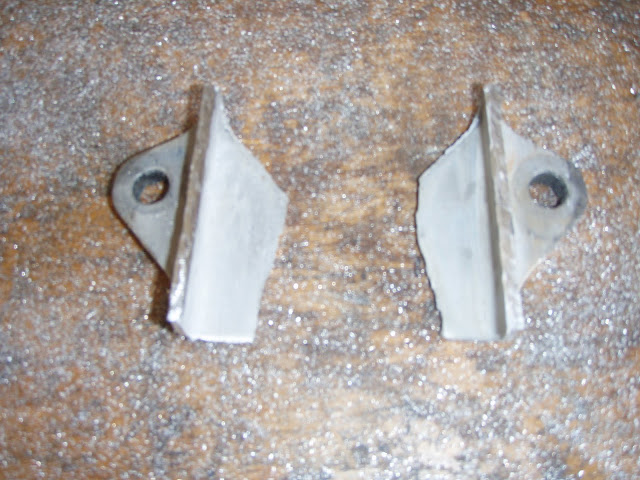
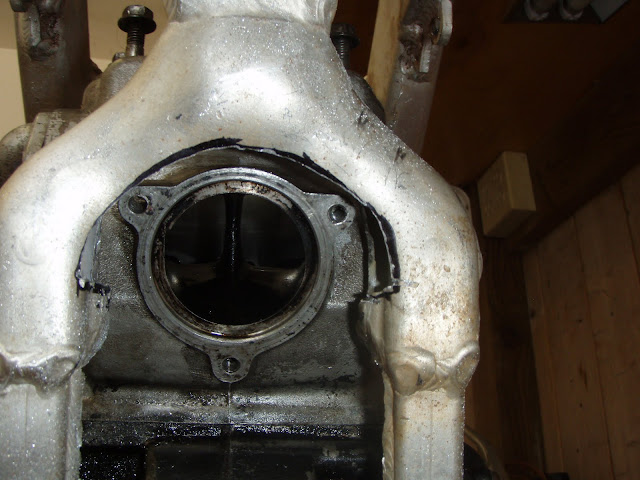
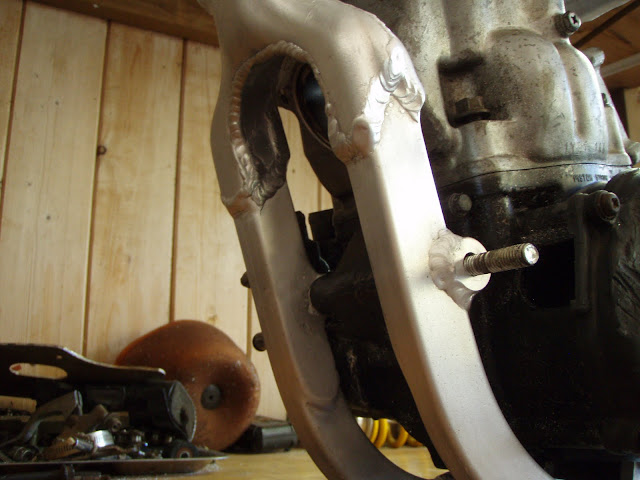
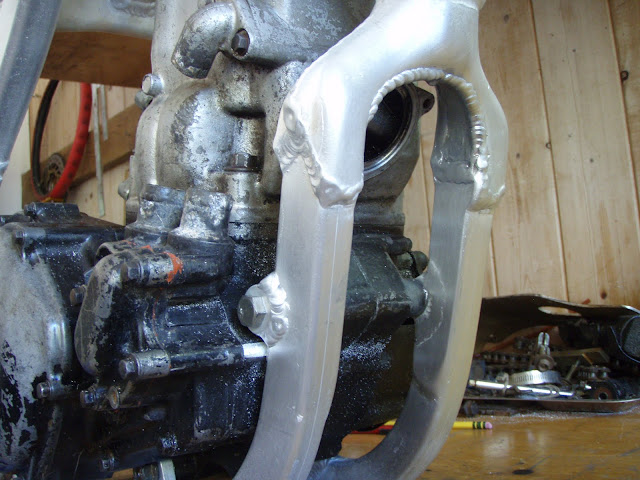
Nor am I - but after watching other builds, I found it best to leave the Y's integrity alone and just move it up via modification of the lower tubes and upper union. Been holding up fine for 3 years so far - and I am not easy on it by any means.ddewey78 wrote:Im by no means an expert fabricator or rider, so I am not going to tell you how you should do your bike. But what I will tell you is after complete, keep a VERY close watch on that y. Mine was done in the same manner and cracked horribly bad where it was clearanced.[/img]
The CR500 is an acquired taste. If you don't like it, acquire some taste...
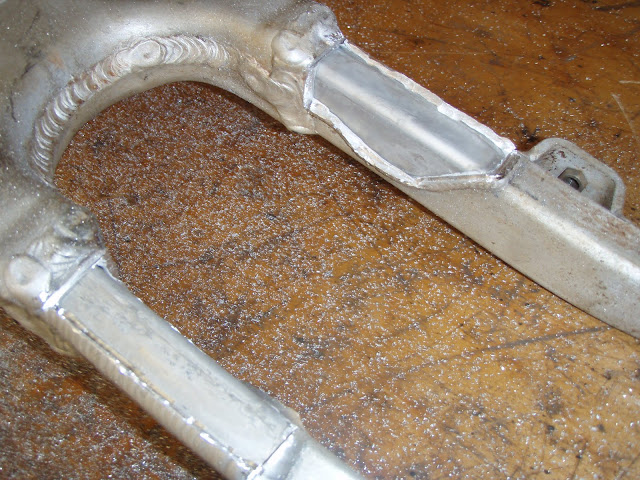
After all the work it took to clearance the Y and make a piece to fit I would deffinatly just move the Y up on my next build (after the one I made cracks  ) . One thing I did alittle diffrently than others is I cut very little away from the front of the Y and more from the rear which leaves alot more of the original Y remaining. Being a novice tig welder it was much harder to close up the Y than it was practicing on a flat surface. This would be another reason to just move the Y it would be way easier to weld together. Its my first build and a learning process I wasnt expecting it to come out like some of the builds I saw on this forum. Some of you guys can build some amazing shit!!
Thanks for the warning, What area of the Y seems to crack most often when the Y is clearanced?
Thanks for the warning, What area of the Y seems to crack most often when the Y is clearanced?

was that a gen 2 or 3?ddewey78 wrote:Im by no means an expert fabricator or rider, so I am not going to tell you how you should do your bike. But what I will tell you is after complete, keep a VERY close watch on that y. Mine was done in the same manner and cracked horribly bad where it was clearanced.[/img]
13 isnt unlucky i just keep falling off

I was thinking of doing somthing similar to that. But I think I am going to run it as is if it cracks you guys can say "I told you so" yes the pipe and springs will fit, for the top springs I may have to use a different type of spring but it will fit without hitting.
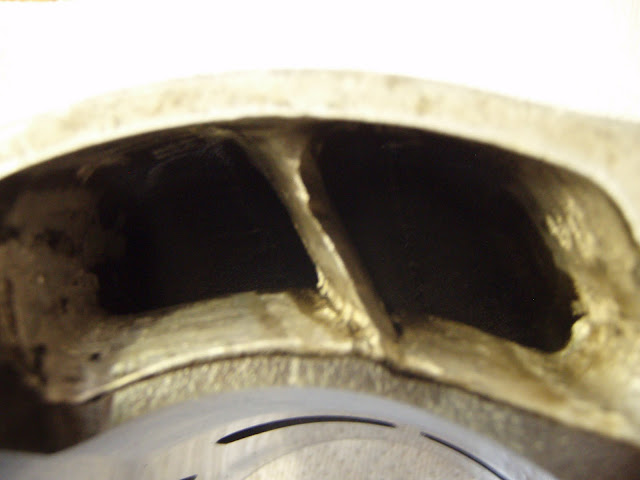
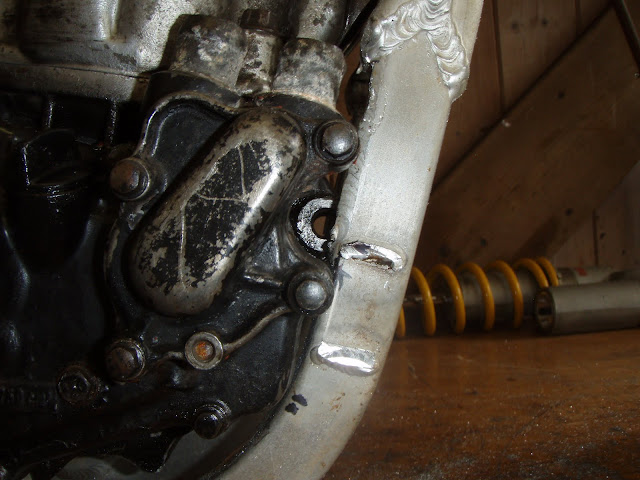
Now it's time to start rebuild of the engine..
Now it's time to start rebuild of the engine..