CR500 Engine Build Pictorial Part 3

All Engine, Clutch, Chains, and Sprockets Stuff Here.
Post Reply
dogger315
Posts: 87
Joined: March 14th, 2010, 2:41 pm

CR500 Engine Build Pictorial Part 3

Post by dogger315 »

This segment will deal with the installation of the clutch and ignition
and complete the bottom end portion of the rebuild.

First up is the clutch. The clutch outer was already installed in the
last section so now it's time for the rest of the components.

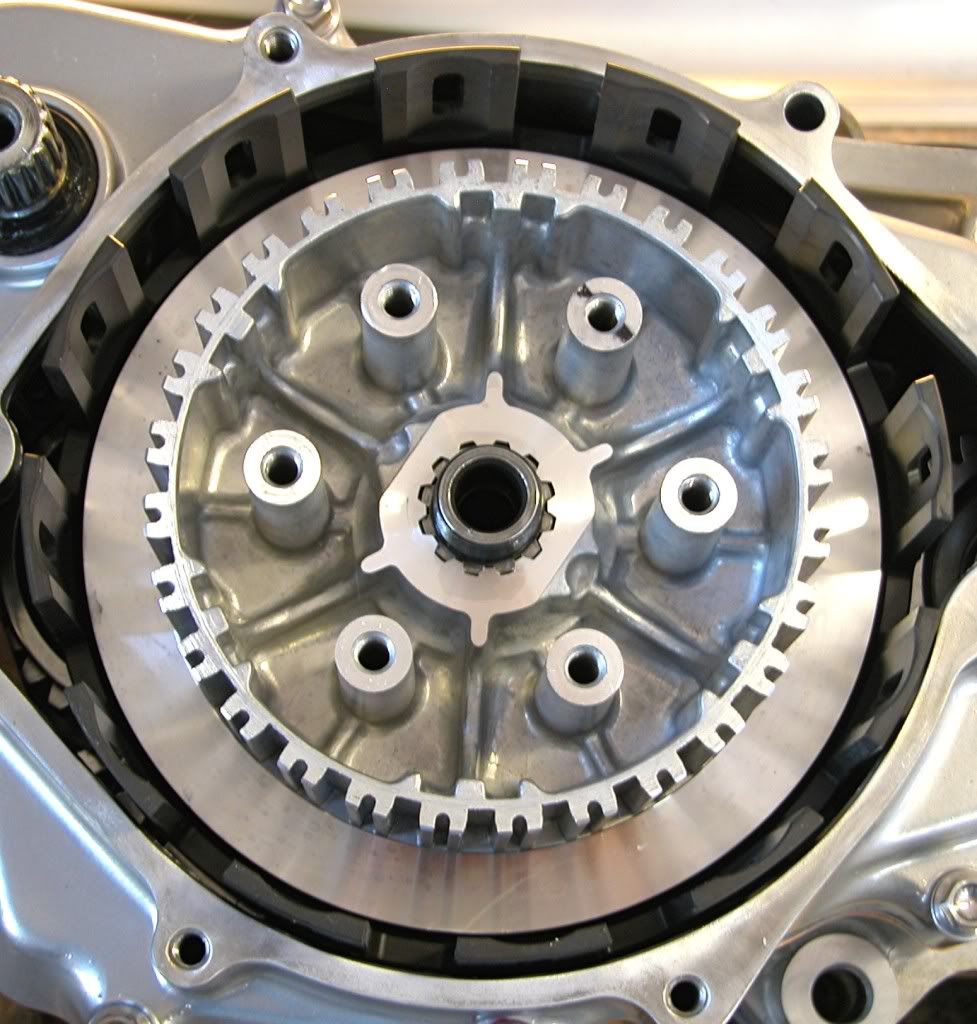
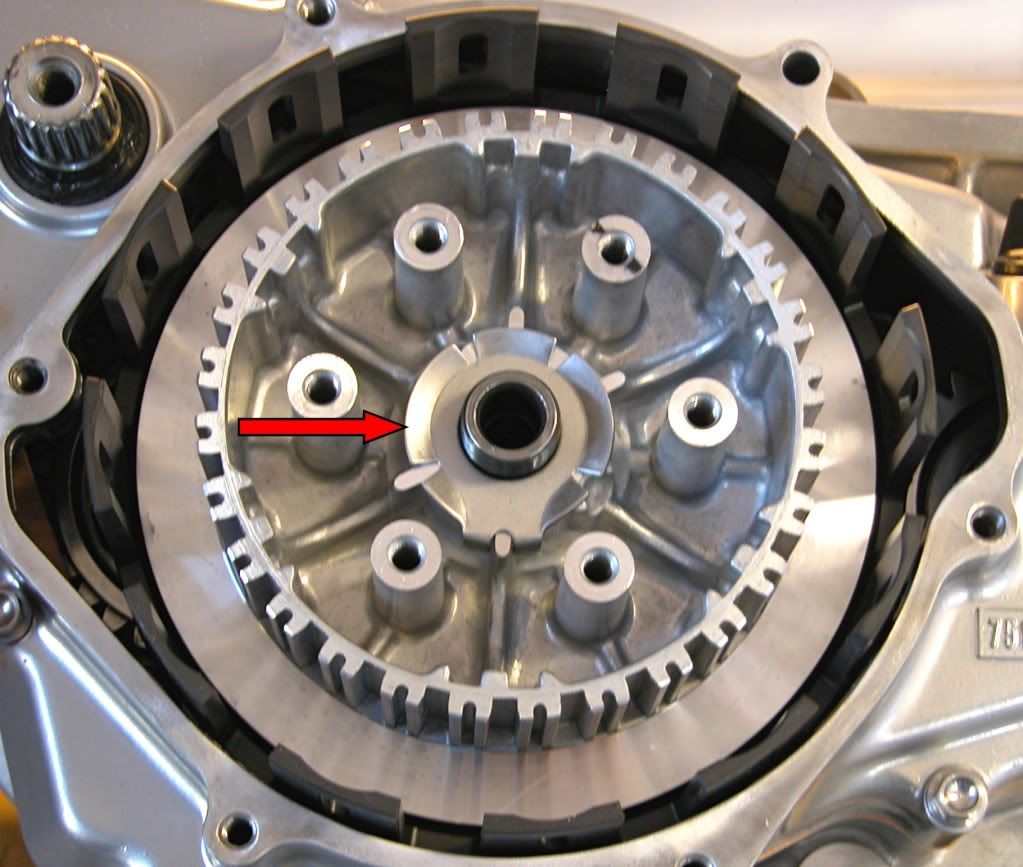
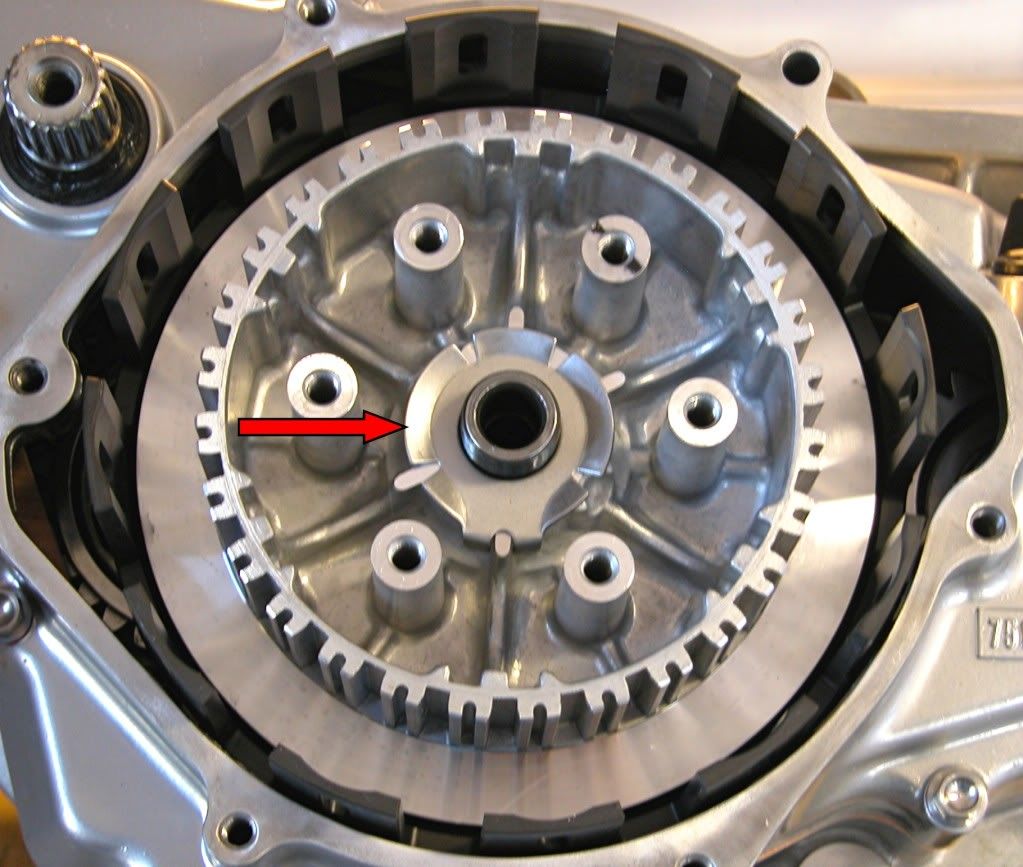
Install the thrust washer as shown.
Image
Install the clutch inner.
Image
Place a lock washer over the mainshaft.
Image
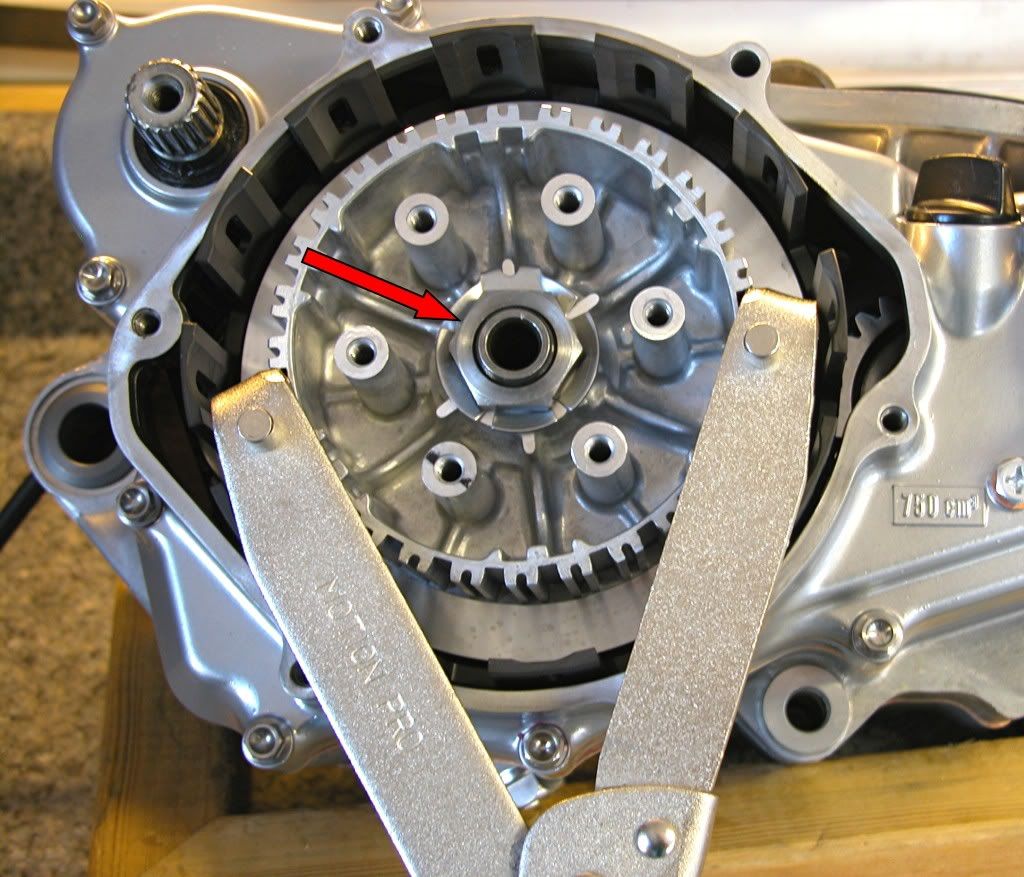
Thread the retaining nut onto the main shaft. Clamp a clutch retaining tool
on the inner and torque the retaining nut to 59 lb.ft.
Image
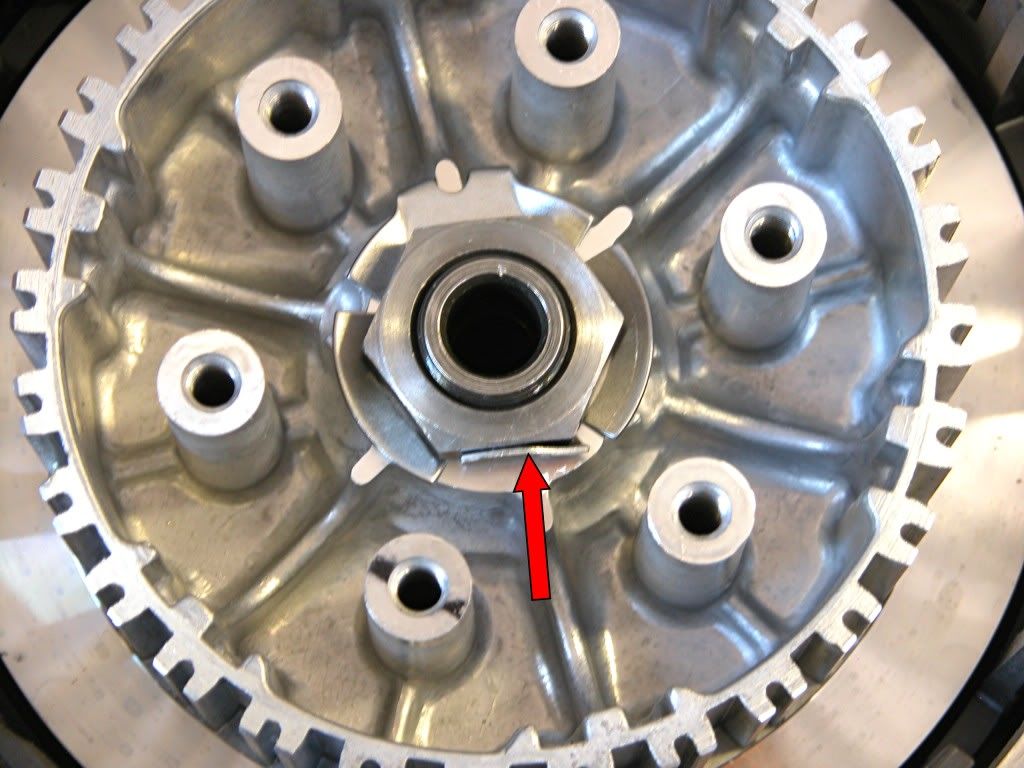
Bend at least one of the ears of the lock washer against the retaining nut.
Image
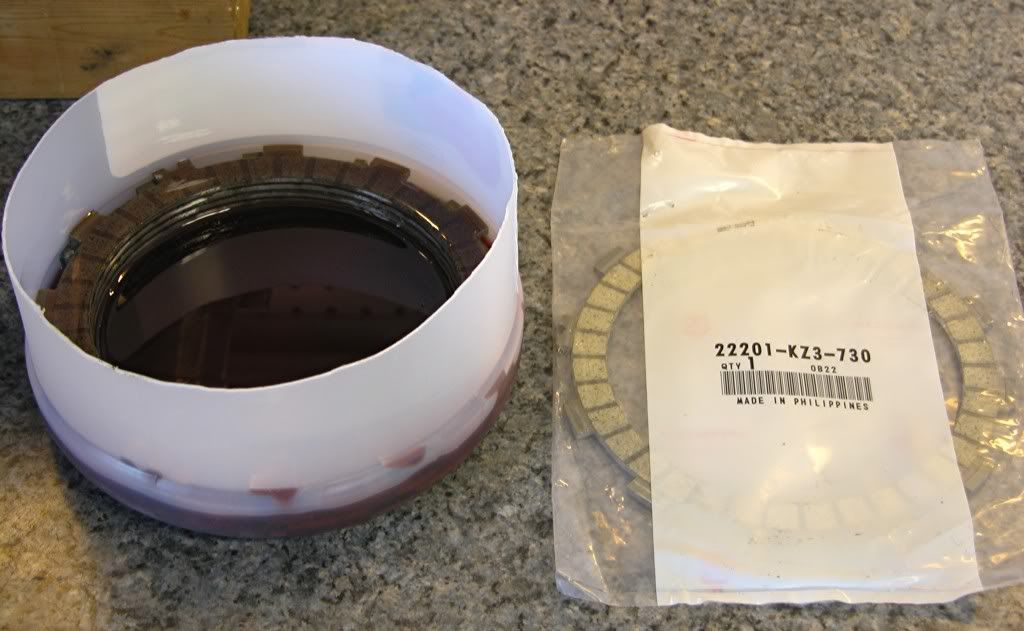
Soak the fiber plates in gear oil.
Image
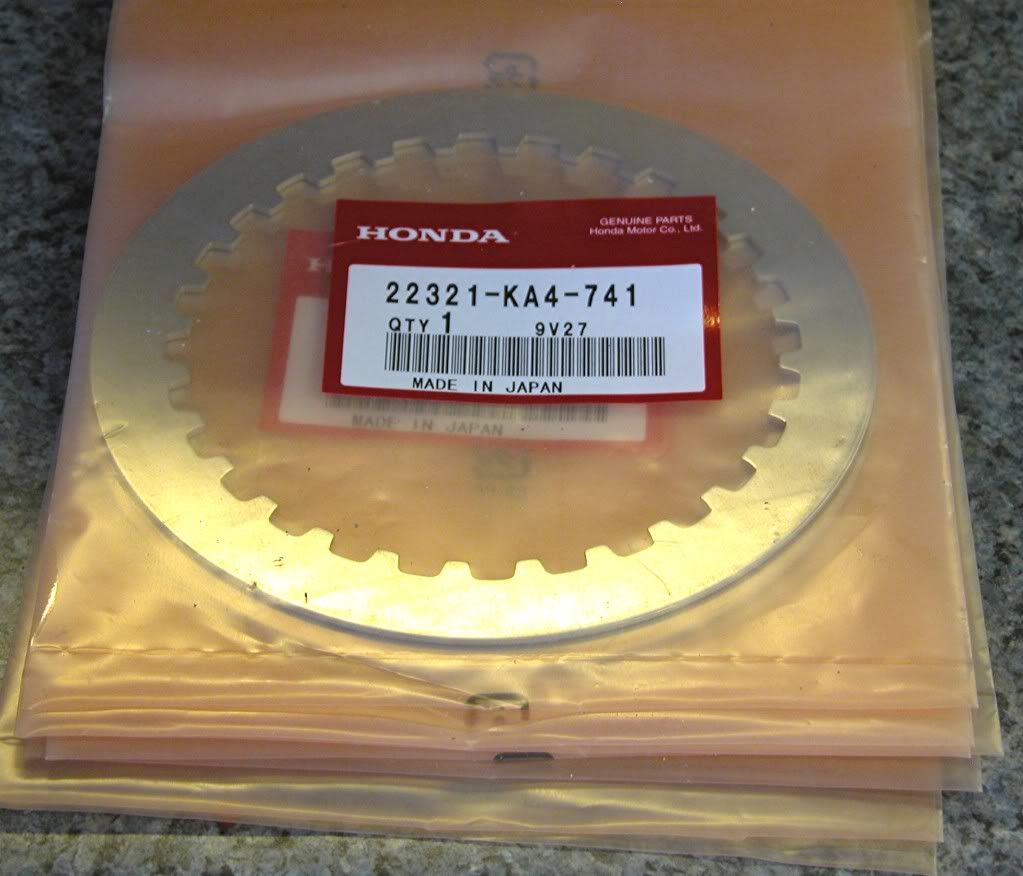
I like to use OE Honda fiber and metal plates when using an OE cast
Aluminum inner and pressure plate. Clutch disc with Kevlar are hard
on the soft cast aluminum parts and may cause premature wear.
Image
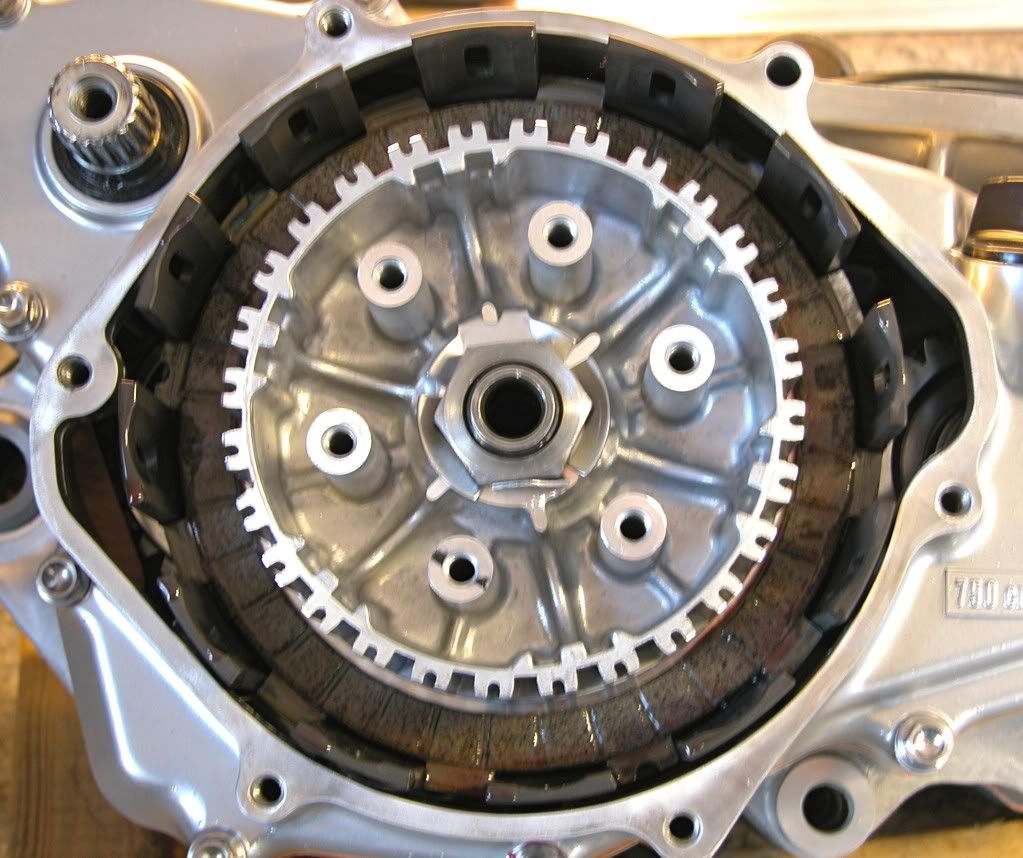
Load the clutch pack starting and ending with a fiber plate.
Image
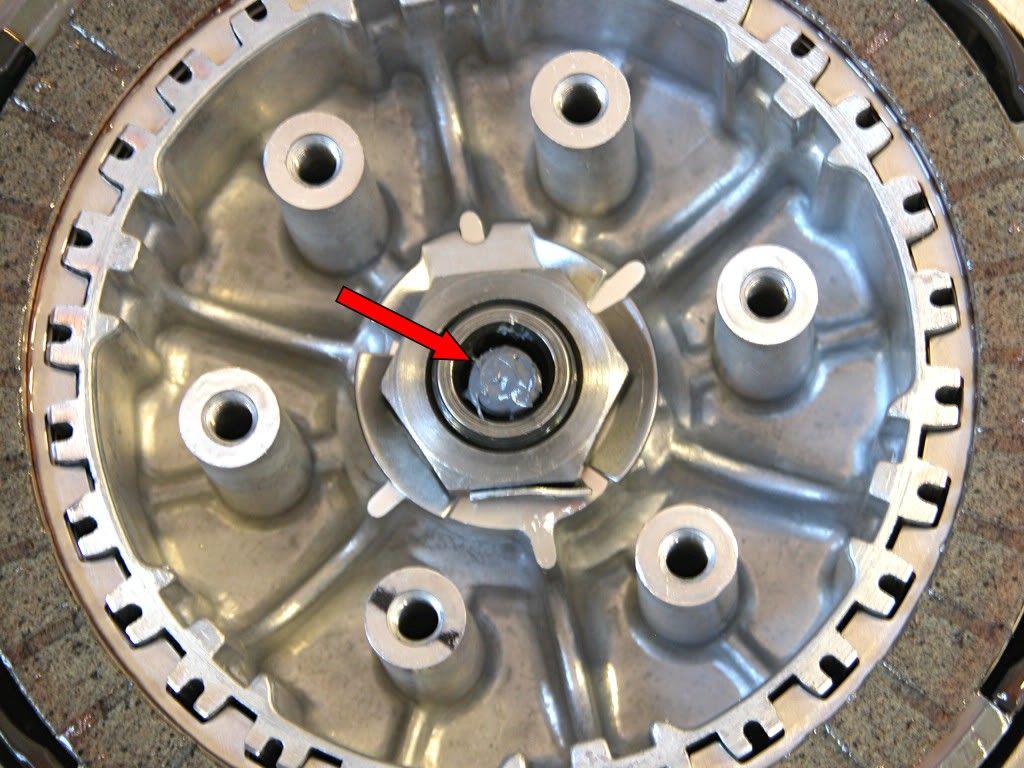
Apply Moly grease to both ends of the clutch actuating rod and insert into
the mainshaft.
Image
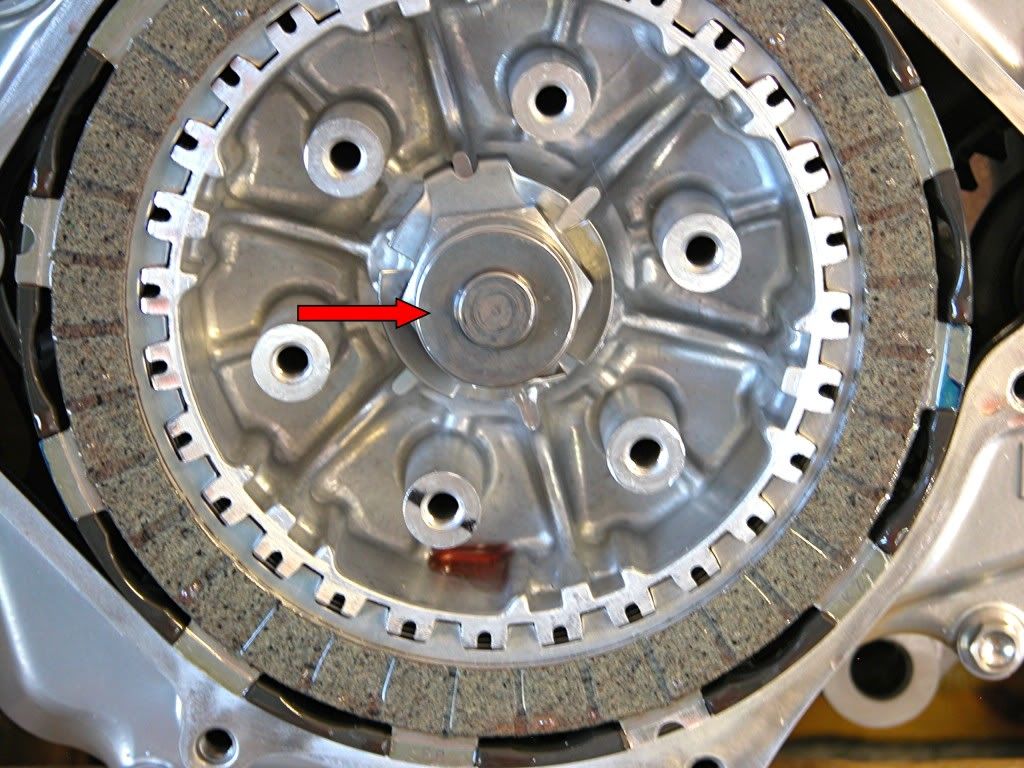
Dip the clutch hat in gear oil and install.
Image
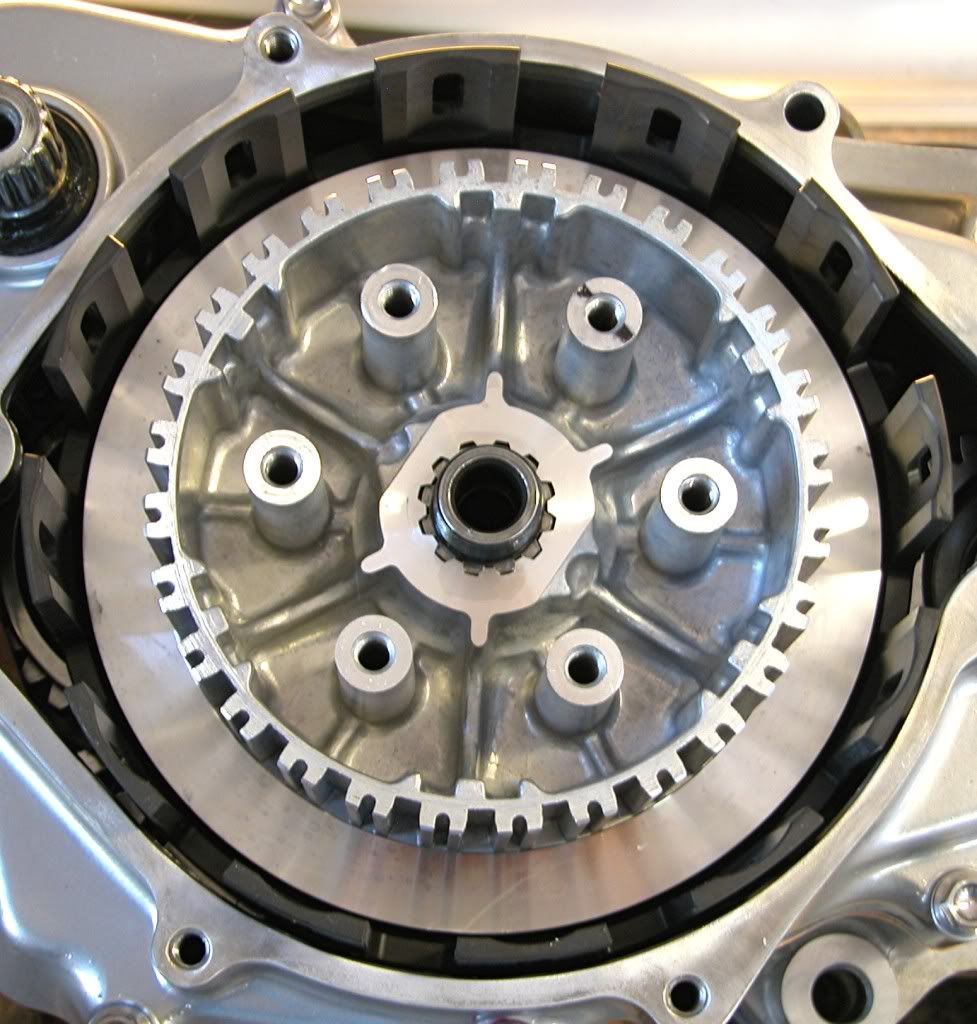
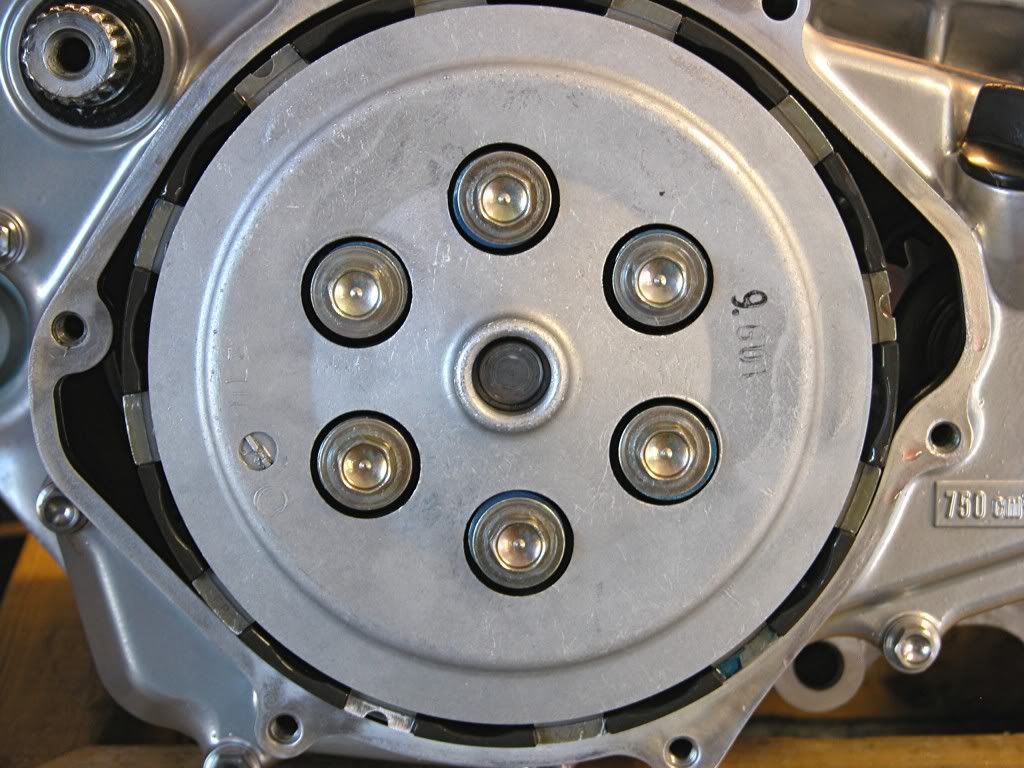
Install the pressure plate, clutch springs and bolt/washers. Tighten the bolts
in 2 or 3 steps and in a criss cross pattern to 7 lb.ft.
Image
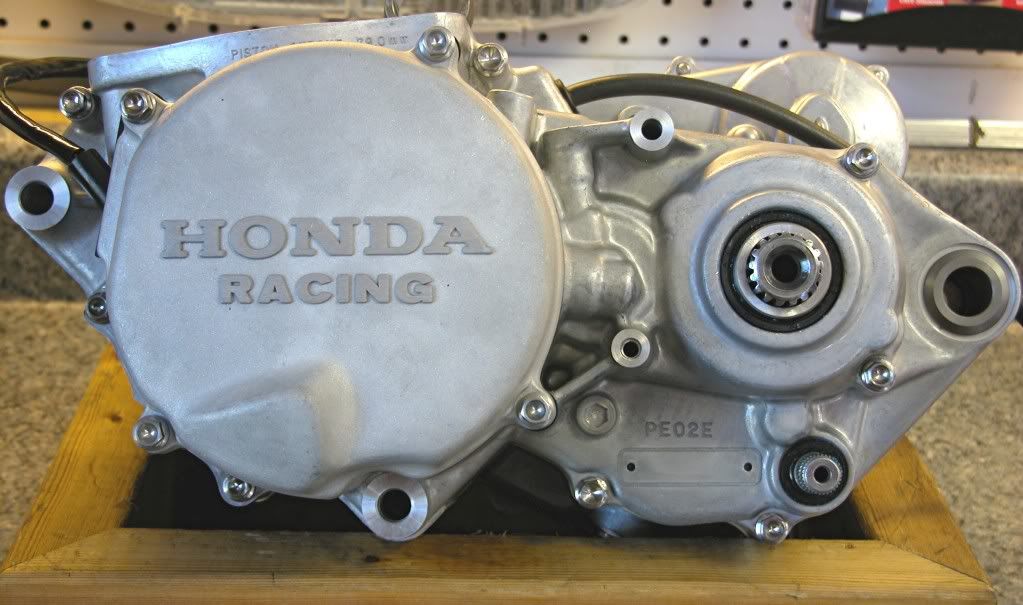
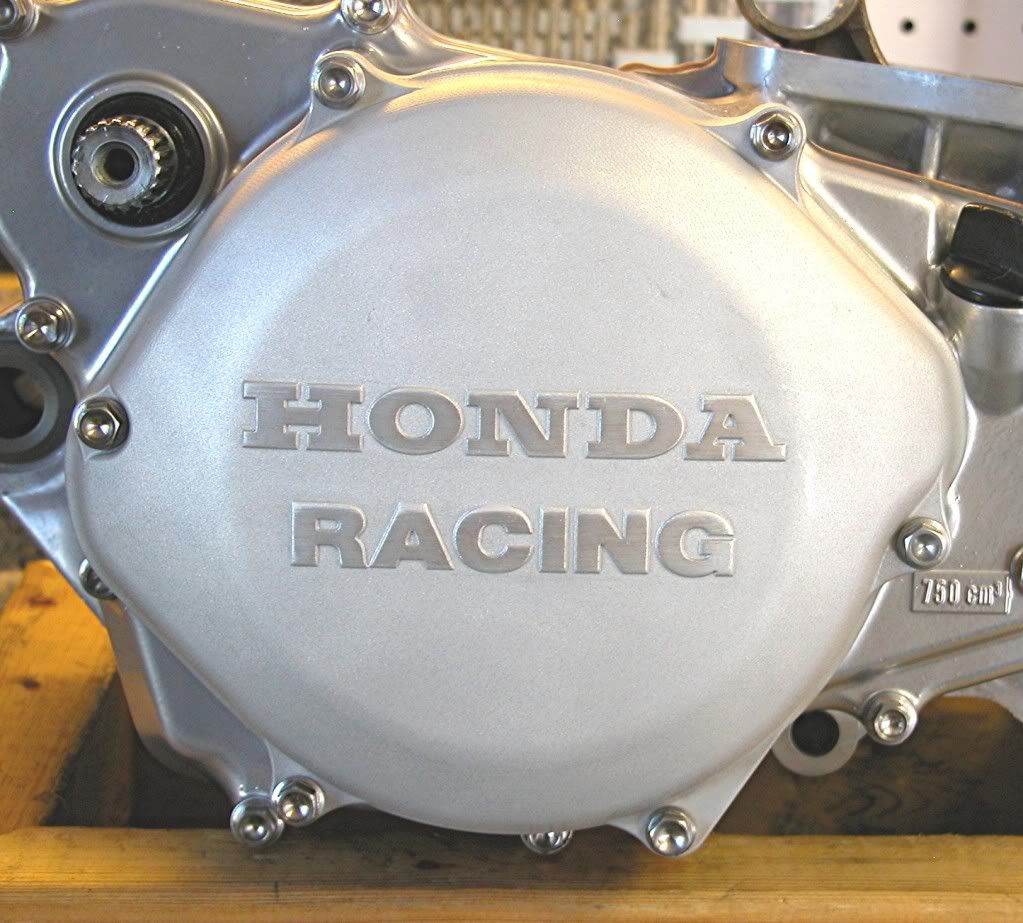
Smear some gear oil on the clutch cover O-ring and install the clutch cover.
Tighten the bolts to 5 lb.ft.
Image
Install the kick start lever and tighten the bolt to 20 lb.ft.
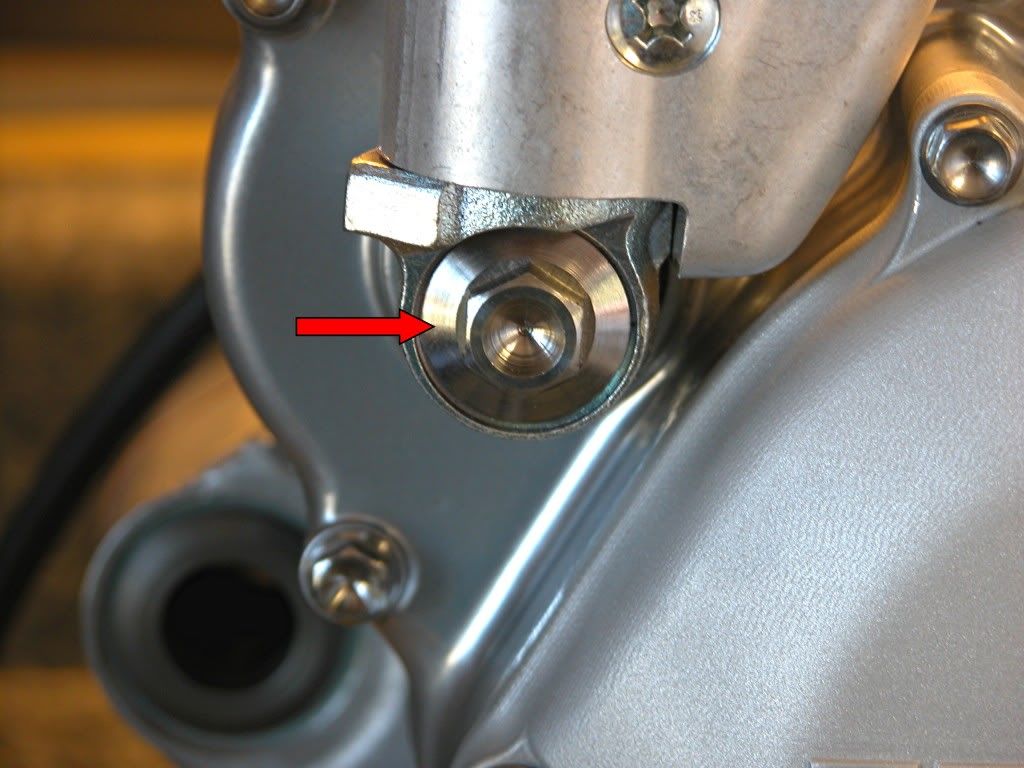
Image

Spin the engine around. Dip the notched shaft of the clutch actuating lever
in gear oil and install (Blue arrow). Mount the stator plate with the two index
marks alligned and tighten the two retaining bolts (Red arrows).
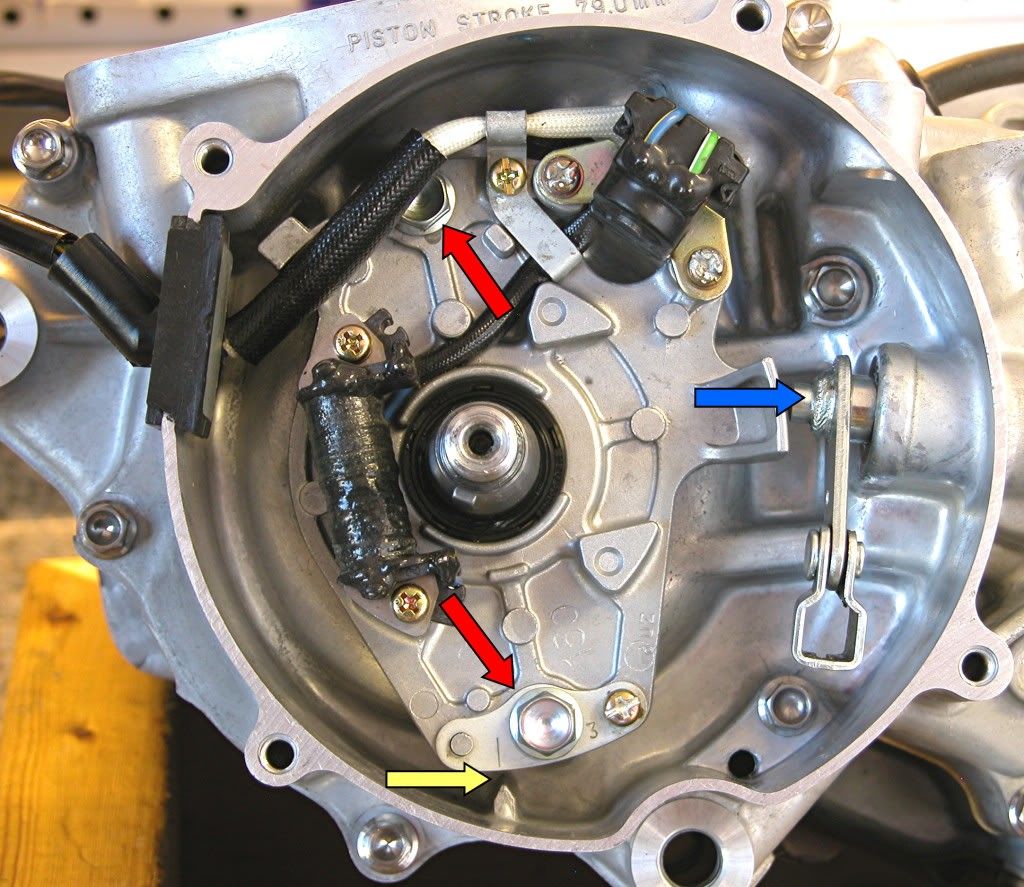
Image
Install the woodruff key followed by the flywheel, flat washer and retaining
nut. Tighten the retaining nut to 40 lb.ft.
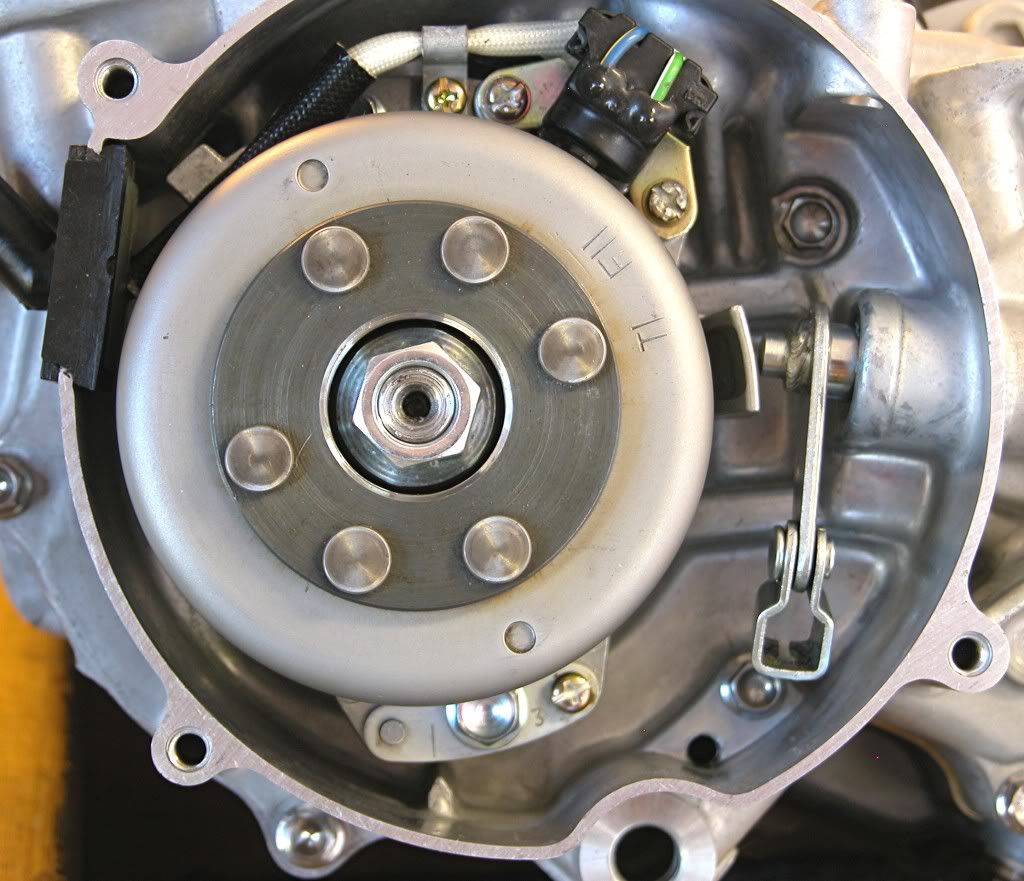
Image
Install the ignition cover.
Image
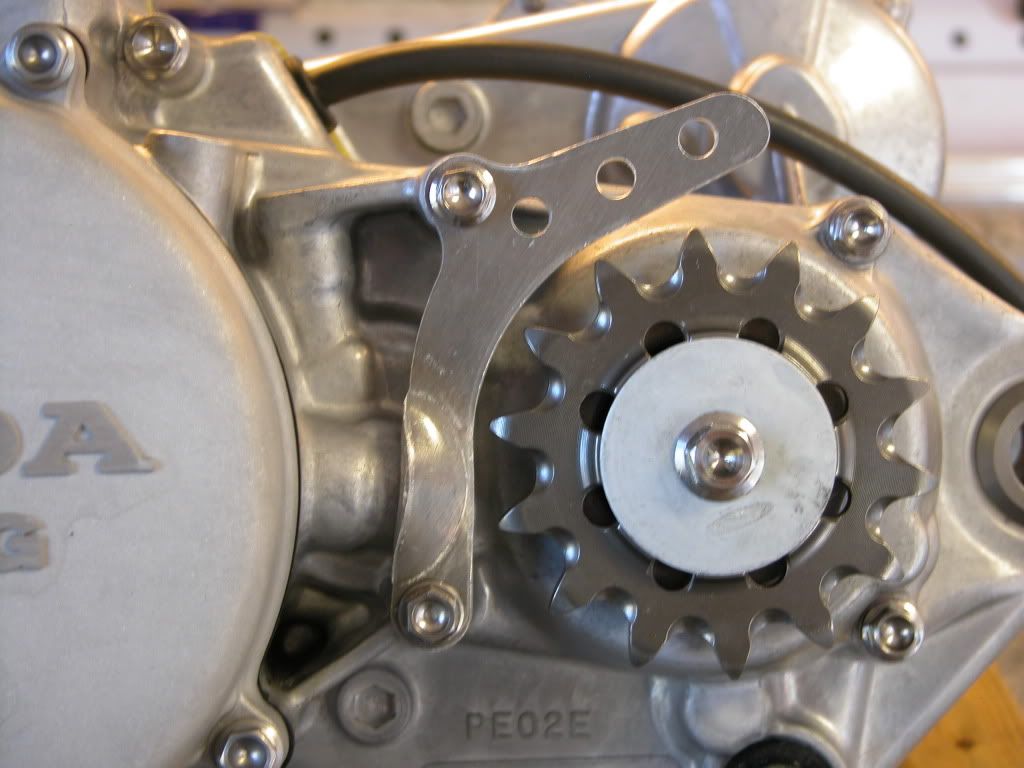
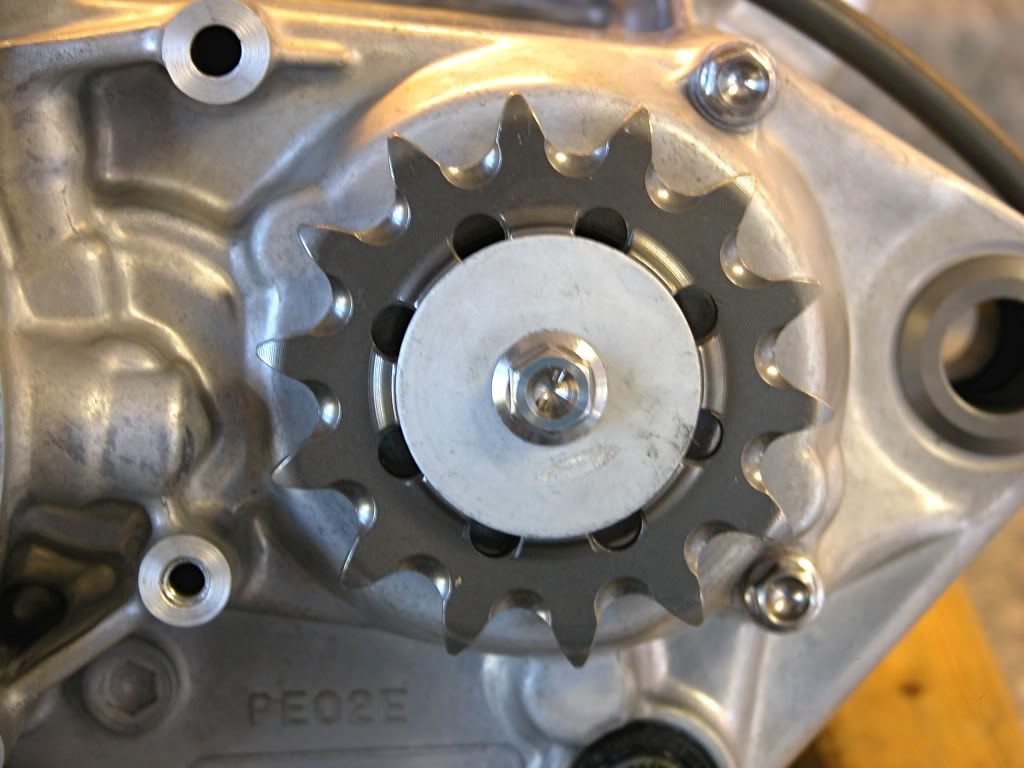
Put the countershaft sprocket on the countershaft with the recessed side
facing the engine.
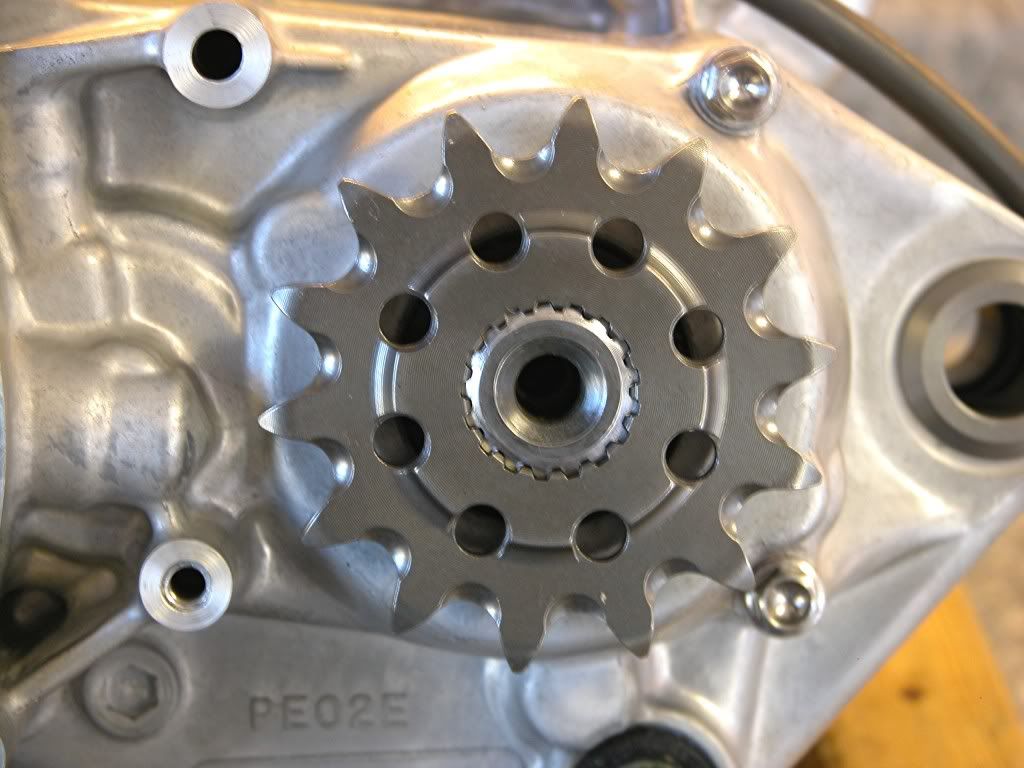
Image
Install the convex lock washer (dome side out) and bolt. Tighten the bolt
to 20 lb.ft.
Image
Install the chain guard.
Image
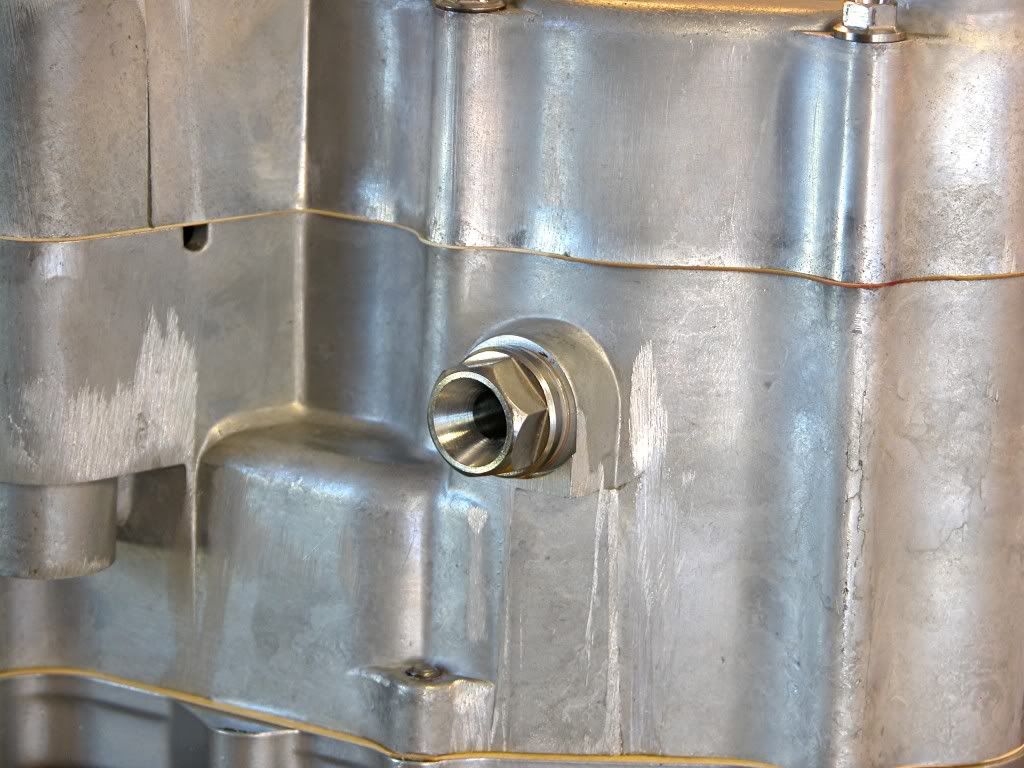
Install the oil drain plug along with a new sealing washer.
Image

That's it for the bottom end. Next up will be the top end.

As always, questions or comments are welcome.

dogger
User avatar
robfromga
Posts: 119
Joined: November 16th, 2010, 6:05 pm
Location: Augusta

Post by robfromga »

nice!
User avatar
AlisoBob
"Hoon-father"
Posts: 15404
Joined: May 31st, 2007, 6:39 pm
Location: Aliso Viejo Ca

Post by AlisoBob »

Only changes I can add is using some thread-locker on the Kicker and Countershaft sprocket bolts.

Seen WAY too many fall off.

Right Brit?

:roll:
100hp honda
Posts: 4394
Joined: July 4th, 2007, 6:57 pm

Post by 100hp honda »

forgot to check air gap :lol:
dogger315
Posts: 87
Joined: March 14th, 2010, 2:41 pm

Post by dogger315 »

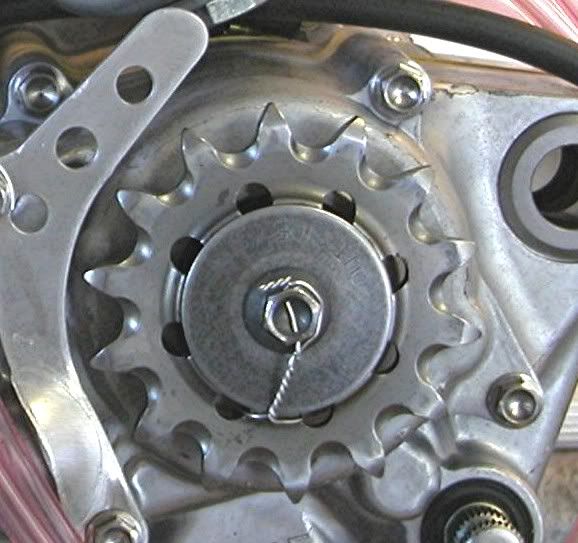
using some thread-locker on the Kicker and Countershaft sprocket bolts.
Good point. I normally safety wire the CS sprocket for added insurance
(just haven't gotten around to it yet) and use a little Blue Loctite on the
drain plug. If you look closely at the picture, you can see the CS bolt
is already drilled for wire. This picture is from one of my other engines.
Image
forgot to check air gap
You caught me. Actually, I am going to install a 2000 CR250 ignition
with a Vortex IC. I documented the CR500 ignition in my post because
I haven't modified the 250 ignition yet. I'm embarrased to say, but I'm
not sure what the correct air gap is for the 500.

dogger
User avatar
redrocket190
Posts: 1229
Joined: September 17th, 2007, 9:07 pm
Location: San Clemente, CA

Post by redrocket190 »

Should the white wire from the ignition pickup go behind the tab on the stator plate? When I took my rotor off the black sheath had been rubbed through, but the wire had not (yet) been damaged...
Michael Stiles
2007 Honda CR500R-AF
User avatar
iggys-amsoil
Posts: 3602
Joined: June 1st, 2007, 6:09 pm
Location: Just North of March Airfield CA

Post by iggys-amsoil »

^^^ Hmm.... yeah, although protected it could rub the flywheel.
Trinity Racing mild porting FMF
62 pilot, EGH needle, 172 main
03 Gen III CR250 frame

2013 Dodger Charger 5.7 Hemi

http://www.prisonplanet.com

Your Amsoil Customer # 350882
dogger315
Posts: 87
Joined: March 14th, 2010, 2:41 pm

Post by dogger315 »

Should the white wire from the ignition pickup go behind the tab on the stator plate?
Yes, good catch. Looks like I got careless since I knew I would be
replacing it before initial start up.

dogger
BrianPaul69
Posts: 110
Joined: September 11th, 2010, 3:01 pm
Location: Carney's Point, NJ

Re: CR500 Engine Build Pictorial Part 3

Post by BrianPaul69 »

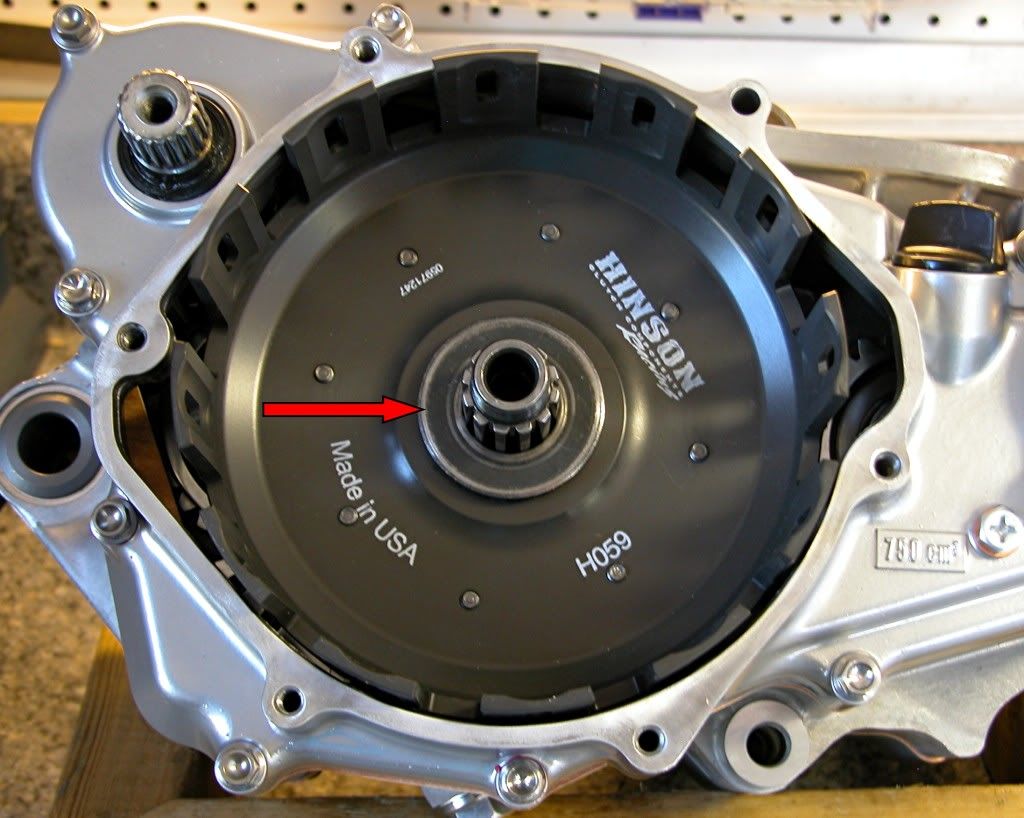
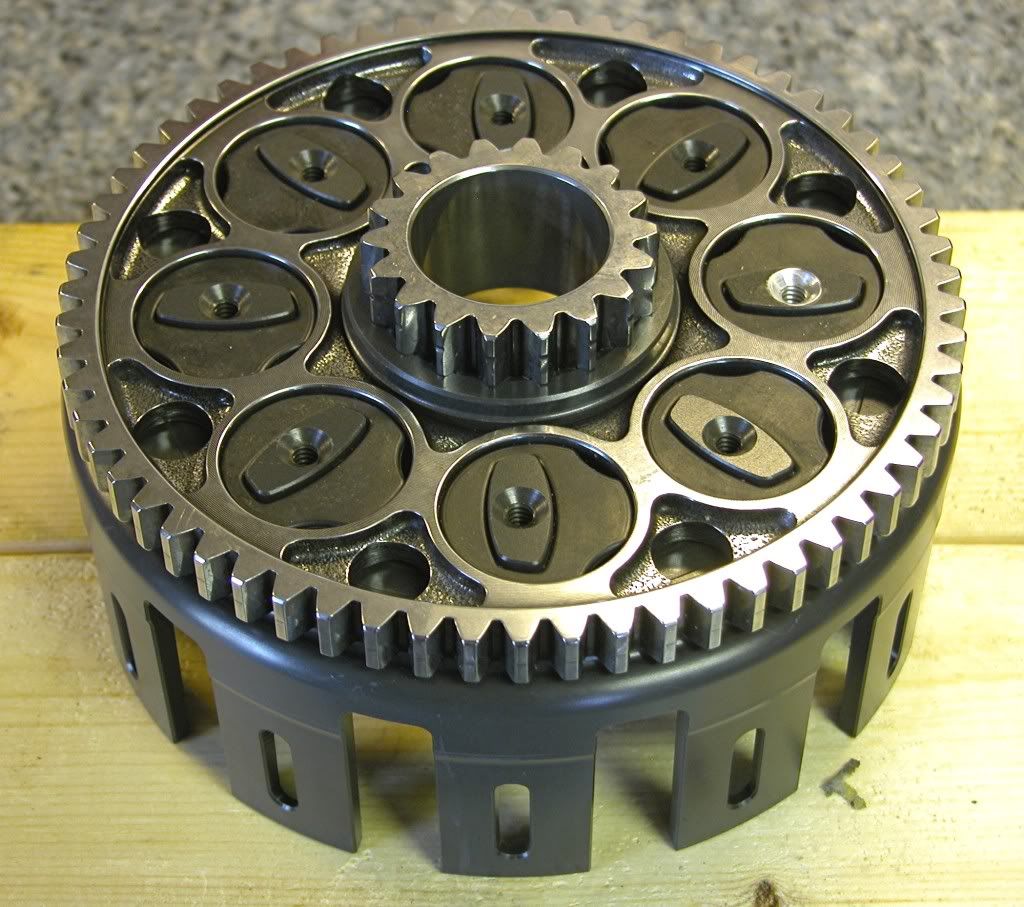
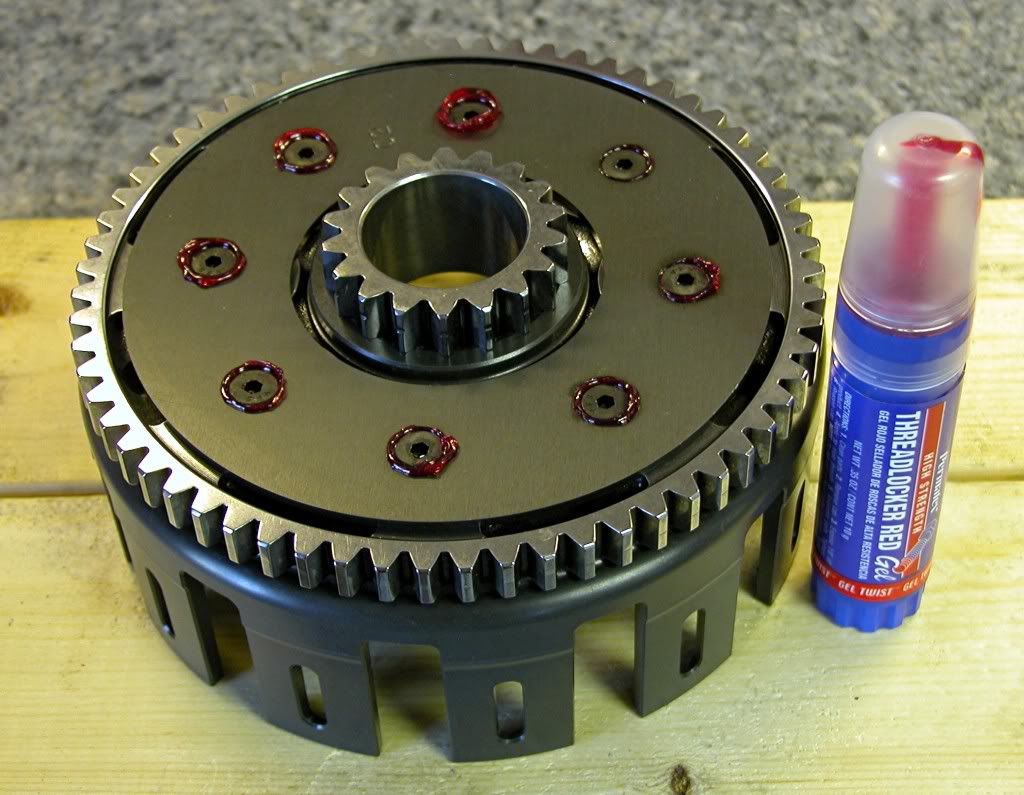
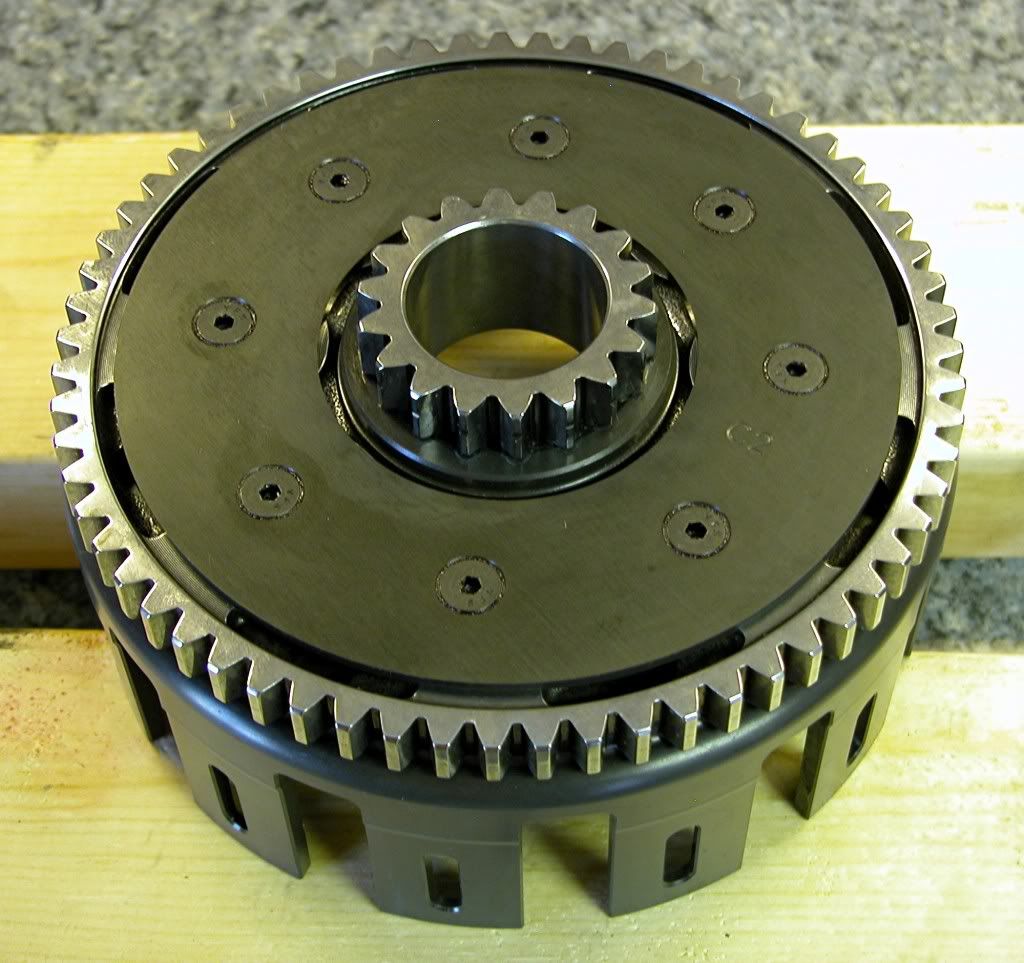
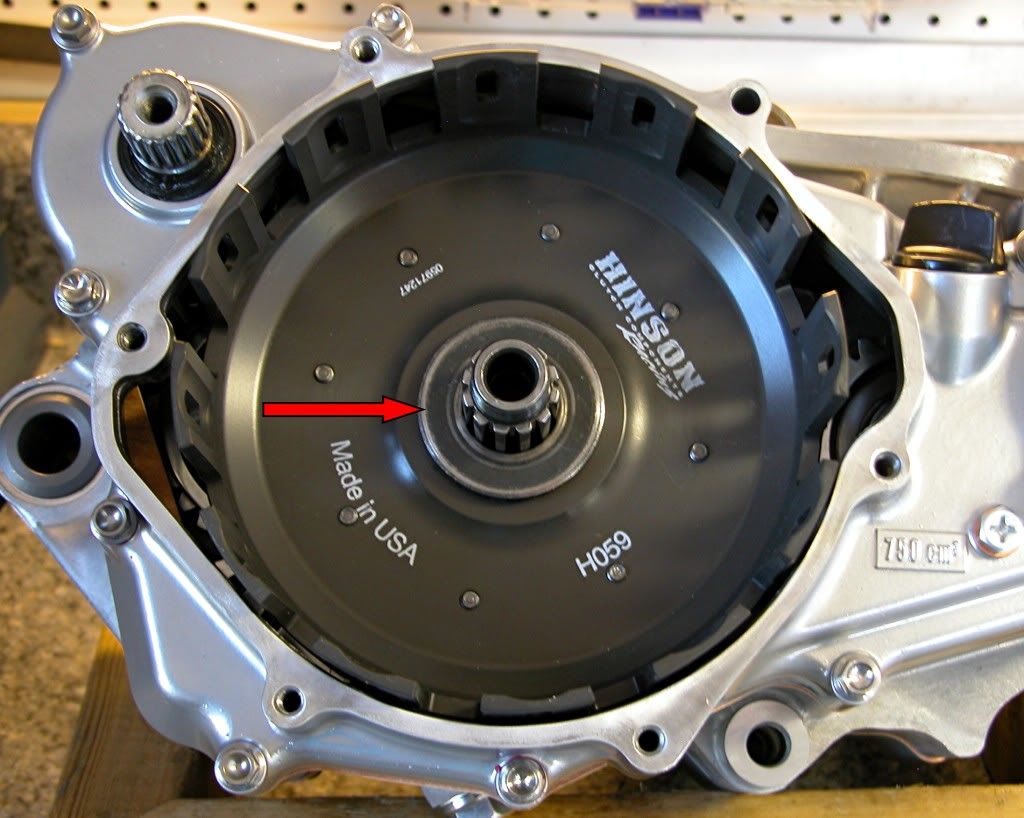
I recently installed a Hinson clutch basket and they highly recommended "peening over" or "center punching" the portion of the allen bolt that is sticking through the clutch basket so they couldn't back out if one came loose. I noticed on your allen bolts that you didn't do any type of flaring or center punching of the tip. My question is with the special high temp, high strength red loctite they recommend is the bolt peening necessary?

dogger315 wrote:This segment will deal with the installation of the clutch and ignition
and complete the bottom end portion of the rebuild.

First up is the clutch. The clutch outer was already installed in the
last section so now it's time for the rest of the components.

Install the thrust washer as shown.

Image
That's it for the bottom end. Next up will be the top end.

As always, questions or comments are welcome.

dogger
100hp honda
Posts: 4394
Joined: July 4th, 2007, 6:57 pm

Post by 100hp honda »

basket turns relatively slow. with blue loctite is see no reason why them screws would ever come out. if you needed to remove the gear for any reason youll never get the screws out without fuking up the baskets threads if they have red loctite and peened tops , not to mention the small allen head would probly strip out then your really up shit creek. i think red loctite is a bad idea on any bolt/nut of these bikes. just my opinion of course.
BrianPaul69
Posts: 110
Joined: September 11th, 2010, 3:01 pm
Location: Carney's Point, NJ

Post by BrianPaul69 »

I understand where you are coming from with the loctite but are you sure the basket is turning slow? I mean its running right off the crankshaft so whatever rpm the crank is turning so it the basket right?

Well even being a machinist I sure as hell HOPE I never have to remove those screws and that gear. The rubber dampers were in good shape so I'll keep my fingers crossed.

I think what the Hinson people were probably thinking was along the lines of the gear being a permanant fixture like the stock basket.

Worse case scenario I can easily machine off the peened over screw tips and I think with enough heat to break down the loctite I could get them out. I just hope I never need know for sure.
100hp honda
Posts: 4394
Joined: July 4th, 2007, 6:57 pm

Post by 100hp honda »

crank gear is about size of a silver dollar, clutch gear is size of a cantelope :wink: . seems like clutch turns alot slower but i didnt graduate high school so dont take my word :lol:
BrianPaul69
Posts: 110
Joined: September 11th, 2010, 3:01 pm
Location: Carney's Point, NJ

Post by BrianPaul69 »

Ok, finally got home and pulled out the manual and you are correct. The basket would turn a lot slower but anyway I just hope I never need to remove those allen bolts.
100hp honda
Posts: 4394
Joined: July 4th, 2007, 6:57 pm

Post by 100hp honda »

it would be many years before you have to worry about that basket. drilling out the allen head might be the easiest way. when the time comes im sure youll get it figured out.
dogger315
Posts: 87
Joined: March 14th, 2010, 2:41 pm

Post by dogger315 »

I've been using Hinson clutch baskets for many years and have never
had a basket bolt back out. I meet Hinson half way and use Red
threadlocker, but I don't peen the bolts. I had documented the basket
conversion process showing start to finish. Like you, I also treat
the installation as permanent (the OE unit is riveted). I guess it
comes down to your comfort level on the bolt peening. Here are
some pictures of what I did.

dogger

Image
Image
Image
User avatar
Kuma
Posts: 854
Joined: February 7th, 2010, 8:26 pm
Location: Norco, Cali

Re: CR500 Engine Build Pictorial Part 3

Post by Kuma »

dogger315 wrote:This segment will deal with the installation of the clutch and ignition
and complete the bottom end portion of the rebuild.

First up is the clutch. The clutch outer was already installed in the
last section so now it's time for the rest of the components.

Install the clutch inner.
Image
Place a lock washer over the mainshaft.
Image
Great build, I'm using this as I'm reassembling my motor, one comment in putting my clutch together, I noticed I have an extra washer :evil: Well in looking in the manual and the Honda fiche, it is the thrust washer for the outside of the inner hub, looks like you left that off your's :cry:
I'm just happy I don't actually have extra parts left over when I'm done :P
Kenny H
Posts: 16
Joined: October 21st, 2012, 3:47 am

honda racing side case

Post by Kenny H »

Where did you get your nice looking Honda racing side cases? And would I be able to buy them?
Post Reply