Gen 3 swap, 2002 cr250 swap.... Pic Heavy
-
Hillbilly500
- Posts: 110
- Joined: January 8th, 2010, 11:35 pm
- Last active:
- Location: Berry Creek, Ca.
Pushy, Pushy 
Ok, well here is todays adventures.....
Started off by picking up some bar stock for the splice pieces and Milling it down at my buddies shop

then checking to see its fit in the frame

Once I got home I went and rode the the 96 500 around my property one last time and Washed it up.. I will tell you, it was harder to strip the 96 then cut the frame on the 02 .. the 96 was truly a Fine machine.. I think I am going to save the roller for when I can find another motor


Ok, well here is todays adventures.....
Started off by picking up some bar stock for the splice pieces and Milling it down at my buddies shop
then checking to see its fit in the frame
Once I got home I went and rode the the 96 500 around my property one last time and Washed it up.. I will tell you, it was harder to strip the 96 then cut the frame on the 02
-
Hillbilly500
- Posts: 110
- Joined: January 8th, 2010, 11:35 pm
- Last active:
- Location: Berry Creek, Ca.


-
Hillbilly500
- Posts: 110
- Joined: January 8th, 2010, 11:35 pm
- Last active:
- Location: Berry Creek, Ca.
-
Hillbilly500
- Posts: 110
- Joined: January 8th, 2010, 11:35 pm
- Last active:
- Location: Berry Creek, Ca.
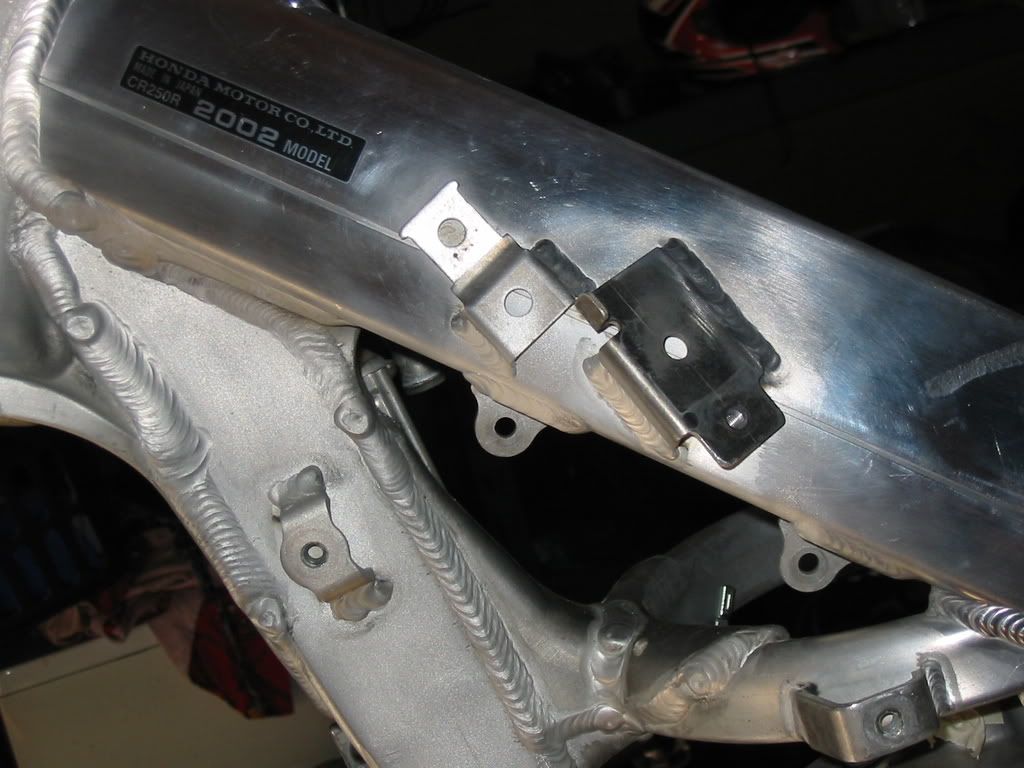
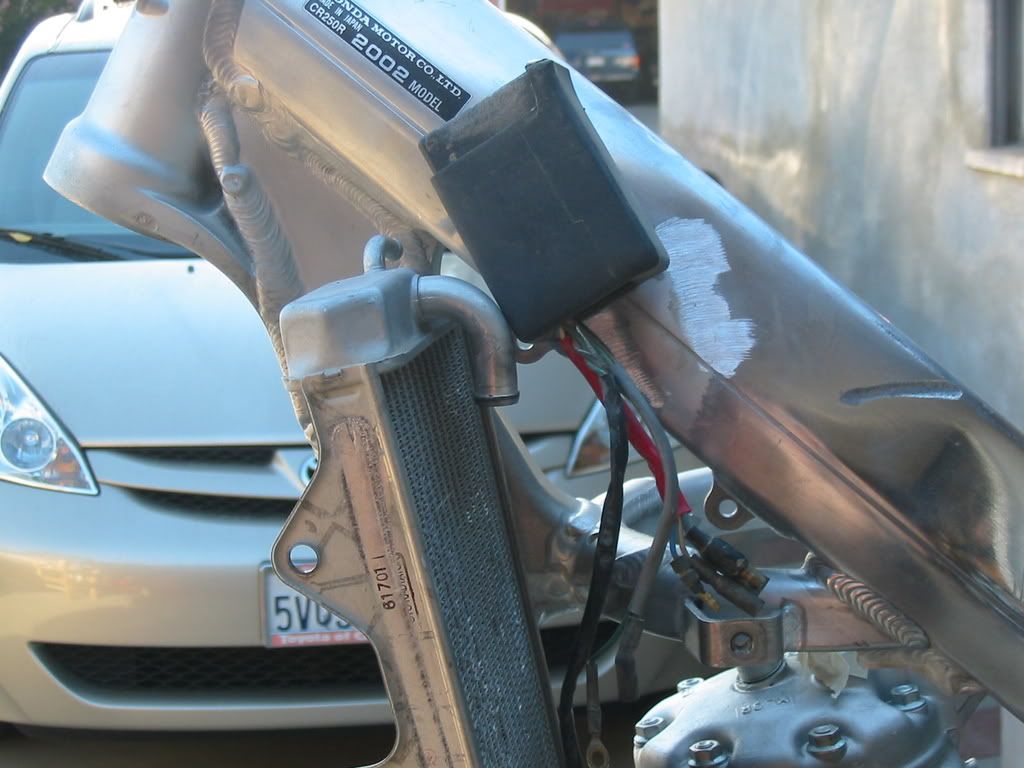
More progress tonight, Got them stinking upper mounts off.. geesh what a pain , Will be trying to finish up the frame Sunday night at my buddies shop.. I am raising the Y alittle more than in pics last night. I want a little extra clearence for the springs and such around the pipe. I am spacing out the bottom mount of the radiator about 1/4" to 3/8 so they will clear. I can't see that effecting anything other then the plastics being out that much more.
Algava, Do you have anypics of where you mounted your Coil and CDI?


Algava, Do you have anypics of where you mounted your Coil and CDI?
-
Hillbilly500
- Posts: 110
- Joined: January 8th, 2010, 11:35 pm
- Last active:
- Location: Berry Creek, Ca.
OK, Got the motor back in the frame for some mock up and it is looking great. (got the motor in no problem with frame in place< was worried I would have to yank the head or jug)
The only clearance issues are with the bottom of radiators and when I put the pipe on it is really close to hitting the pipe on the back side up against the frame.. As far as the radiators sice I will be spacing the bottom mount out about a hair under 3/8".. And as far as the pipe I will heat up the spots near where it is close to the frame and put small clearance dents to keep it from having any potential for rubbing or touching.. Both spots will be very minimal since they just barely clear as it is, just want some wiggle room
I am going higher than I really could get away with with the Y and but like the clearance, the only sacrafice it having to space the bottom of the radiators a tad, worth it to me..
Also I am reusing the stock mounts as of right now but considering using a tighter fitting mount to the frame so I can bring the tubes in closer to the motor.. Still up in the air on this one...
Here are tonights pics
-
Hillbilly500
- Posts: 110
- Joined: January 8th, 2010, 11:35 pm
- Last active:
- Location: Berry Creek, Ca.
Cruzing along today getting ready for welding tomorrow.. No matter what I do, I do need to modify the back pipe mount next to the rear shock, I was hoping to avoid that since the thought of having a completely stock pipe is super apealing for sure. I also am going to be changing the silencer a tad to keep the stock subframe mounts. I like the way the silencer fits better that way.. So shoot both pipe and silence are going to be be custom
the other thing I see is that the kickstarter needs a little attention.. It will hit the frame with out a doubt, I tried the 250 starter too and will go with the 500 kickstarter.. where the kickstarter twists out on the pivot it has a stop where when it folds back into the motor. I will be adding a little material and building up the stop some thus keeping the kickstarter from coming all the way in, not by much but just enough to keep it from contacting the frame. only need a hair, might shave a hair off the kickstarter too but not much..
I saw in other builds guys had put a rubber in the kick and some had used the 250 starter but the 250 starter hits the pipe big time, At least the gnarly I have on it now
Re-indexing the kickstart is pretty easy. No, I'm not talking about just the lever. You can re-index the mechanism inside the case.Hillbilly500 wrote:
No longer have a CR500.
07 Yamaha YZ250, 17 Husqvarna 701 Enduro
Get on with riding or get on with dying.
https://www.youtube.com/mojoscojo
07 Yamaha YZ250, 17 Husqvarna 701 Enduro
Get on with riding or get on with dying.
https://www.youtube.com/mojoscojo
-
Hillbilly500
- Posts: 110
- Joined: January 8th, 2010, 11:35 pm
- Last active:
- Location: Berry Creek, Ca.
-
Hillbilly500
- Posts: 110
- Joined: January 8th, 2010, 11:35 pm
- Last active:
- Location: Berry Creek, Ca.
-
Hillbilly500
- Posts: 110
- Joined: January 8th, 2010, 11:35 pm
- Last active:
- Location: Berry Creek, Ca.
Exciting Day and Night of fabwork yesterday, Even including a stabbing and the Police:lol: Even have pics
Well last night I got most of it done.. Frame is welded, Pipe and sliencer is complete, Radiators are done.. All I need to do now is clean up the frame at the splices and it will be ready..
Machining a double head stay out of one peice so it should be rigid, More on that later this week..
Will have pics later of yesterdays progress

-
Hillbilly500
- Posts: 110
- Joined: January 8th, 2010, 11:35 pm
- Last active:
- Location: Berry Creek, Ca.
I talked to Bob about the stretch method before doing this.. And Bob had said it was hit or miss on what frames you could do it with.. Seems even all gen 3frames are different. I have zero regreat on doing it this way.. so far the only advantage I can see is I had to dent the back side of the pipe a tiny bit the clear the frame.. Since the down tubes are further forward it was a clearence issue. If I did it again I think I would do it the same way but machine my own weld on mounts. the stock ones are really tall making the down tubes pushed farther forward by a good margin, enough to where i would not have to dent the backside of pipe.
yeah thats an area of concern on any of these builds, i replaced the rails on my gen 4. that gave me the clearance needed to clock the motor farther foward without getting out there to far for pipe clearance.
The way you did yours is probably the way i would do it to, you gain more engine and exhaust clearance around the ex manifold.
Keep up the good work and rubber down
The way you did yours is probably the way i would do it to, you gain more engine and exhaust clearance around the ex manifold.
Keep up the good work and rubber down
-
Hillbilly500
- Posts: 110
- Joined: January 8th, 2010, 11:35 pm
- Last active:
- Location: Berry Creek, Ca.
ok here are the pics, First the good stuff
After working on this thing all day, I hear some noise out infront of Jeffs shop, look at the door to see 2 guys standing there with their hands up and lit up like the 4th of july with lights, next thing I see is a cop walk up with a gun doing the full felony arrest on them
Ends up one of them had just been stabbed and was laid down on cuffed anyways:lol:
them just next to where they were on the ground under Jeffs 4runner was a pair of scissors.. Don't really know what happened other than about 12 police cars, a couple of fire trucks and a ambulance where there with tax dollars flying out the window
Cops did not even care about the scissors, they just looked at them, and left them under the 4runner.. Jeff and I went and picked them up after they all left.. they did have something on them.. yuck.. nice german scissors though, Score hahaha
-
Hillbilly500
- Posts: 110
- Joined: January 8th, 2010, 11:35 pm
- Last active:
- Location: Berry Creek, Ca.
One thing I can say with the way this one is, is the motor goes right in and out no problem.. I was worried I would have to pull the head or worse the jug to get it in and out..mxdogger wrote:yeah thats an area of concern on any of these builds, i replaced the rails on my gen 4. that gave me the clearance needed to clock the motor farther foward without getting out there to far for pipe clearance.
The way you did yours is probably the way i would do it to, you gain more engine and exhaust clearance around the ex manifold.
Keep up the good work and rubber down
Few more pics


-
Hillbilly500
- Posts: 110
- Joined: January 8th, 2010, 11:35 pm
- Last active:
- Location: Berry Creek, Ca.
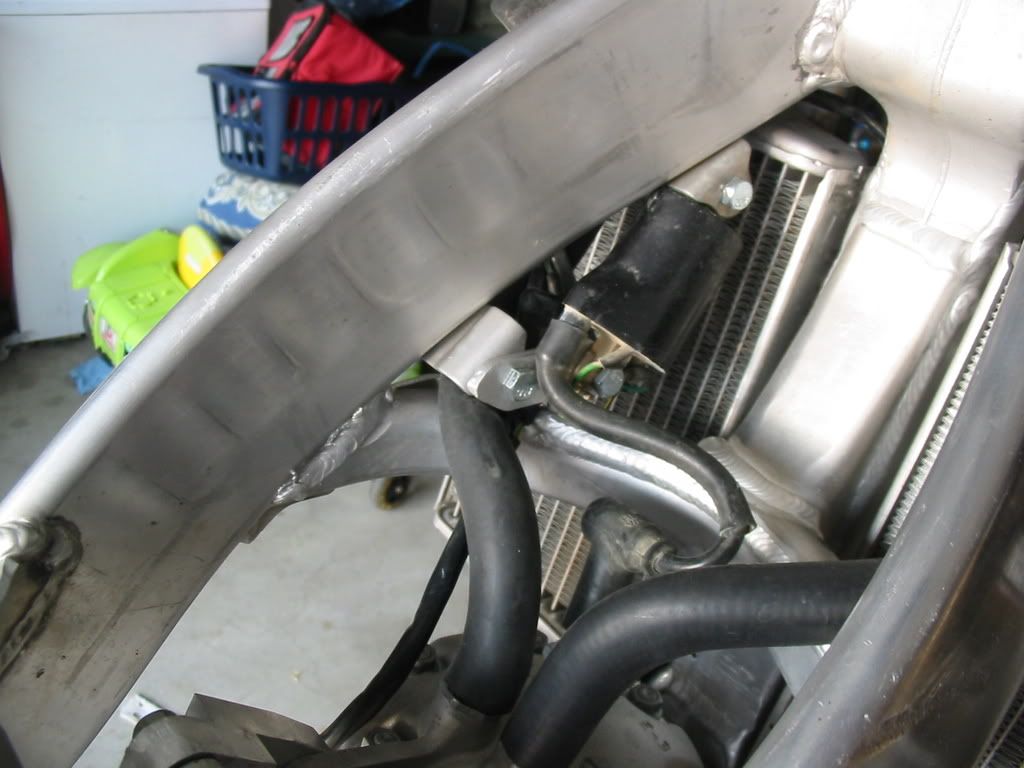
Radiators came out great, Check out the killer little plug My FREIND Jeff whipped out on his lathe to plug the not used outlet of radiator.. He also took about 2 minutes to turn the downtupe going to motor on his lathe keeping me from butchering my steelie radiator..


Last edited by Hillbilly500 on March 8th, 2010, 8:31 am, edited 1 time in total.
-
Hillbilly500
- Posts: 110
- Joined: January 8th, 2010, 11:35 pm
- Last active:
- Location: Berry Creek, Ca.


-
Hillbilly500
- Posts: 110
- Joined: January 8th, 2010, 11:35 pm
- Last active:
- Location: Berry Creek, Ca.