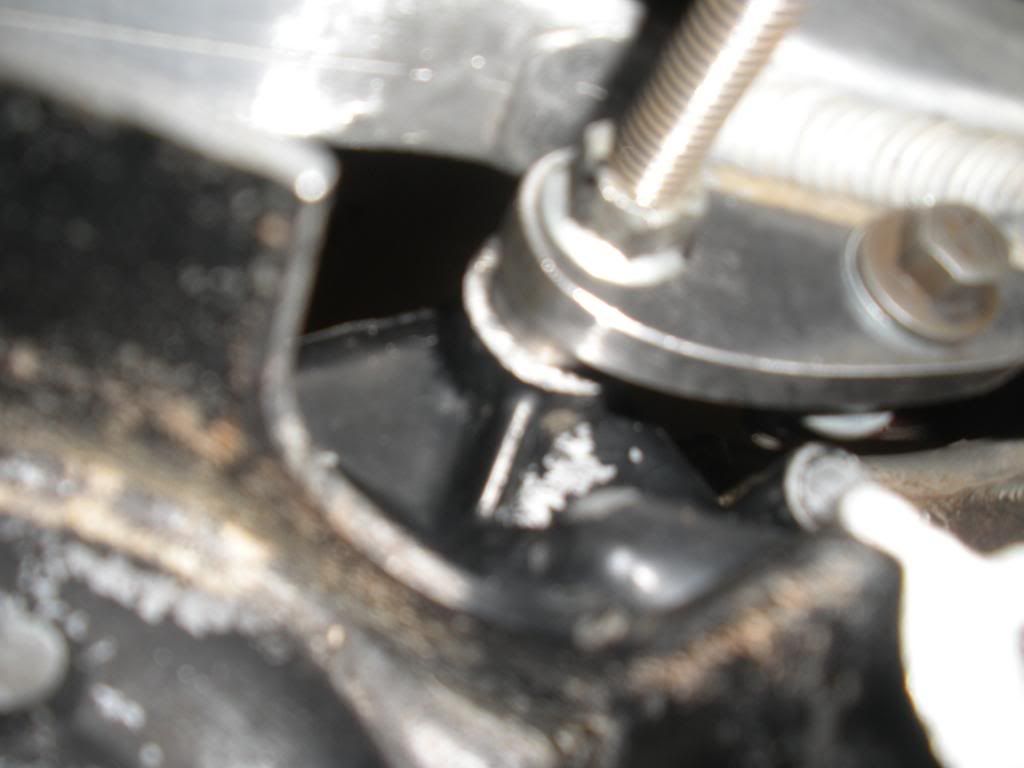
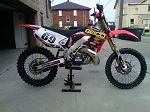
I'm working on a gen 3 & I'm trying to avoid welding the front mounts. I pushed the rails forward with a hydraulic ram, lopped some of the stock front mount off & this is what I have so far.
My question is has anybody run something like this with out problem? Do they vibrate loose really easy? Any pics of easier or better techniques?
I dont weld AL , I've also read on here of bolting in the front mount.
Cool you have had your laugh , could I get some productive input, hence my asking
"Any pics of easier or better NO WELD techniques?"
I realize it aint the shit, but , could I have expressed the idea without actually doing it, to have "crayola" pictures explaining my thought.
Personally I think 1 more bolt in there to control scheer isnt any different than all the other bikes that have the front mount removable, kx500, rmx 250, cr450R, cr480 to name a few
Really not trying to be a douche, just cant find any bolt in mounts I've heard reference of .
& that is why I asked. I can get a 3rd bolt in there, not triangulated though, it is wedged into the corner firm enough it doesnt pivot off the single bolt though.
I really dont like welding , or having AL welded. We have a hardness tester at work for AL & it doesnt take much heat to fatigue the stuff. If theres better bolt in mounts I'm all ears, with pics please as I really need the crayola version
Right, I'll start with being a Nasty Bastard - if you need crayola drawings, well fuck me, you shouldn't be doing a conversion - even though conversions rank barely above High School Metalwork level engineering.
Rip over.
So, you can't get any Great triangulation through bolts in the plate. But, as I think I've interpreted your writings, you've got the small area above the original engine mounts bolt, that you could put a bolt through. To have 3 mount points, giving a very, very shallow triangulation, or just a three point line, that can counteract 'clocking'.
That's a possibility.
Three methods:
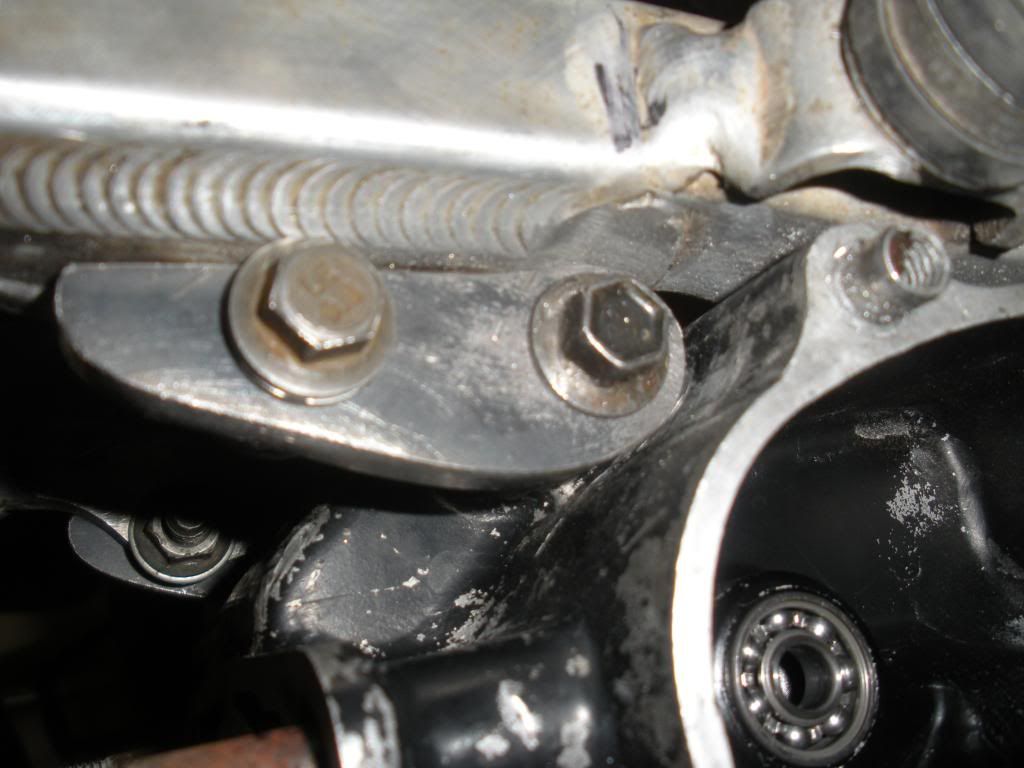
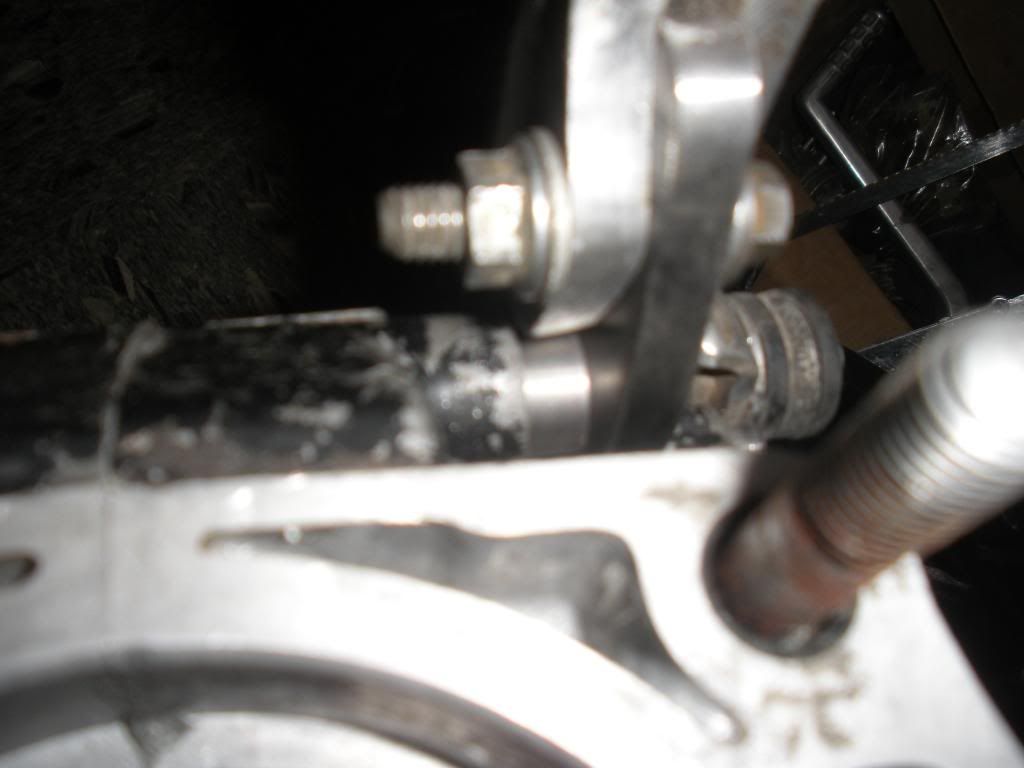
1: Much like you have pictured, with the extra bolt through the Original engine mount, * more details in the next section, and further on *:
2: Using alloy RIGHT ANGLE Sections. I've pointed out here quite a few times - whilst so many people machine up ultra rigid mounts - you can easily get RA alloy sections, of various thickness' and grades. With radi at the inside angle. Fuck knows why people insist on machining ultra rigid blocks / RA mounts to weld onto 3.18mm tube sections. I guess they want to say they have machined, or CNC machined mounts.
**** You can put a Smaller bolt,, possibly 2, one either side - if you have the same sort of "extra" as shown on the high side of the mount - the second on the lower side through the original mount as the Extra Bolt(s). And I Mean smaller, 6mm at the max, with no thread through either the original mount or whatever mount you bolt onto it. Considering the stress risers within a bolt, a 6mm bolt with just 'shank' to it at the sheer point between the 2 mounts is stronger than a 8mm bolt with the thread root at the sheer point. No thread bearing against the inside of the plate / mounts is also better, as there is no 'sharp point' contact. Up to you to decide the bolt size. I'd have no qualms about using 6mm, with thread only at the nut area. More possibilities for positioning, less risk of getting too close to edges / welds, and seriously bloody strong, when using high grade bolts.
* If you used a bolt either side of the original mount bolt / mount , I'd have NO qualms about using very high quality 5mm bolts, though they are difficult, at times, to get with 'shank'. Though, you could drill and tap the original mount to take the 5 x .8mm bolts , or 6 x 1mm - keep it in mind, as it would give you "triangulation" at the original mount. It would be Very Good to use with the third, steel plate mount set up that is further below * Or, the alloy plate / RA options
Counter sunk cap head bolts are great for clearance (eg: you can have the CS head go slightly under another bolt head, if you have bolt head clearance issues), and the CS head gives a large bolt head to metal interface. This is of great use where there are space constraints.
Now, you may be able to use RA section to have the RA Against the frame down tube / cradle, thus giving extra support to the plate and original mount. If that can be snug up against the downtubes / cradle, there is a 'triangulation', so to speak. Intelligent use of quite small bolts, say 5mmm, with .8mm pitch thread (better for more thread in the One side (Don't go through the whole cradle / tube, then crush the tube in doing up the bolt) of the 3.18mm thick tube ( or, you might have a far thicker section), to hold the RA against.
Off course, you will have to remove sections of that RA, to bring the mount back to being a 'plate', at the engine mount points / other points, but you'll have to use your brains, eyes and measuring devices to do it. This could all be done with a hack saw, drills and files (copyright: Bob - he's right) , if you don't have a mill etc. As I said, this is school student work.
3 : Another alternative is using STEEL for the plate type mount you show there. Using, once again, a small bolt, or 2 small bolts, for a third / fourth bolt point, you could use Steel as the plate. Chrome Moly, can be a third of the thickness of aluminium - well, even just high carbon steel. I'd not want to go below 4.5mm in thickness with sometihing less than 4130, or other grades of CM, but that would more than strong enough in decent steel.
You could, possibly, use the RA plate method with steel. Or, weld a RA section to the plate, to do the type of thing I mentioned in method 2. Though, that would be overkill, and possibly loose the potential for vibration control / chassis feel experimentation.
The steel plate would be quite an effective Vibration controller, and you could try various thickness's. Gen 5s I built, with entire new cradles, that were made to take triangulated plate front mounts, were quite an eye opener for the two riders I made them for, when we experimented with a wide variety of plates, in different metals, thickness's and shapes.
Most 4ts now use a front plate mount, and the plates are used as key chassis dynamic controllers - look to the specs on the 2014 Kawis - I think they've gone thinner, and to steel.
THINK, take it slowly, Don't overdo sizes in some bolts, use bolts with Shank against metal / at sheer points, and you may come up with a very good set up.
Just realize, that during your bending of the cradle / downtube / whatever, you've taken those sections, past their limit of elasticity, and thus damaged the metal, at those bend points, just about as much as the welding process would effect the 'hardness' / "T" spec of the aluminium.
The extra 6mm bolt is shanked but would be "below" the existing 8mm which is shanked as well. The original frame mount is tapped so the nut is just a second locknut. I like your right angle idea does the aluminum frame hold the threads or would you use thread inserts.
Thank you again. I appreciate the answer.
& yes you have a point
Just realize, that during your bending of the cradle / downtube / whatever, you've taken those sections, past their limit of elasticity, and thus damaged the metal, at those bend points, just about as much as the welding process would effect the 'hardness' / "T" spec of the aluminium
The bend is focused in one spot & if I have a a backbone type mount welded in it would reinforce the bend location.
If you can do a conversion without welds, that is great and it may end up being the future of these, but once you install the cylinder you are going to find that you need to move the Y up, not sure how you can do that without welding?
Point is, get everything setup with all the parts, take it to a pro welder it will be worth it!
My
Gen 2 AF, yes it's a SH, so I can call it an AF Damm it!
Yeah there is one of those on kxriders right now, WELDED
Bearoso, Thanks again you really got my brain kicked in with your thoughts & this afternoon I think I got the right direction. Got some 4130 plate on the way
Last edited by 81cr450 on June 24th, 2013, 7:09 pm, edited 3 times in total.
I found a kick ass local guy who welded up my Gen-3 for $100 after I did all the fab work and used my crappy harbor freight welder to tack it. Find a local guy to do the welding for you and you will be totally happy to pay for it.
'09 kx450f 4-Poke
Gen-4 trail bike --SOLD--
Gen-3 badass trail/mx bike --SOLD--
Gen-1 built dunes bike --SOLD--
'05 klx110 --SOLD--
'95 pw80
No Gregrobo, just open to different ideas. It's what this place Should be about.
As scary as that first (I hope) iteration of the mount the bloke showed, it does have merit.
My experience with the front plate Gen5 set up, though I Was aware of the differences / advantages it could present, still was educational.
And the blokes I used for the testing, were both former Very High level riders, and both with Brains, and they learned a lot. Relatively thin, steel plates were prefered, but, they were able to be made as a wide angled triangle, in very good quality 4130.
I really think the Steel plate, with the smaller bolts either side, with NO Right Angle to frame attachment , would be a Good Thing. Just use every bit of space / clearance for the plate, then reduce it's sizing if he felt the need.
Of course, I can't see , or recall the extent of the original mount, and at the moment, I can't find a Gen 3, to have a squizz at. Buggered if I can find a Gen 3 250 - I need to get dimensions to do a new subframe / airbox for my steely, that I will make to take Gen 3 plastics.
** Bob - you used a "welded" conversion there as your example of carnage.
Showing that a inadequate weldment at the down tube, combined with the HAMMERING that bike got - watch the video of the riding, the bloke was absolutelt Gonzo - will break, too.
If you have ever cut open a Gen 3 Clamshell..... you would be shocked how thin it is ....
The Gen 3 is vastly different than any Gen 4 or Gen 5.
If you wanted to bolt in the front mounts on the later Gens... I'd say go for it.
On the Gen 3, you really need the stressed member ( aka as the engine) in place to hold the whole thing together.
Like posted above... unless you want to leave the pipe hold down springs off, you need to do some welding on the bike anyways.... just weld the mounts in too.
AlisoBob wrote: 1: If you have ever cut open a Gen 3 Clamshell..... you would be shocked how thin it is ....
2 : The Gen 3 is vastly different than any Gen 4 or Gen 5.
If you wanted to bolt in the front mounts on the later Gens... I'd say go for it.
3 : On the Gen 3, you really need the stressed member ( aka as the engine) in place to hold the whole thing together.
Like posted above... unless you want to leave the pipe hold down springs off, you need to do some welding on the bike anyways.... just weld the mounts in too.
1: I have - I was Not shocked at how thin they were. Strength, is not down to just material thickness. I have made frames, for bicycles and Motorcycles, since my teens. With some of my bicycle frames, I regularly weld sections that are less than 10 thousands of an inch, thick. It's a demanding thing to do, at my age, state of eye sight and steadiness of hand, I can tell you that! I am also a Mechanical Engineer.
If moving the 'Y', well, you do it properly. Reinforcement, is a wise thing to consider, and very, Very easy.
2: Yes it is, but, so what? Different jobs, require different solutions.
3: The engine is part of the frame structure / designs' strength, in virtually every frame made. Some, more than others. A Gen 3, I see as no more so than the other generations.
I stopped lifting the "Y", or "Clam Shell", as you call it, very early on with doing 3s. It's not necessary. And, welding on exhaust spring mounts, is Not necessary, nor is running without the top springs. I've explained it here, quite a few times.
I've a full workshop, with a TIG, so welding is as nothing for me, but, if I don't have to, I'd rather not. And, giving people thoughts on how to avoid welding, who have not my facilities, is a fair and decent thing to do, if I feel it's safe.
The bloke's asked about something different. If he has Not compromised the original front mounts (I think he referred to doing something? to them, which raises concerns for me), and has a healthy frame (something people Really Need to Think About - 3s ( and 4s, And you need to know the history of a bikes usage, I reckon, whatever age it is ) are getting OLD, I can see no problem with his idea of a front mount plate, if done well / properly. Though I really do not like the practice of 'stretching / expanding' frames. For the reason I put at the end of my posting.
Not all conversions have to fit into "Bob's Box", you know.
No offense meant, but there is more than just one way to do things - and a few of them, are very good ways to do them. A few of them, can be frightening, indeed. Some I've seen done by 'experts', are dreadful things.
I , personally, have now, No interest in doing more AFs. But I contribute my thoughts / ideas / criticisms, to help others, with No hidden agendas, or money making plans. I never have here, nor ever will. I'll leave that, to others here.