
Yup....other wrote:..This position gave me the best fit for exhaust pipe, air boot, chain run and spark plug. ... I was pleased to find that the most practical 'clocking' was true horizontal (as near as 'fuck it' is to swearing) on the cluch cover text.
Gen 4 CRF450X build
That piece of square tube you use between the head and the Y, I did the same thing when I built mine (crf450 2006 frame) and found out this is where the engine needed to be!!!AlisoBob wrote:Yup....other wrote:..This position gave me the best fit for exhaust pipe, air boot, chain run and spark plug. ... I was pleased to find that the most practical 'clocking' was true horizontal (as near as 'fuck it' is to swearing) on the cluch cover text.
That's exactly what it was there for, allowing for the radiator cross pipe. I figured 25mm was my absolute minimum, but as it turned out, I settled on the ideal clocking with 28mm clearance there. (the 25 SHS is loose). I'm glad that the overall consensus is that I have the engine clocked in pretty much the right position, as this was a cause for much concern to me. Been almost fuck all progress since, as the missus keeps finding bullshit jobs for me that are suddenly way too important to put off for another second ! sigh.
Last edited by other on May 30th, 2012, 7:08 pm, edited 1 time in total.
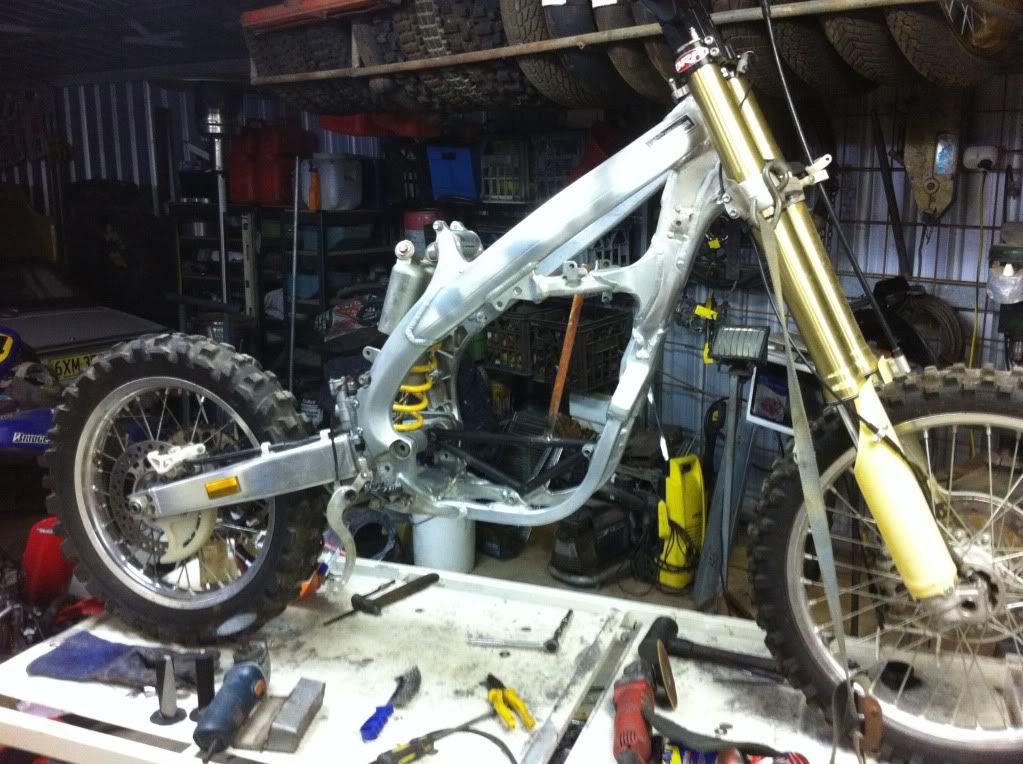
Finally got around to firing up the TIG and sticking the thing together. Headstay, airbox mods, radiators and exhaust mounts and she'll be finished ! Gotta get stuck into it, as I want to use it for riding the Holland Track stock route in August, and I only get alternate weekends to work on it, if I'm lucky !
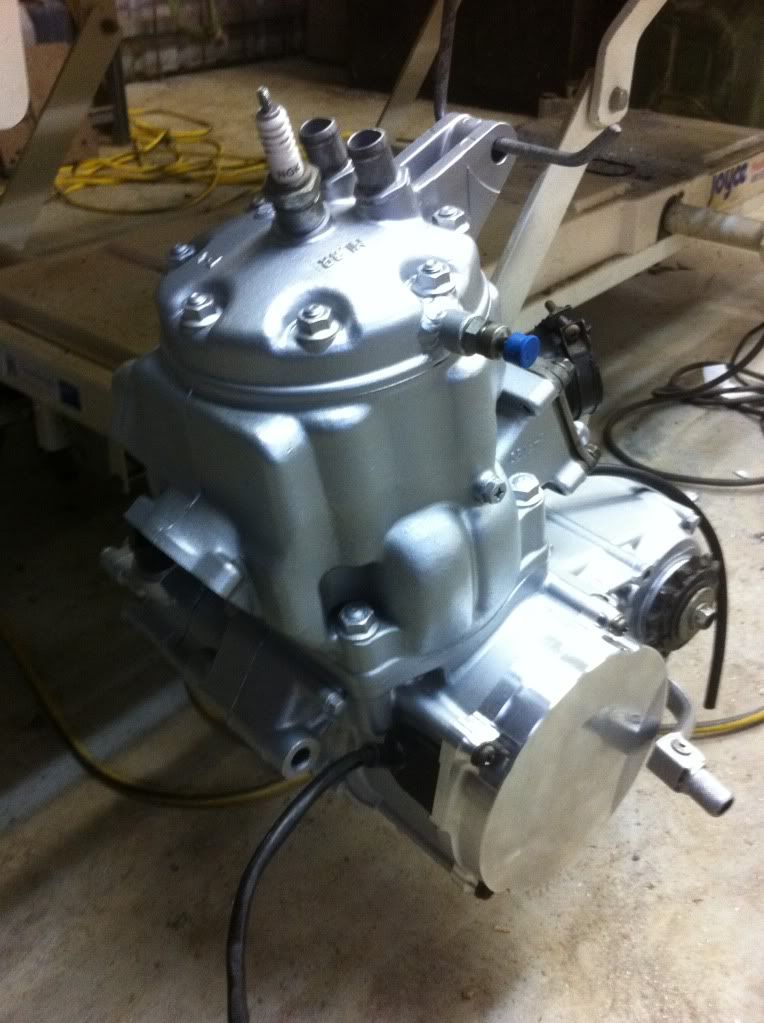
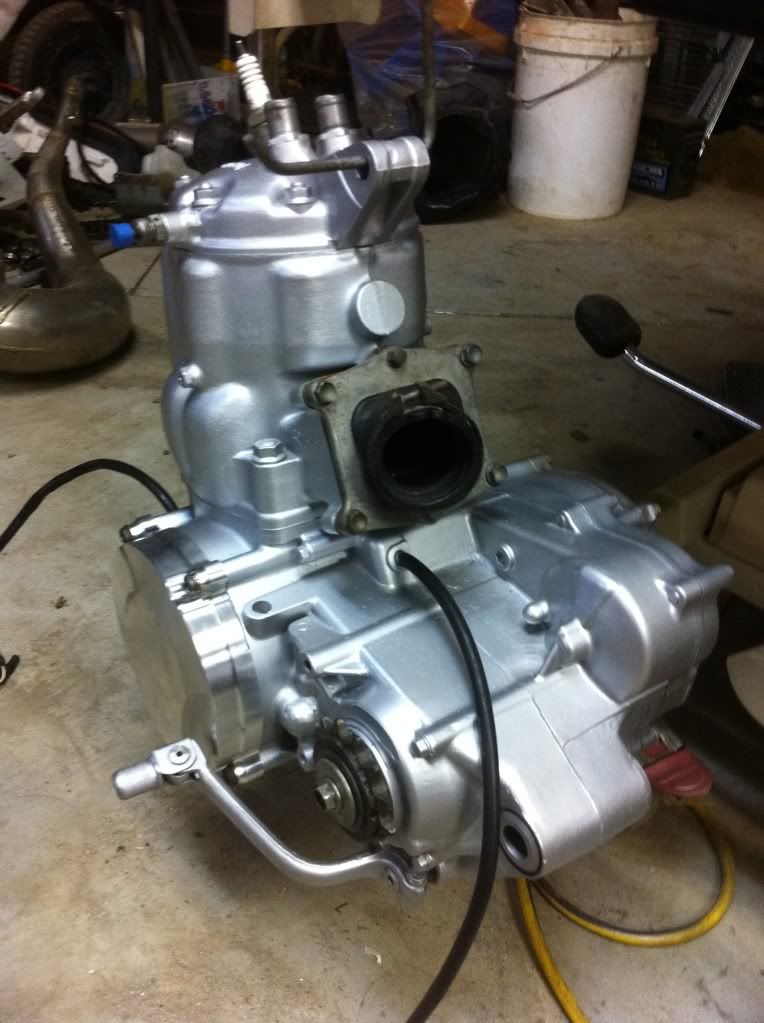
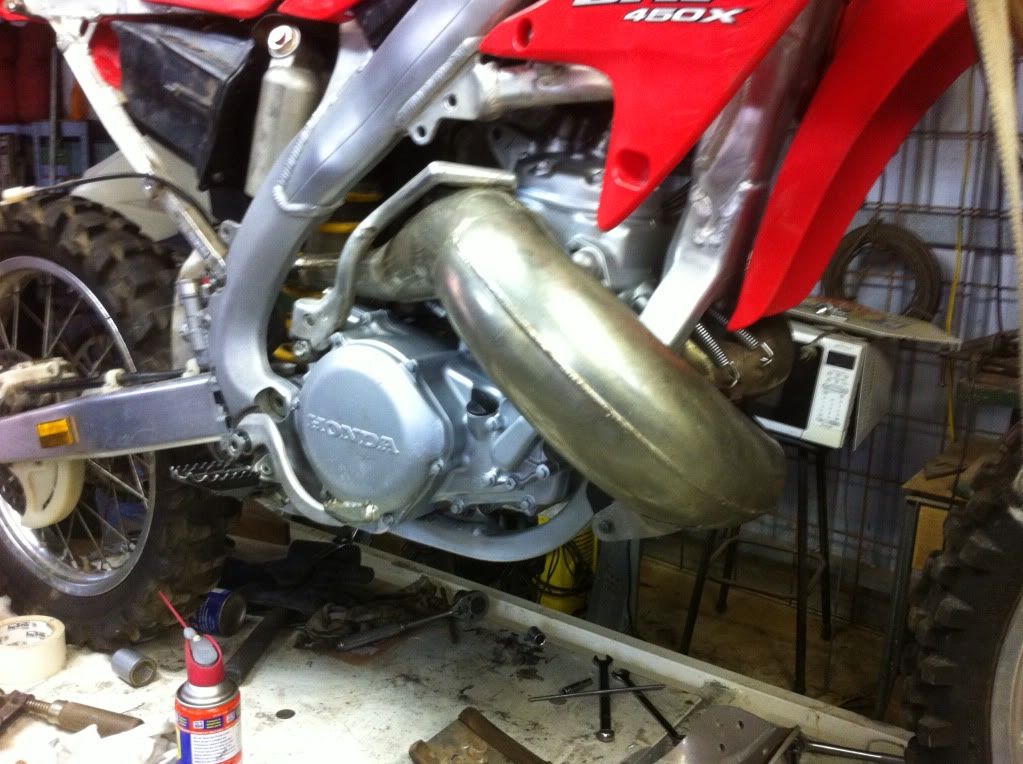
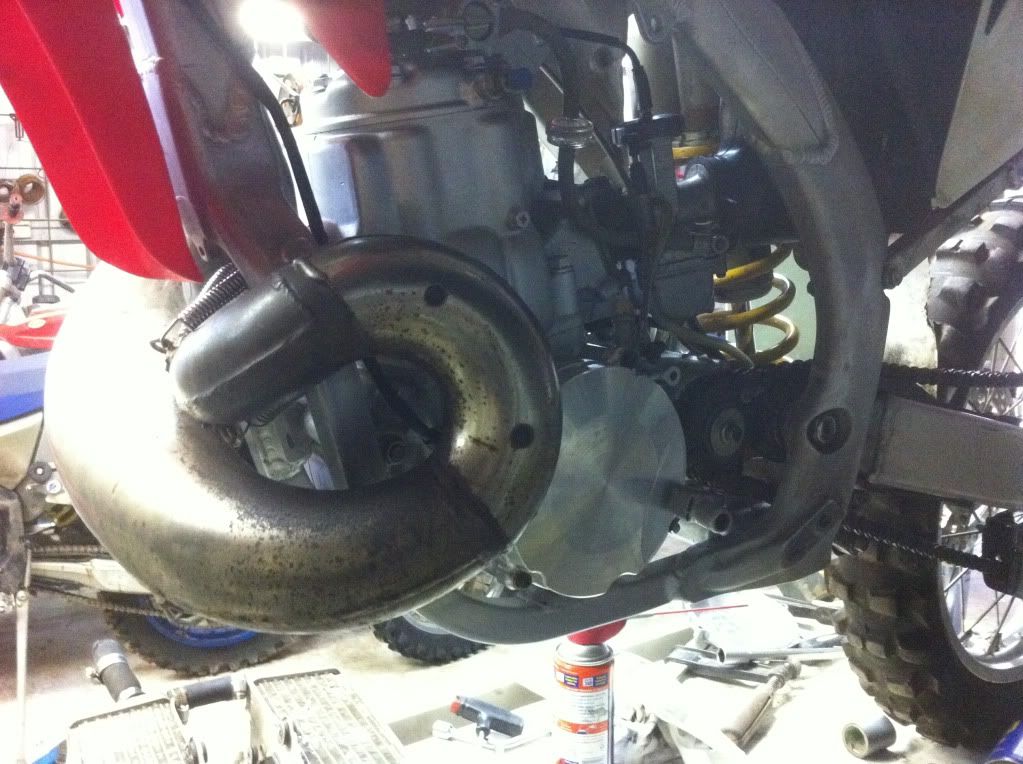
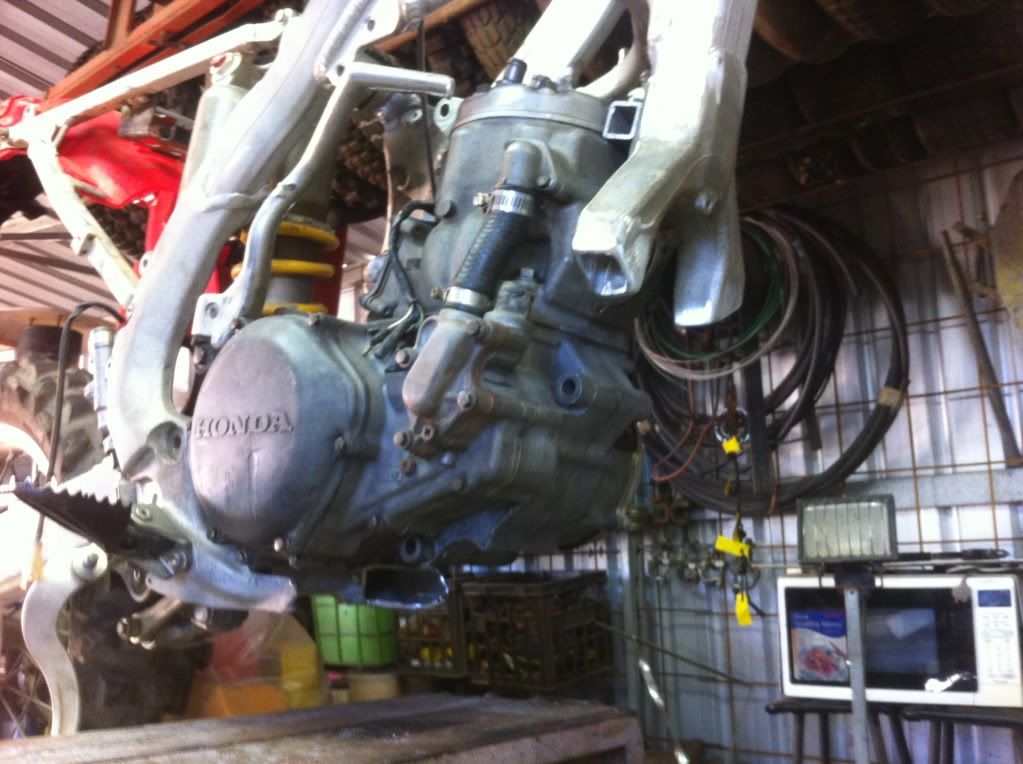
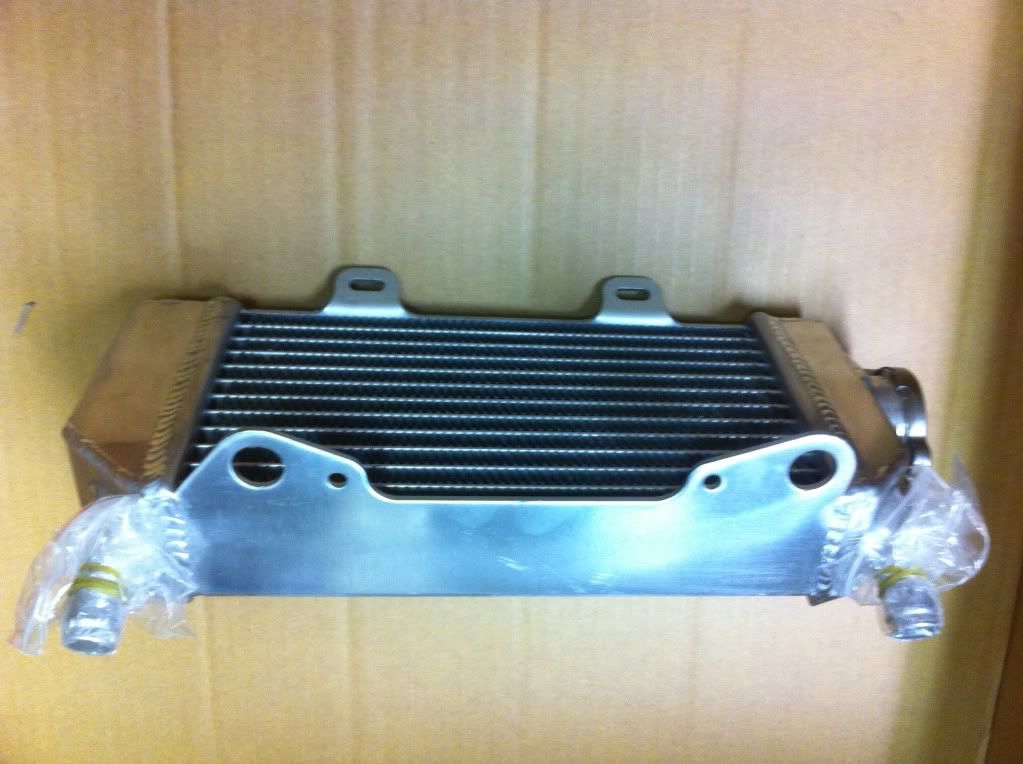
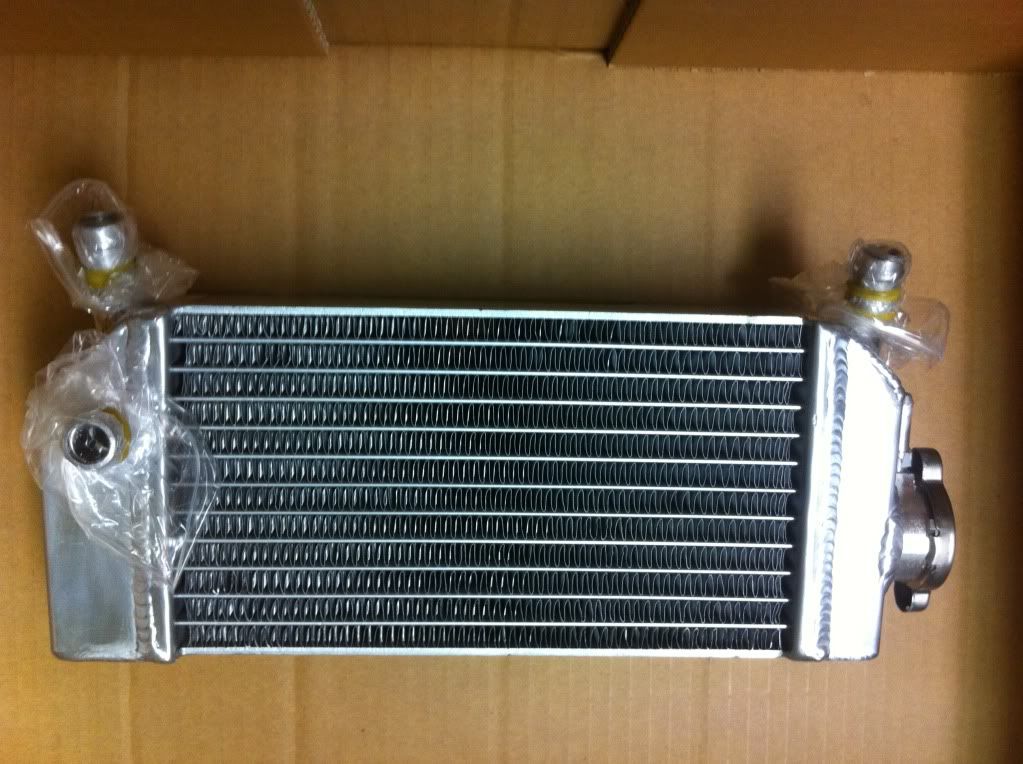
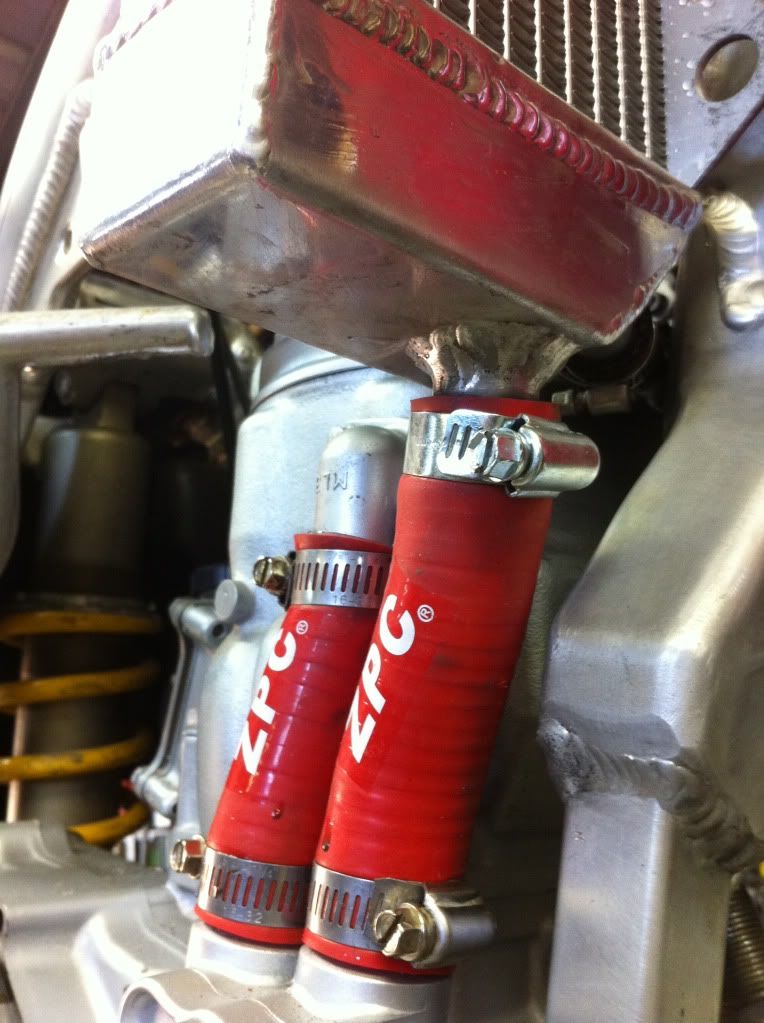
Made a little more progress this weekend. managed to stuff the freshly rebuilt engine back in the freshly welded frame. Also, completed the airbox mods (although I will have to pull it all apart again to seal it properly. Discovered too late that I didn't have any black Sika 11FC, only grey, which would look crap . . . .) Hydraulic clutch fitted and bled up (the "Bob" method is the nutz !) and a lot of peripheral reassembly stuff done. Silicone radiator hoses arrived this morning, and now just waiting on radiators to arrive. I have bought a set of the Fleabay chinese units, just to try out. I want to make sure the small CRF250 rads are going to do the job before I pop the coin on Fluidyne's. Mind you, the chinese one's look OK, and for $94 US freighted to my door for the pair, I can get through 5 sets before I'm even close to 1 set of Fluidyne's . . . . let's see how they go.
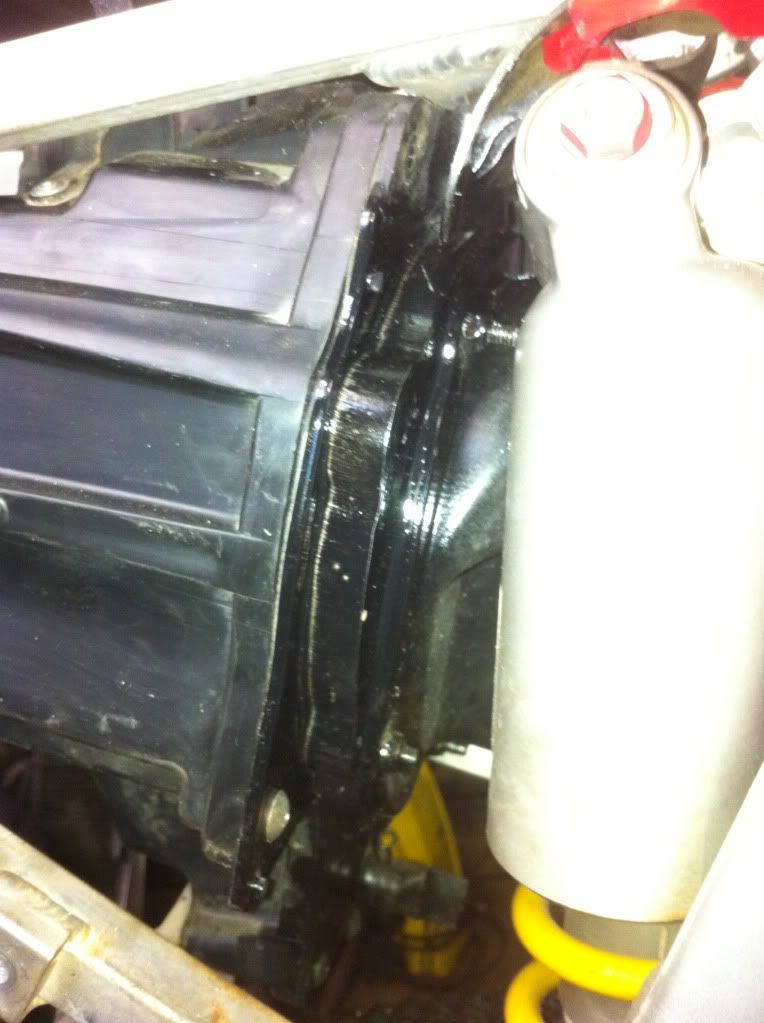
Airbox adaptor plate installed and sealed. I used Sika 252 black, as I couldn't get any 11FC in time, and I'm an impatient bugger ! (actually, truth is I get very few opportunities to work on the thing, so I can't let lack of material hold me up !) I'm hoping the 252 lasts as well as the 11FC did on my XR airbox mod, 25 years ago and still going strong !
Chinese radiators turned up today, and I have to say I am REALLY impressed with the workmanship and quality ! (not to mention the packaging ! Took 10 mins to get to them !) I will put 10 psi into them tomorrow, and stick 'em in a bucket of water, but I'm confident from their appearance, that they'll be fine.
I'm keen for that mate we have a 2 day enduro up here in November great rideother wrote:Cheers Greg. If I'm around your stomping grounds sometime soon (possible August trip planned), maybe we could roost some Goldfields dust skywards together ?gregrobo wrote:Another nice west Aussie bike nice build mate
only posties ride 4 stroke hondas
goldfields sheet metal fabrication
98 yzfr1
05 crf 500 race tech goldies
2010 rmz 500af
01 banshee
goldfields sheet metal fabrication
98 yzfr1
05 crf 500 race tech goldies
2010 rmz 500af
01 banshee

Cheers warnum. The silicone hoses are just the fleabay items. There are a few brands available, and various prices. I bought the middle priced ones, as I wasn't sure I'd be able to make them fit. The quality seems pretty good (I guess time is the real test, though). They aren't designed for an AF, I just bought the CR500 ones and utilised the original CRF cross hoses. As I used CRF 250 radiators, I have to modify the other inlets/outlets on the rads anyway . . . . . .warrnum wrote:job other, well done mate. where did you get your silicone hoses from? Are they specifically made for af conversions? Would like eventually to get a blue set.
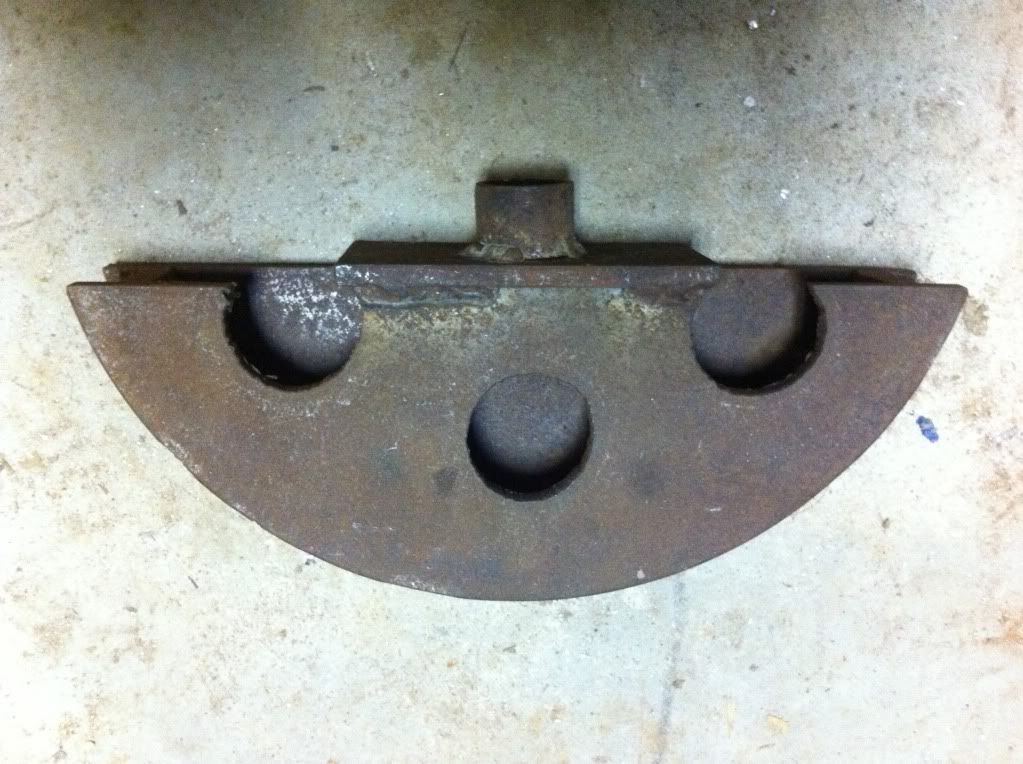
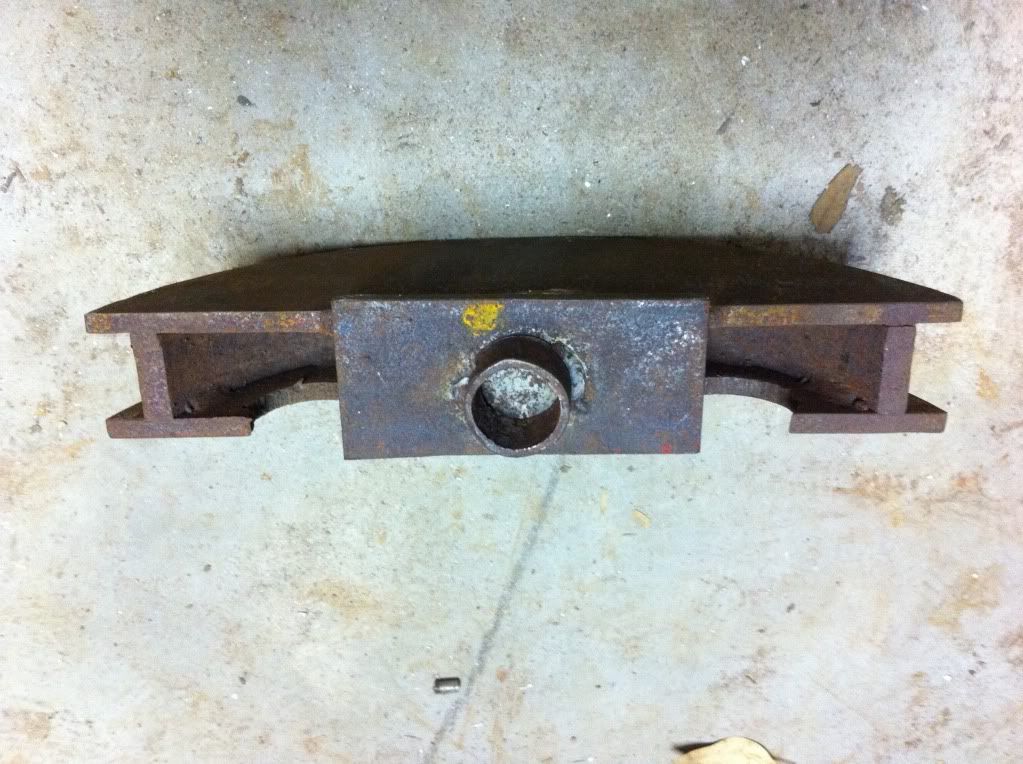
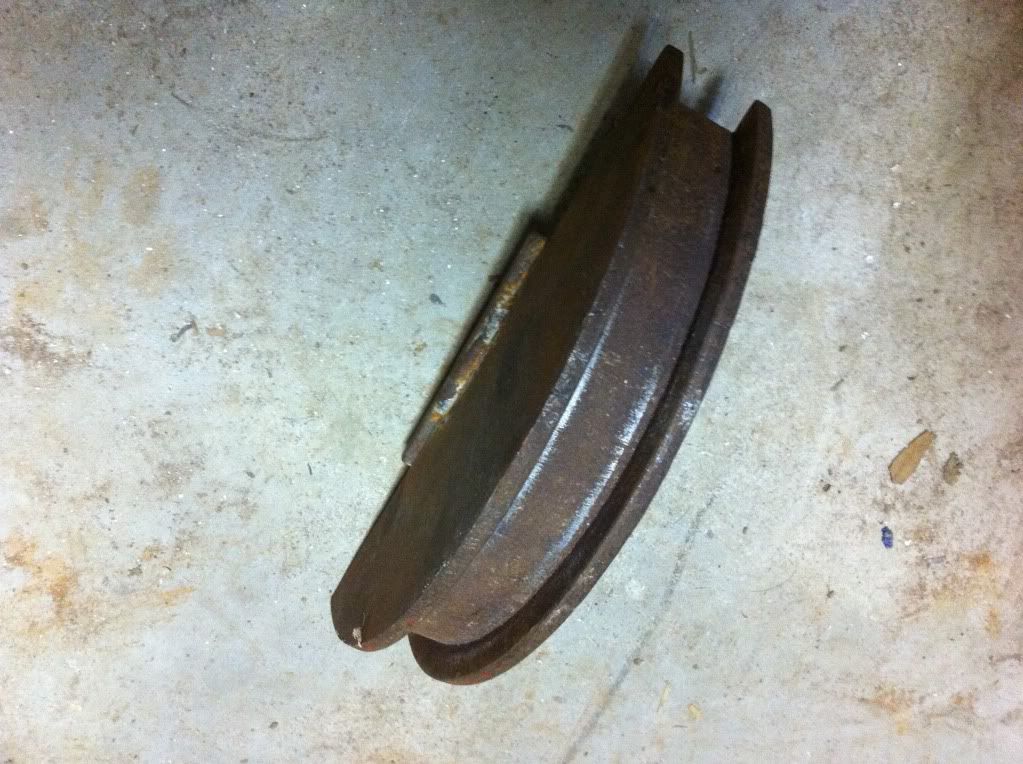
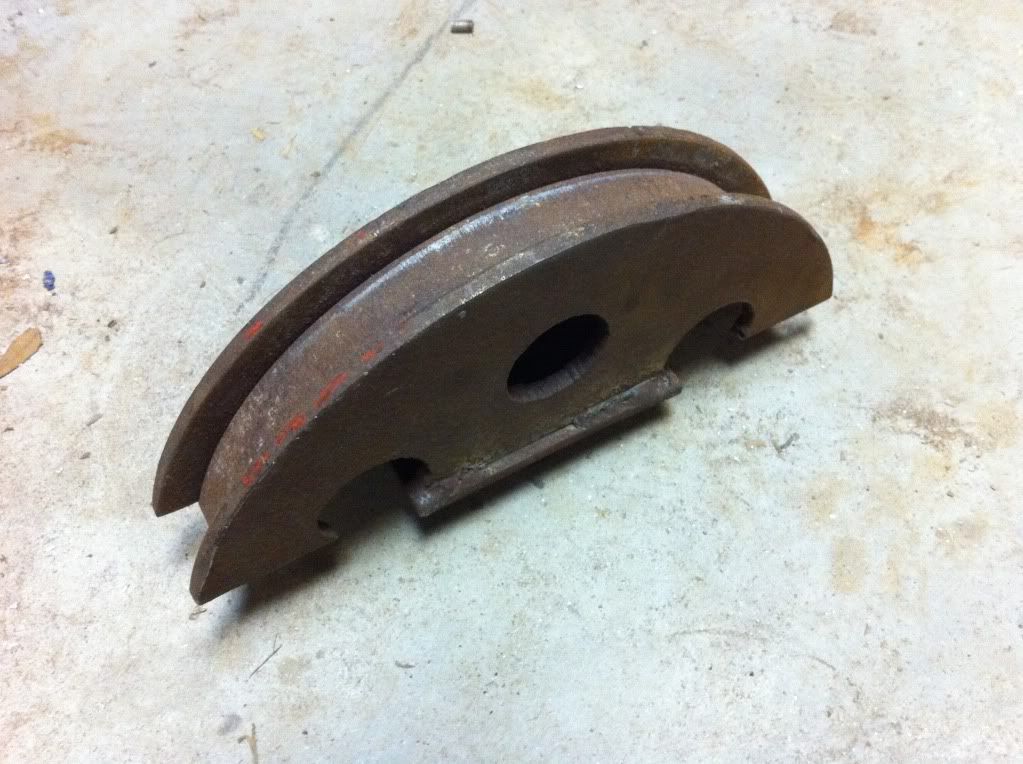
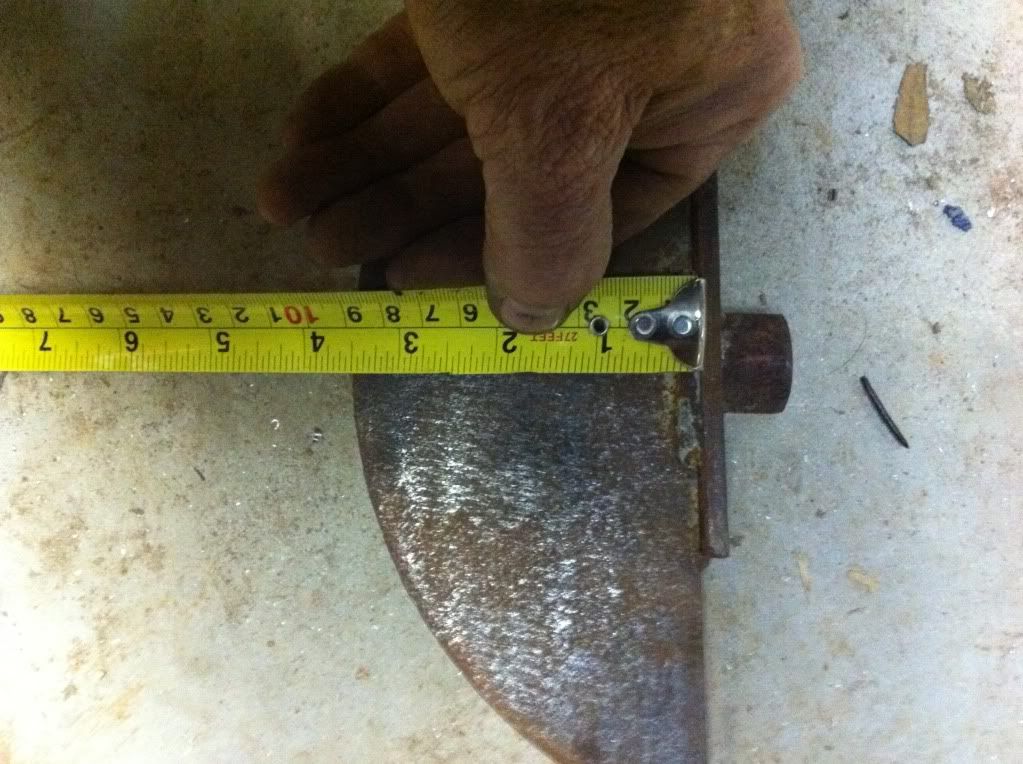
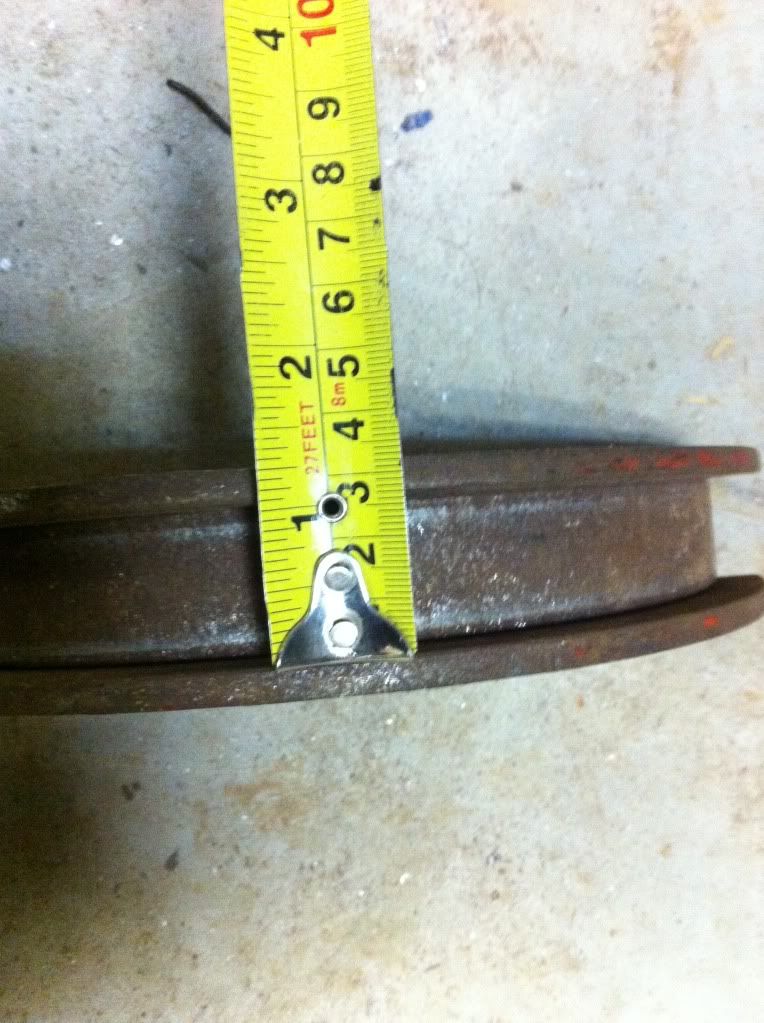
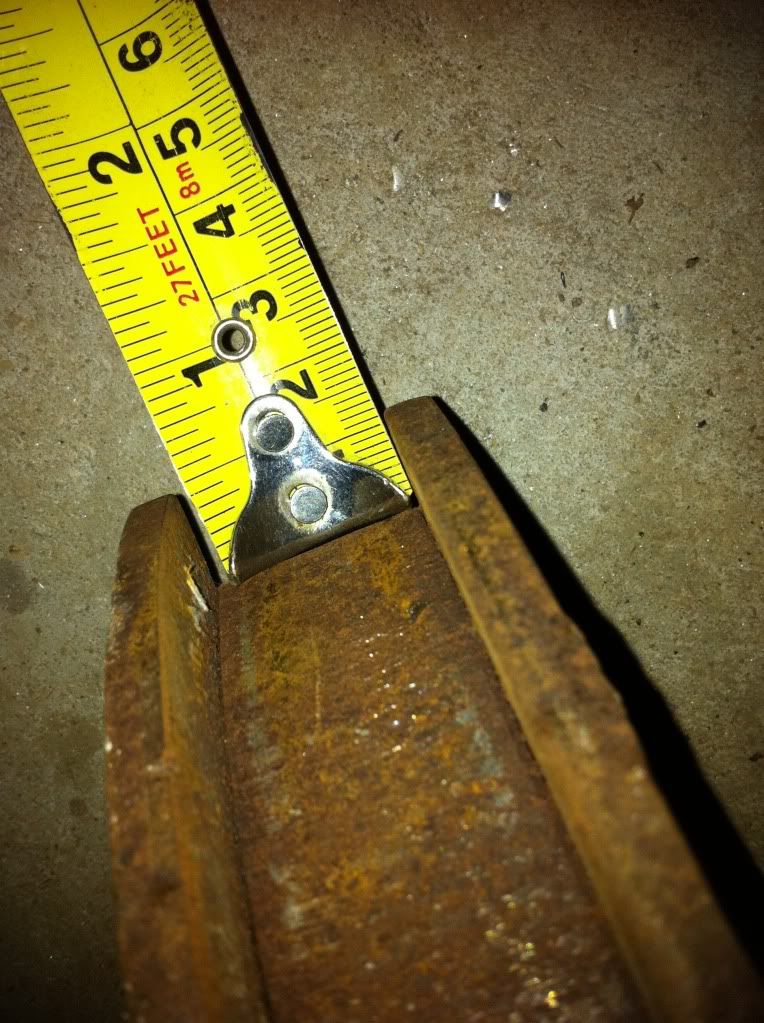
Thanks Les. I'll grab a couple more pics for you shortly, and some dimensions as well. The die I used belongs to another member on here, and I think he wants to sell it, if you want me to ask him ? It's only home made, but it works really well. Main trick is a little bit of heat, and bend really s - l - o - w - l - y !lerea3 wrote:Fantastic job!!! Can you take a couple of pictures of the die you used to bend the cradle? I have a pipe bender but need to build a die for square tubing.
Thanks Les.
I fucked one up by bending too fast . . . . luckily I had a spare.
Sorry it took a while Les. You should be able to get design and dimensions from these shots, I hope.lerea3 wrote:Fantastic job!!! Can you take a couple of pictures of the die you used to bend the cradle? I have a pipe bender but need to build a die for square tubing.
Thanks Les.
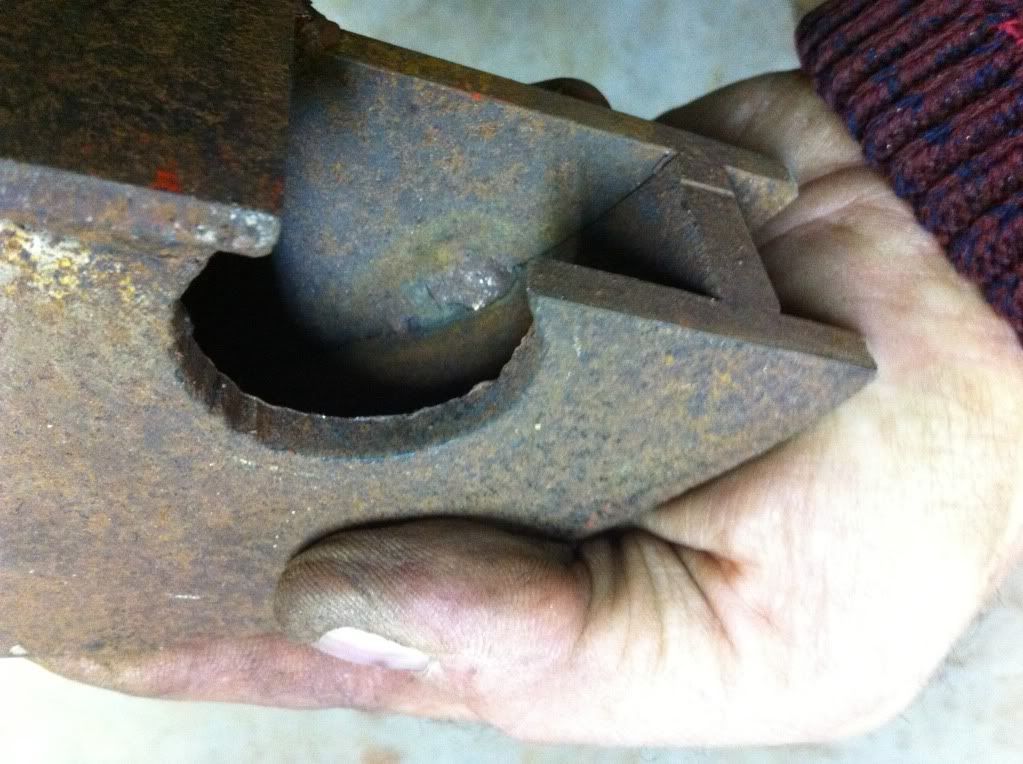
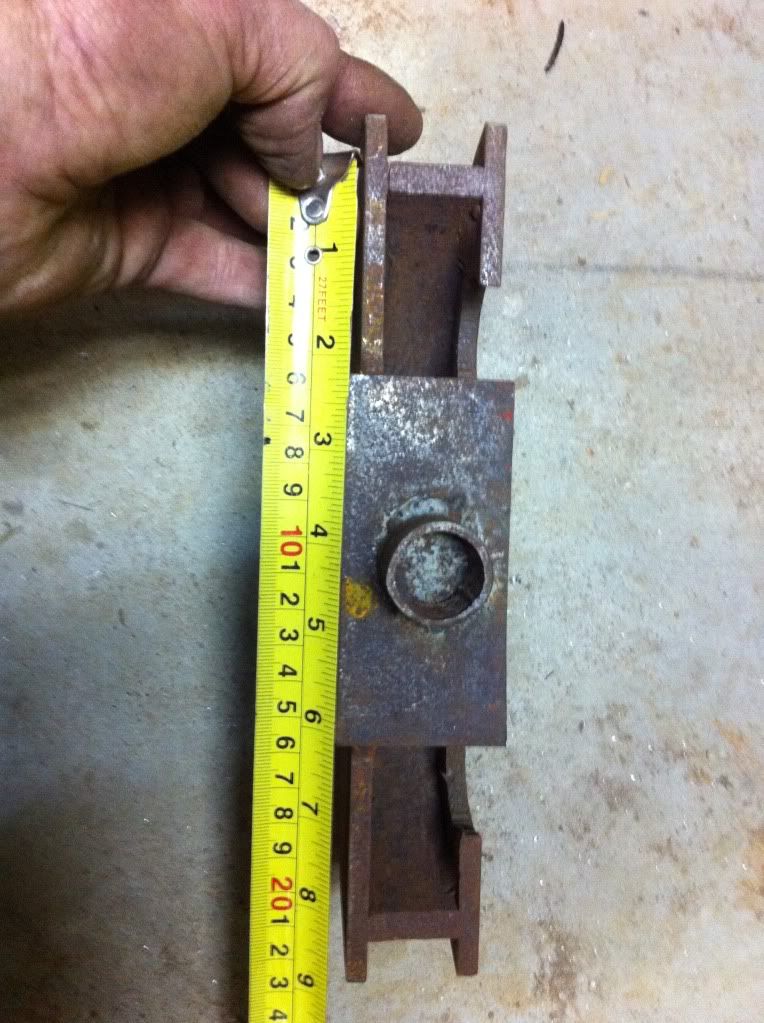
If that's not enough, let me know mate.
Anyway, managed a little more progress, but only slowly, because I've been recovering from the long awaited operation on my lumbar spine, so that should give me a few more years riding !
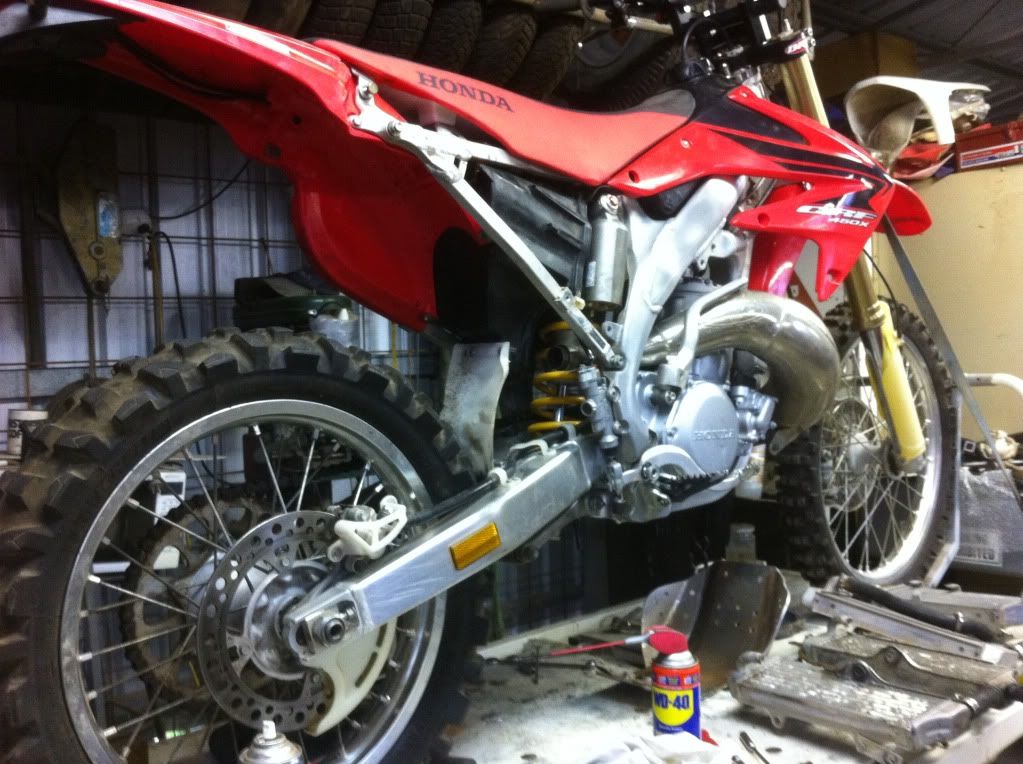
Radiators modified and fitted.
Including some mods I wasn't expecting ! Ugly but effective . . . .
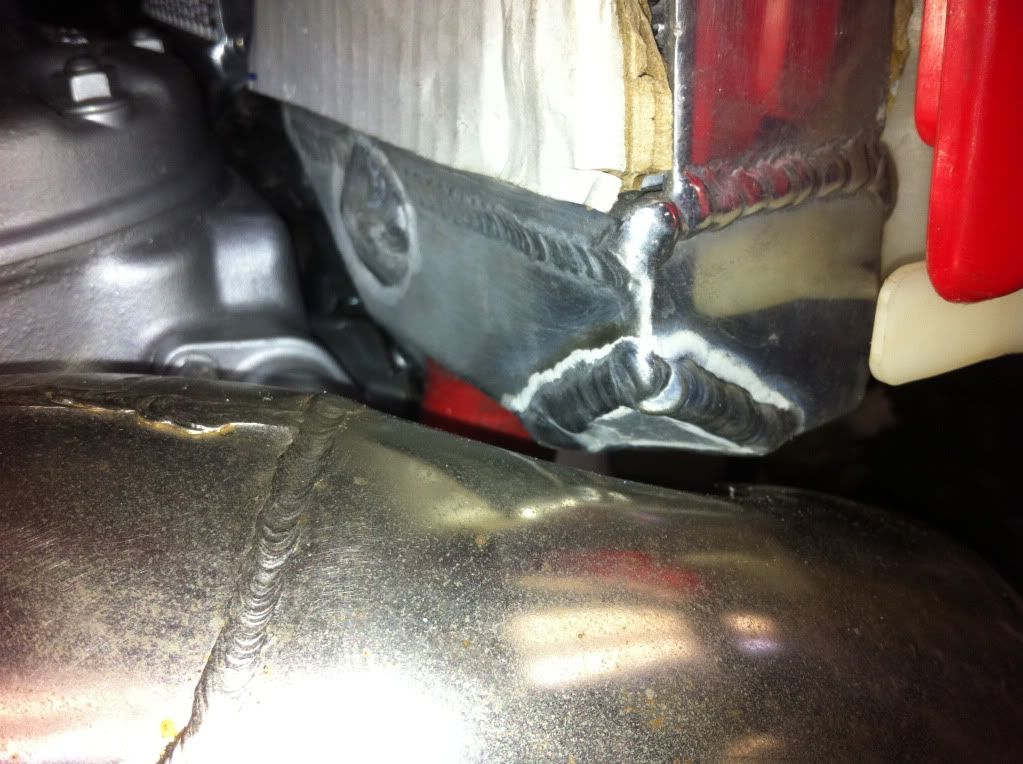
Exhaust mount
Using the UGLY standard muffler for the time being, just until our local law enforcement operatives get tired of stopping me to check it . . . .
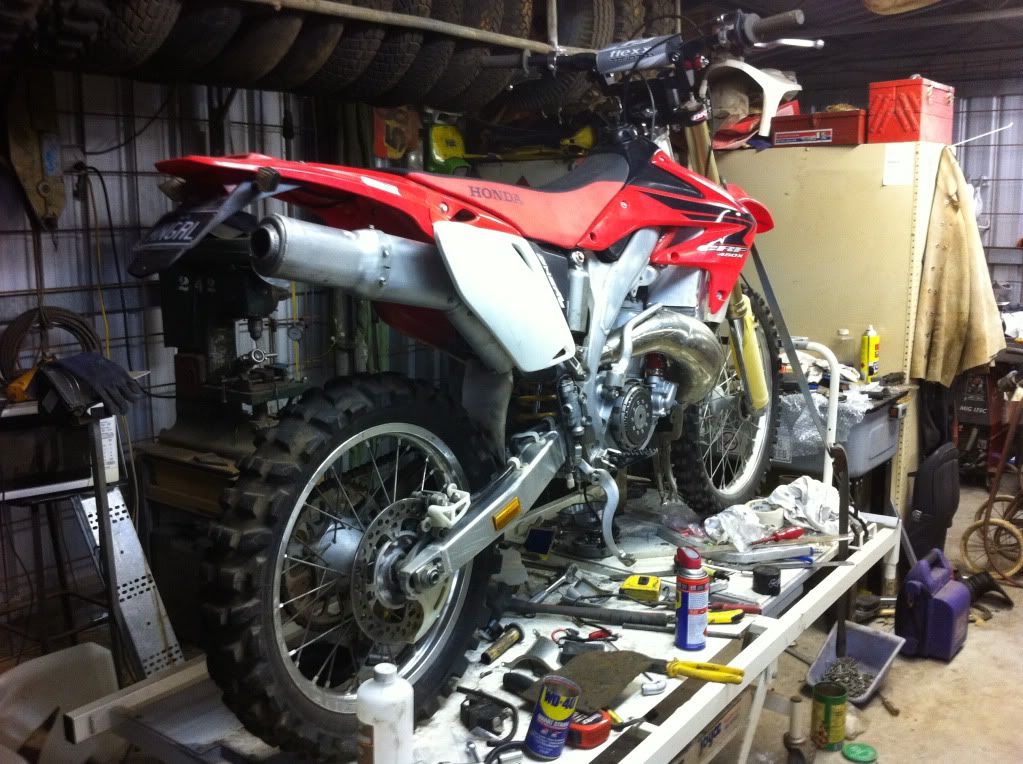
The only real job left to do is the headstay, then the 250 ignition and lighting coil. Should be finished just in time to coincide nicely with my healing schedule ! YEEEEE HAAAA.[/img]
Radiators modified and fitted.
Including some mods I wasn't expecting ! Ugly but effective . . . .
Exhaust mount
Using the UGLY standard muffler for the time being, just until our local law enforcement operatives get tired of stopping me to check it . . . .
The only real job left to do is the headstay, then the 250 ignition and lighting coil. Should be finished just in time to coincide nicely with my healing schedule ! YEEEEE HAAAA.[/img]
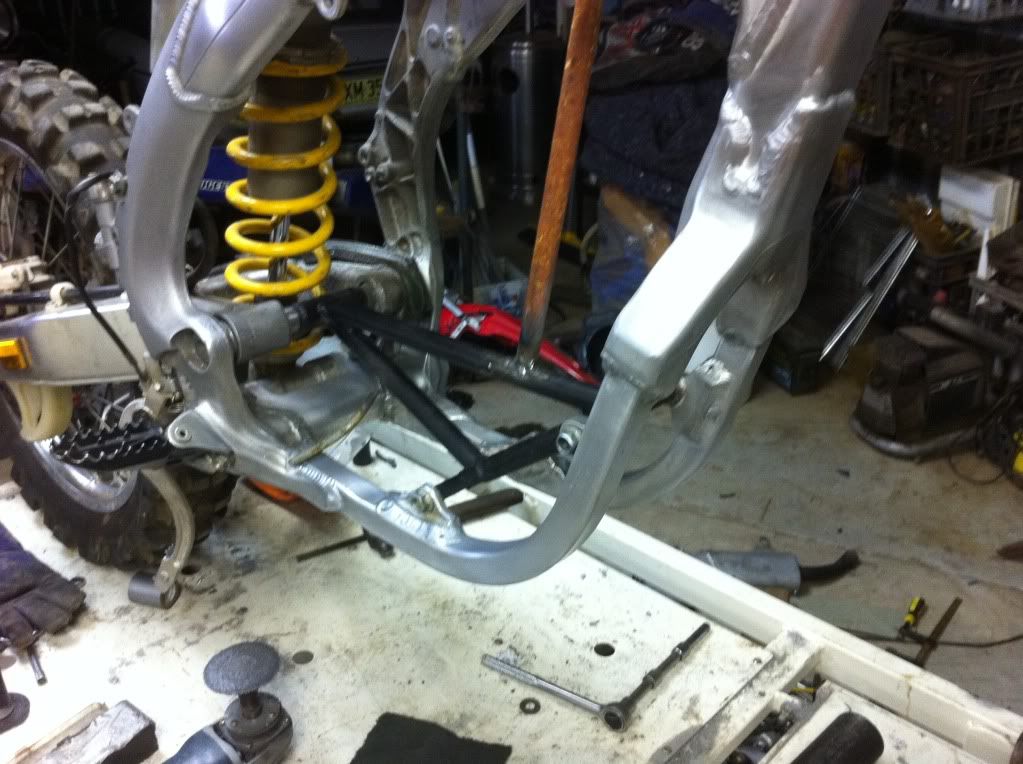
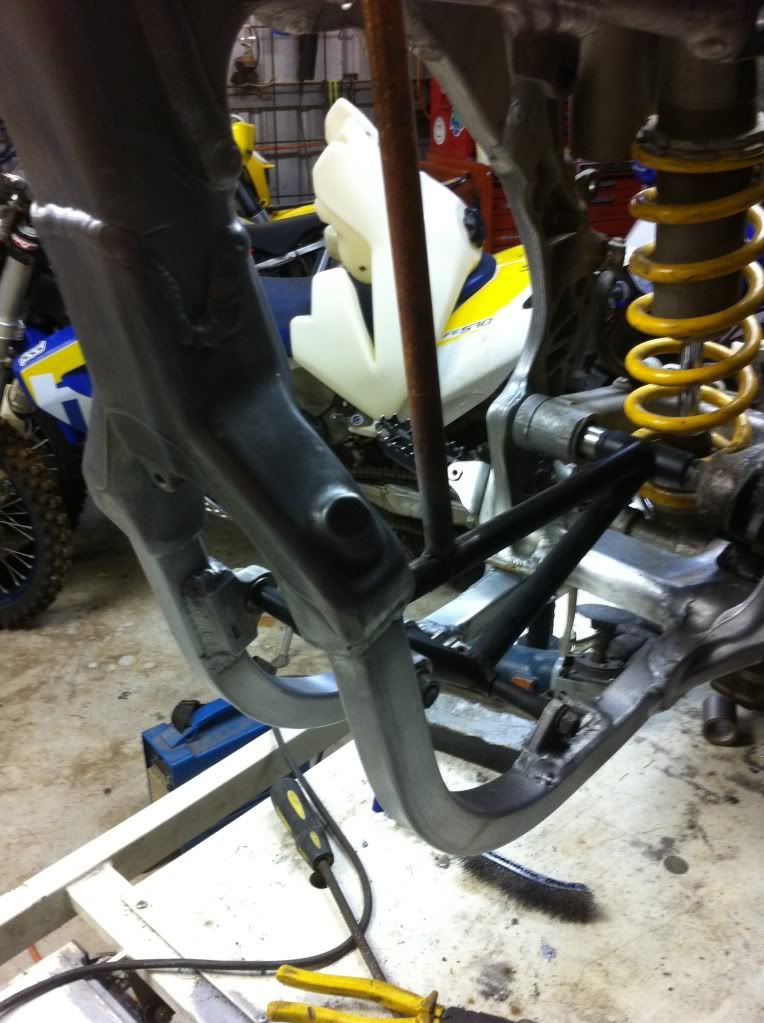
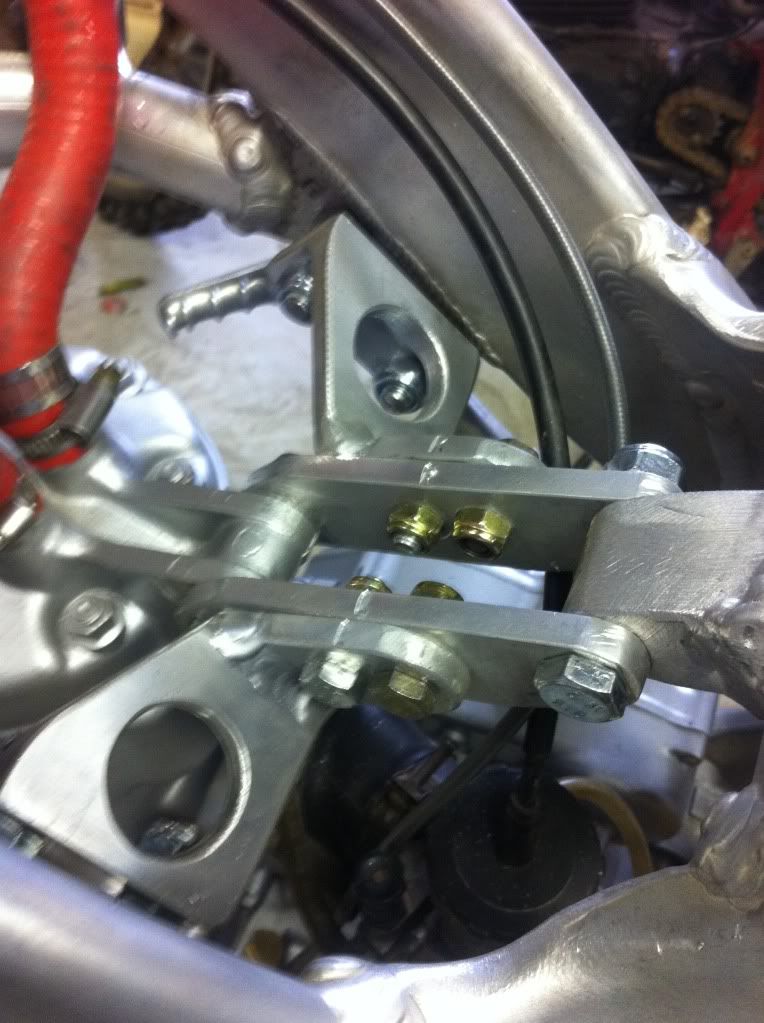
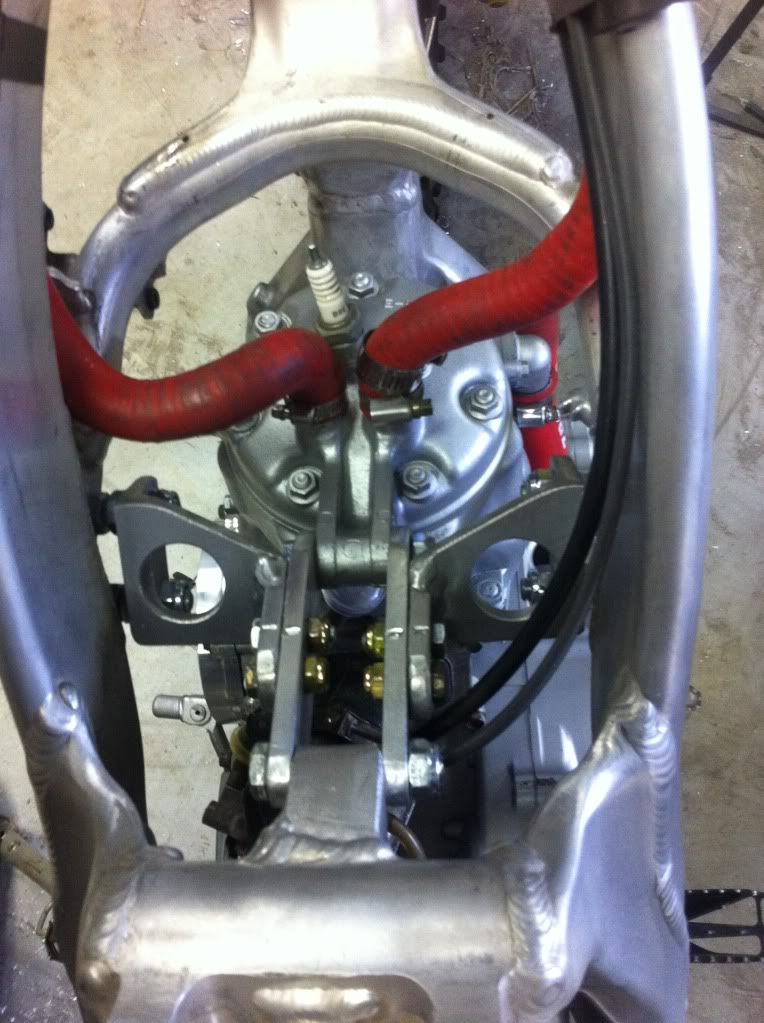
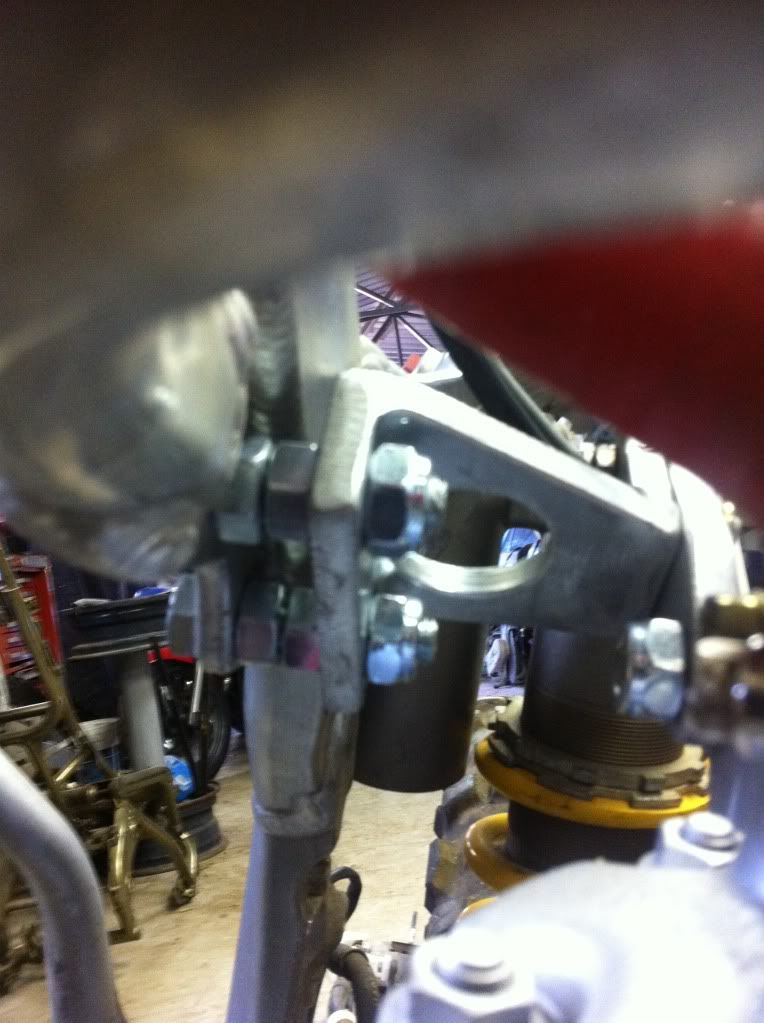
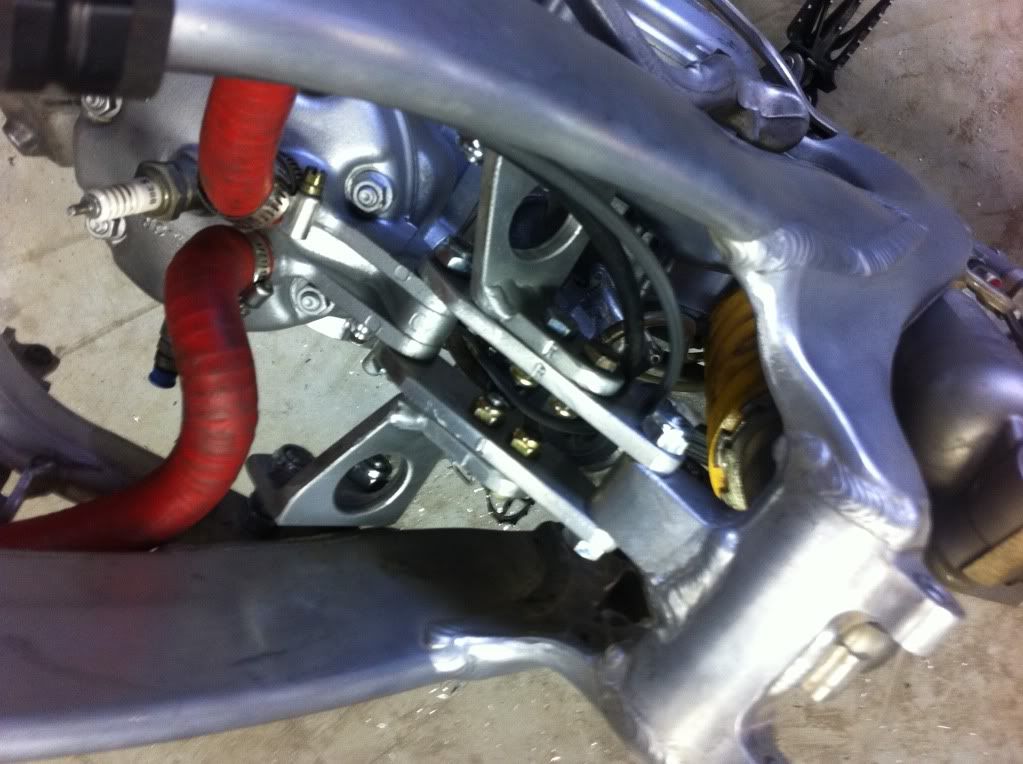
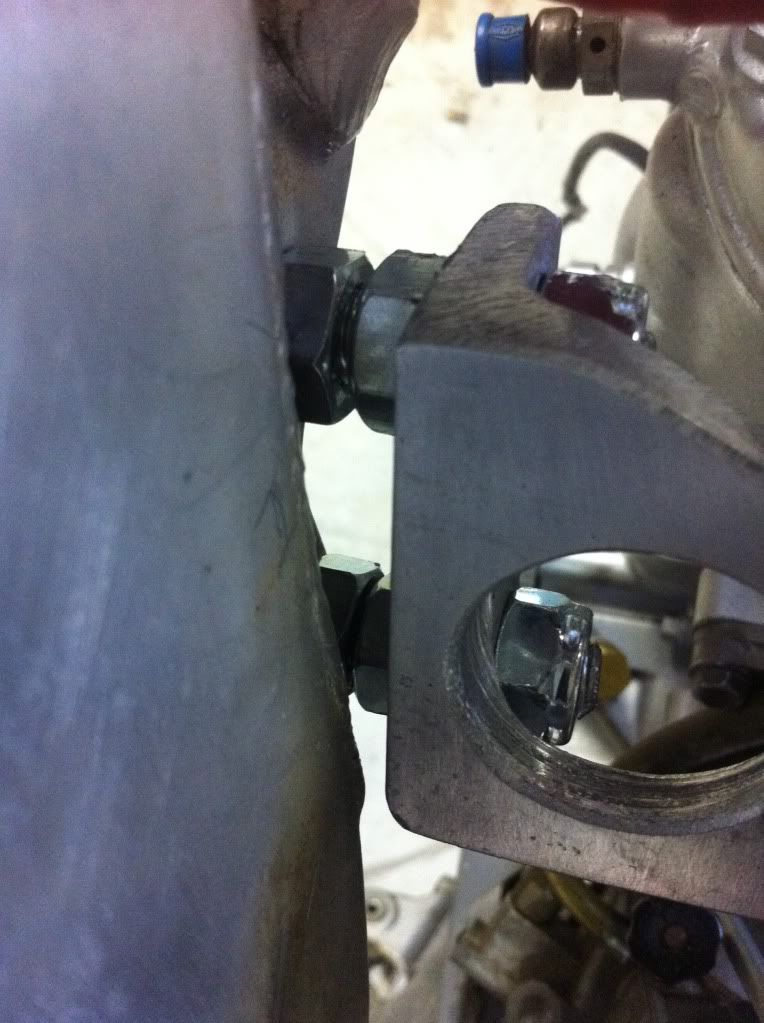
G'day to anyone actually interested in this build thread, I finally got back to the overdue business of building this thing ! Was laid up for a week or so following spinal op, but then straight back to the busiest period at work I can ever remember. Just finalised that contract, and so now have a week off work, and in the shed, before the next job starts. So . . . . . the first headstay was a disaster ! I only braced across the frame to the original CRF headstay mounting positions, using an a simple but chunky aluminium angle headstay. It vibrated as bad as standard.
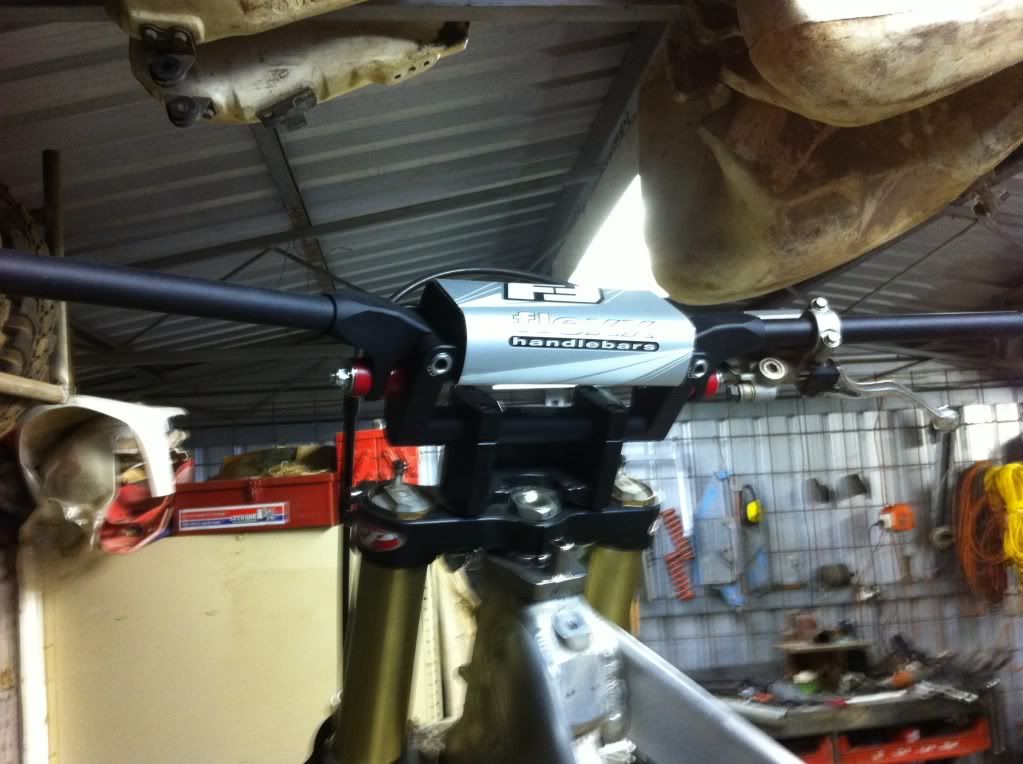
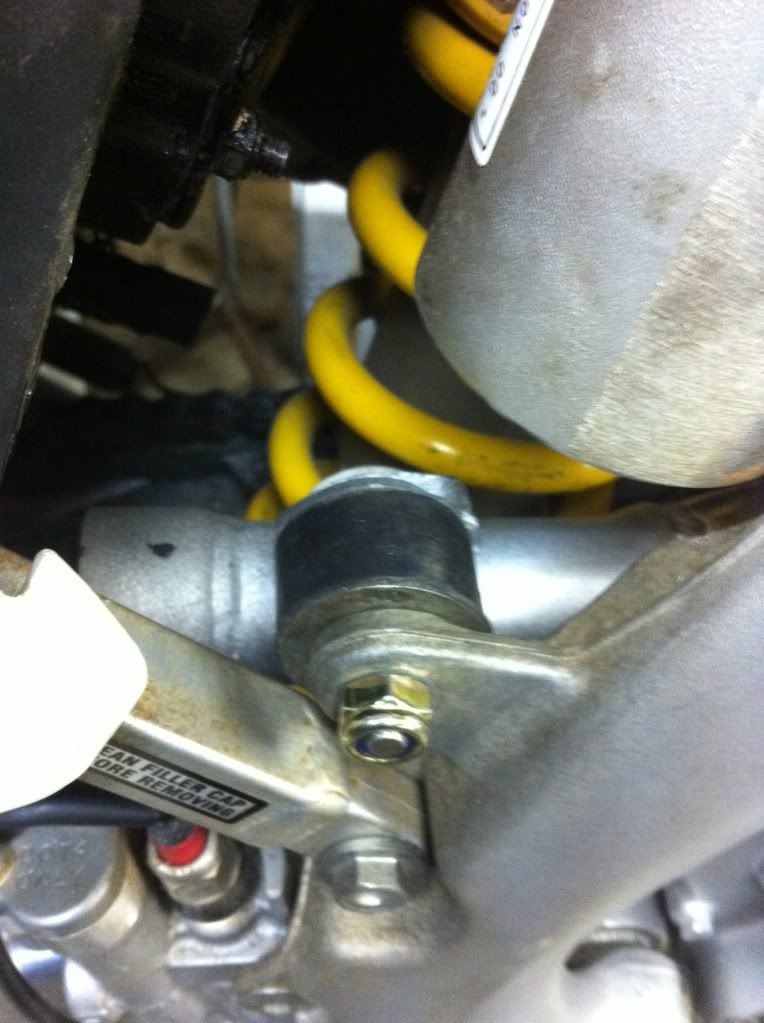
So, for Mk2 I went all out . . . I welded a big alloy boss onto the top shock mount, then ran standard style 8mm thick plate braces to the cylinder head. Onto the sides of these, I bolted a triangulated 8mm angle plate on each side, (welding would have made it impossible to remove and refit, and still incorporate the "zero tension" anchor system) and attached that to the original CRF lateral mounts using a basic M10 "zero tension" bolt system. This works by bolting the entire stay together, with the lateral bolts loose, and then when it's all tight, and found it's neutral position, you lock the sub nuts behind the lateral plates, and then tighten the top nuts down. This ensures that the act of tightening bolts neither compresses or stretches any component of the frame or headstay (similar principal to shimming mounts). You want vibe free, baby, this is the way to go, it works like a dream ! This is now the most vibe free 500 I have ever ridden. (Guess I wasted my money on the Flexx bars !) Bit of fucking about, but worth it. The whole affair is aluminium, and, including the Gr 8.8 bolts, weighs 610 grams (about a pound ?). Photobucket is on a go-slow right now, so I'll upload pics when it's done it's thing !
So, for Mk2 I went all out . . . I welded a big alloy boss onto the top shock mount, then ran standard style 8mm thick plate braces to the cylinder head. Onto the sides of these, I bolted a triangulated 8mm angle plate on each side, (welding would have made it impossible to remove and refit, and still incorporate the "zero tension" anchor system) and attached that to the original CRF lateral mounts using a basic M10 "zero tension" bolt system. This works by bolting the entire stay together, with the lateral bolts loose, and then when it's all tight, and found it's neutral position, you lock the sub nuts behind the lateral plates, and then tighten the top nuts down. This ensures that the act of tightening bolts neither compresses or stretches any component of the frame or headstay (similar principal to shimming mounts). You want vibe free, baby, this is the way to go, it works like a dream ! This is now the most vibe free 500 I have ever ridden. (Guess I wasted my money on the Flexx bars !) Bit of fucking about, but worth it. The whole affair is aluminium, and, including the Gr 8.8 bolts, weighs 610 grams (about a pound ?). Photobucket is on a go-slow right now, so I'll upload pics when it's done it's thing !
o.t.h.e.r . . . . .Over The Hill Enduro Rider
Hope was O.P was a complete success other so you can keep it on 2 wheels for many years to come. I very much enjoy reading and seeing where you are up to with your build, so please when you have time keep the thread going. I dont have the skills or know how to do what you are doing but its great seeing the result of yours.
Cheers
Cheers
Thanks Warrnum, I appreciate the comments. Op did go well, I already feel 10 years younger (which still makes me old ! ). So much so that I celebrated yesterday by going out and buying a brand new 2012 FE570 'Berg, so I now have a matching pair ! (OK, I'm gonna sell the '09, but it looks good in the shed at the moment !) As for the skills and know-how, mate, the skills are all pretty basic hand-tool tasks, (apart from the TIG welding, which can be bought at a very reasonable price) which anyone can do with a bit of perseverance. As for know-how, brother, you are looking at the richest source of detailed information, right here on Banned ! You could build the same mate, I'd bet my house on it ! (and if you ever did get out of your depth, there'd be a dozen good folk who would step up with advice or hands-on assistance, no doubt ). If you have the urge, take the plunge , they're lovely bikes to ride . . . .warrnum wrote:Hope was O.P was a complete success other so you can keep it on 2 wheels for many years to come. I very much enjoy reading and seeing where you are up to with your build, so please when you have time keep the thread going. I dont have the skills or know how to do what you are doing but its great seeing the result of yours.
Cheers
o.t.h.e.r . . . . .Over The Hill Enduro Rider